Sunday, March 13, 2011

Bedroom Redecorating: Complete (mostly)

fullBR2

I realized that I never posted the photos of the completed bedroom re-do. I'd posted a sneak peek back in August and took this photos on October 10th. So much for being on top of things. *ahem*

BR-before-fromdoor
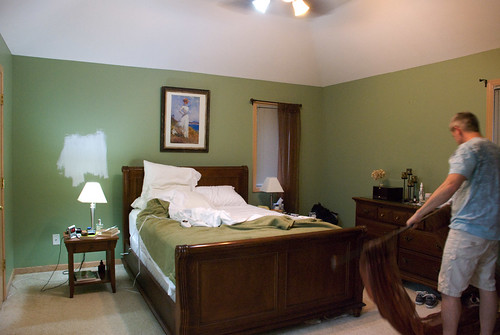
Before (more photos here)


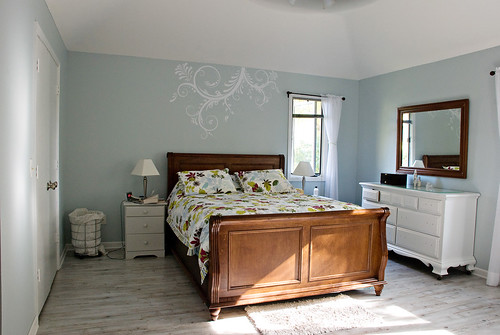
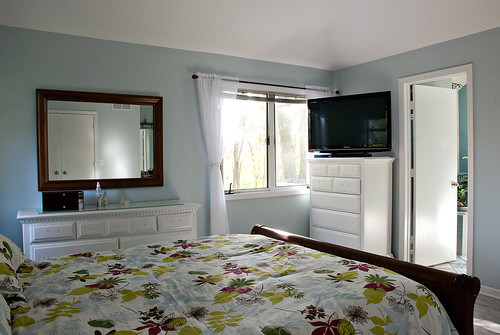
ANYway, here are the "after" shots, and I must say that we're very happy with the results. Most of them at least. The beadspread looks fantastic in these shots. After washing? Not so much.

BR-after-toward-closet

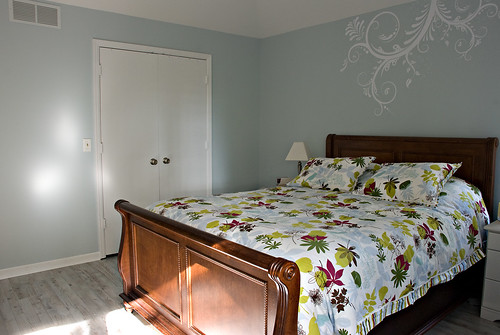
I bought it from Target and while I love Target AND the beadspread, I'm not happy that it's so stinkin' large that it barely fits in my Whirlpool HE washer. But that's a big "shame on me" for not paying attention to that fact when I bought it. It says right on the box that it should be washed in a high-capacity commercial washing machine. Yeah, like I'm going to do that. I don't buy dry clean only clothes (or ignore the fact that they ARE dry clean only) so why the heck am I going to deal with a high maintenance beadspread. Again, shame on me.

The other flaw is the stitching on the cover. There's very little of it holding the layers together, so now it's lumpy lumpy lumpy — not cool. Lesson learned.

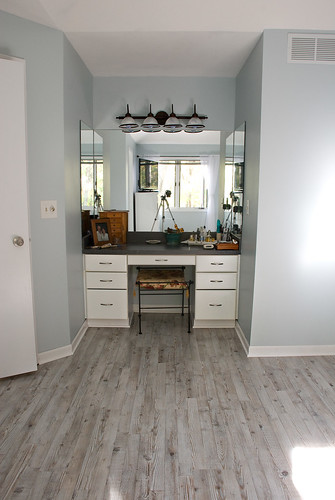
Other than the beadspread issue, the rest of the bedroom is great. Love the paint color, LOVE the wall decal and love the floor.

BR-after-toward-bath2

wall-decal

vanity-floor

I still haven't gotten any drawer pulls —STILL! Told you I wasn't on top of things.

UPDATE:
Here are links to the products I used.

The decal went on great once we figured out the trick. The directions provided were useless and actually made it WAY worse. It's easier than they make it out to be. Just stick the paper up where you want it then use a credit card or other flat rigid utensil to rub the decal onto the wall. There's a low-tack adhesive on the paper so that it stick to the wall while you rub on the decal. That peels off and the decal remains.

We bought this one from Amazon, but there are a lot of other sellers. Etsy has TONS of sellers and there are so many gorgeous designs there.

Swirly Floral Decal


The floor is special order laminate from Lowe's. We love it, despite the fact that it's a lot noisier than carpet - kitty nails go click-click-click and you lose the noise dampening effect of carpet. But it's a breeze to clean.

Pergo Driftwood Pine laminate floor

Tuesday, March 1, 2011

BBA Challenge Bread #43—Roasted Onion & Asiago Miche

BBA43-crumb-celebrate2

Pop the champagne. I did it. I baked EVERY bread in The Bread Baker's Apprentice. Sure, it took almost a year longer than I thought it would but here I am.

Roasted Onion and Asiago Miche
Otherwise known as The Final Bread. This bread was a spectacular end to a 22-month long journey of awesomeness.


I'm officially done baking my way through Peter Reinhart's award winning book, The Bread Baker's Apprentice, along with a number of other amateur bakers. (I'm not sure how many are still with us. Many have finished - and some are just starting). Want to learn more about it? Check out the following links:

Technically, I finished with the challenge about 4 weeks ago, but am now getting around to writing it up. I'll probably write a final-final post about the challenge, so for now, let's just talk about this lovely beast:

bakes-vert

Roasted Onion and Asiago Miche. Let me tell you, the is one of the best smelling - and tasting - formulas in the book. AH-mazing. But I'm getting ahead of myself. I'll begin at the beginning.

As with the Potato, Cheddar & Chive Torpedoes, this formula is meant to be a mixed method of wild and commercial yeast, and like the PCCT, I opted to use a poolish in place of the wild yeast starter seeing as I no longer have one. I mixed that up 2 days before I wanted to bake the bread (this is a 3-day job).

The next day was most of the heavy lifting. I roasted the onions (a little TOO much)...

BBA43-onions

Shredded a pile of cheese (oh, yeah)...

BBA43-grated cheese-OH

Shaved a pile of cheese (oooooh, yeaaahh)...

BBA43-shaved cheese

And got to mixin'. This bread calls for scallions but I completely spaced that and decided to use my Penzeys dried shallots instead.
freeze dried shallots

I mixed the poolish, flour, yeast, water, a bit of olive oil, that big ole pile of shredded cheese, along with the shallots and dried chives. I attempted to take a picture of the windowpane - which I really almost kind of achieved - but it's tough with just one hand.
BBA43-windowpane

After it was all mixed and at the right consistency I let it ferment about 2-3 hours. I have a new favorite place to proof my dough. I usually nuke a mug of water in the microwave until very hot then pop the dough in with the steaming mug, but Dwight installed these under the counter lights and they get... toasty. I just slide the bowl right under one of the lights and it warms it up nicely. 
new proofing method

After fermenting, it gets shaped, covered and goes in the fridge overnight to let the flavors develop even more.

BBA43-shaped

After I pulled the pan out of the fridge the next day, I realized the the original pan I had the bread on was going to be too small, so I moved it to my half sheet pan and let it sit at room temperature about 2 hours.

BBA43-proofed

Then you're supposed to brush the top with olive oil (missed that step) dimple the dough, sprinkle on the cheese then the onions and let it rest about 20 minutes. But I didn't quite do that. I'd seen some of the other bakers' breads and noticed that the onions were, shall we say, well done. So I hedged my bets and put half of the onions under the cheese and half on top. And as you saw, I decided to shave the cheese instead of shred. Don't know why - just felt like it, I suppose.

BBA43-dimpled

BBA43-onionlayer1

BBA43-cheeselayer

BBA43-onionlayer2

And I forgot to let it rest. I just popped it into the oven after topping. Oops. *note to self: read ALL instructions*

I hearth-baked the bread as required and let me just tell you how amazing my house smelled right then. Asiago and parmesan (I used half and half) permeated the air. It was intoxicating. 

BBA43-bottom

baked

Alas, the onions did burn. Charcoal bits of yuck on the top. It's the only flaw I can see in the formula, and in my opinion, a pretty big one. Either the onions should go on raw and roast as the bread bakes, or they need to stay safely nestled under a big pile of cheese. 

I just pulled off the charred bits and dove right in. Oh, so good. I should note that due to the size of the original formula, I chose to halve it as Dwight and I were getting ready to try a new diet literally the next day. A "no bread" diet. I know, the horror. So I wrapped up the bread nice and tight and put it in the feezer to enjoy at a later date. Fortunately the diet allowed us to have one "cheat" day a week, so I broke out the bread each weekend. 

We had friends over one evening and I turned it into cheesy garlic bread to go with lasagna.  Holy WOW, this makes the best garlic bread. And, I can tell you from experience, that this bread freezes nicely. It was drier, but still delicious and is worth popping in the toaster for a warm up and light toasting before eating. Excellent!

So there you have it. The very last bread. Hard to believe, isn't it?! Thank you to all that have followed along the way. Here, have a big slice of bread...

BBA43-crumb-celebrate
Related Posts Plugin for WordPress, Blogger...