Friday, October 28, 2011

Corn Maze Adventures

maze paths


About 15 minutes from my house is a huge farm that creates a corn maze every year and is open from about the end of September until Halloween. I don't know how long they've been doing it, but long enough that I've told myself repeatedly that I'd like to go. I was hoping to go last year when a friend came to visit for a long weekend, but the weather didn't cooperate.

But on the 15th, I finally made the trip. The weather was windy but lovely — and I got to check the very first item off my 6 'til 40 list. Win-win!

I told my sister I wanted to go hoping she and her kids would come, too = extra fun and extra photo opportunities. She was game and on Saturday afternoon, she picked me up and we headed to Leininger Farms to walk the corn maze. Her oldest was with us and her middle girl was coming with our parents. So it was a whole family affair. 

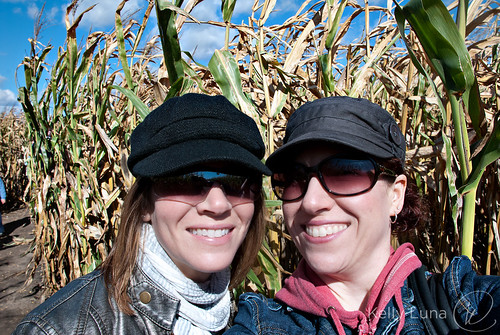
maze-lisa & me
My sister and me

Except. My mom was creeped out by the idea of spiders in the corn, so she was NOT game for going through the maze. She was cracking me up. I think it was one of those childhood trauma things rearing it's head and she just wasn't having anything to do with walking though 7 foot high corn. 

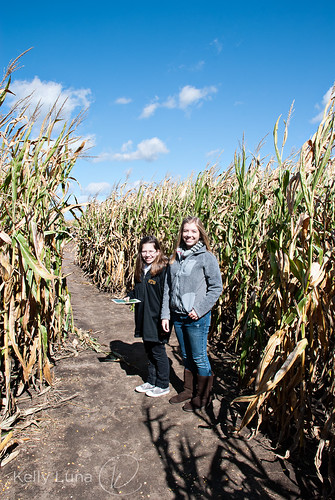
Well, she needn't have worried because these guys have this thing DOWN. It's pretty obvious that they plan out the maze even before they plant the corn, so the paths are made of packed dirt and really wide. It was really well maintained and really easy to get through. As a bonus, the corn blocked the wind AND the sun was shining like crazy. Beautiful!

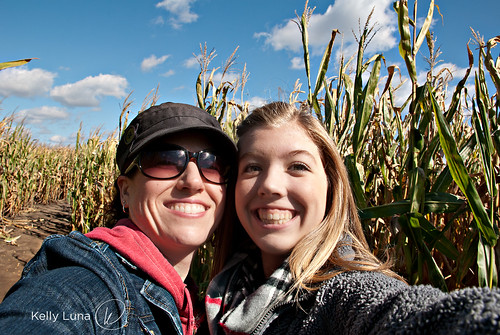
Me & K
Me and K

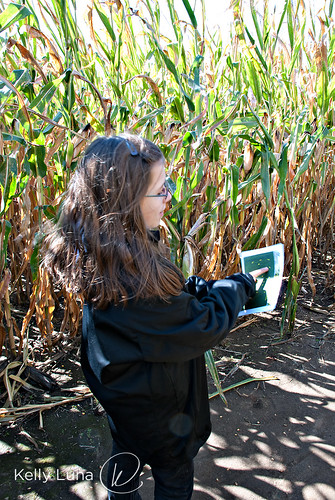
Lisa's middle girl, M, turned out to be quite the map reader. She became the official guide and earned the nickname "the human GPS." My sister and I joked that she certainly didn't get that from our side of the family, or at least from HER. Or me. I can read a map OK, but my sense of direction is pretty abysmal. I had no idea where we were it that maze, but my argument is that I was too busy taking pics and letting them lead the way.

M-the human GPS
M- the human GPS

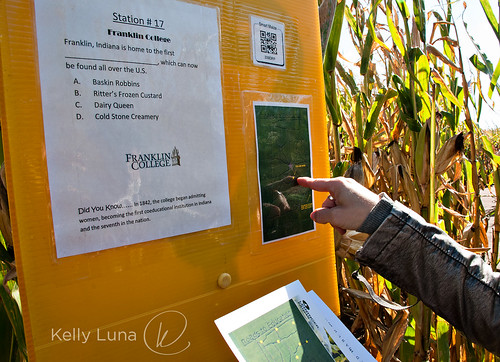
One of the fun things about the maze is that they set up stations at various points along the maze. Each station is marked on the map they hand out and has a question pertaining to the theme of the maze. This year the maze was in the shape of Indiana and all of the questions had to do with the state. 

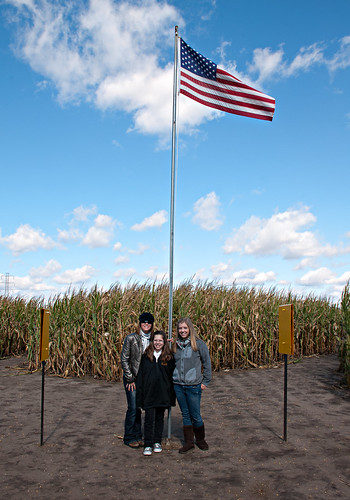
you are here
You are here.

Many were really easy, some we THOUGHT were easy and weren't. We missed 3 or 4 out of about 14 or 15. M quickly discovered a way to "cheat" on the answers. The questions were multiple choice and there was a hole punch at each station, so you punched either A B C or D. M saw the punched circles scattered on the ground and found out what everyone else was answering. It was pretty funny.

maze-answer punches
Scattered answers

We made it to the middle...

maze center
The center!
And kept on going.

maze-K&M
M & K

We even found a very elusive someone while we were in there. 

maze-found him
Hey! I found him!

So if you're wondering where Waldo is, last time I checked, he was walking around a corn maze.

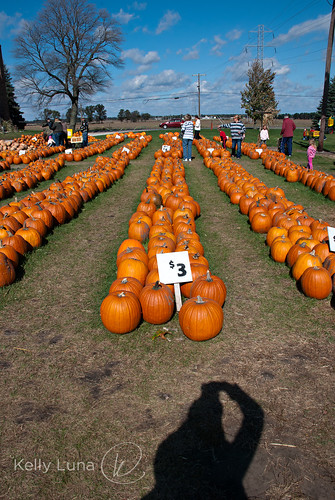
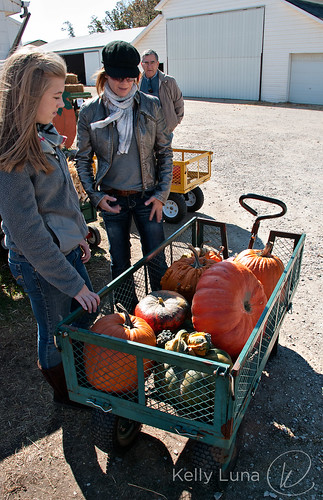
We kept going until we hit all of the stations (or so we thought - we missed one) then walked over to the HUGE selection of pumpkins and gourds. And went to town.

pumpkins

ready to check out

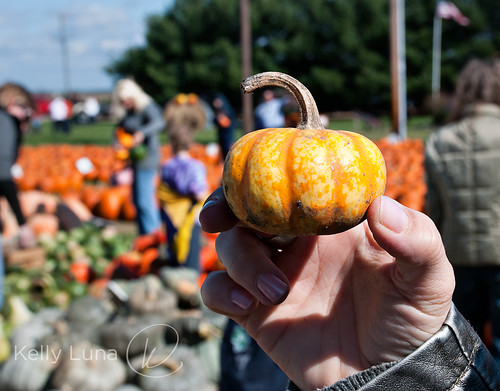
And my sister found a teeny tiny pumpkin/gourd. Awwww.

tiny gourd

It was a blast! I'm so glad I went and got to spend time with my sister and two of my nieces and visit with the 'rents. 

In case you want to see even more of the adventure, here's the whole flickr album:


* * * * * * * * * * * * * * * * * * * * * * * * * * * * * * * * * * * * * * * * * * * * *

This is the first of many adventures I plan on having over the next 5 months or so  (yep, already down a month - yipes).  I'm turning 40 on April 2, 2012 and I've created a list of fun things I want to do between now an then. Stay tuned for more 6' til 40 happenings!

Tuesday, October 25, 2011

Chocolate Chip Cookie Dough Cake

CCC Cake

Right off the bat, I'm going to let you know that I'm not including any recipes directly in this post.

Wait, don't leave!

There will be links to all of the recipes I used, though. This post is more about the IDEA of this cake. It takes basic parts — straight up yellow cake, my favorite buttercream frosting, chocolate chip cookies and a simple no-bake chocolate chip cookie "dough"— and brings them all together into something larger than the sum of it's parts.

**********
GOOD NEWS! I've created a PDF of all the recipes so you can have them in one place in addition to the links I've posted here for reference. I hope this helps! Download by clicking here.**********

Another confession — I first made this cake in February. I know. A thousand apologies, really. I totally meant to write it up way back then, but I don't even know why I didn't. But a couple of weeks ago, a co-worker specifically requested this cake for his birthday. As he put it, "It was the best cake I've ever had." Granted this kid would eat just about anything you gave him because he's a 24-ish year old guy and 24-ish year old guys will eat just about anything you give them. They're just grateful for the free meal. But I still took it as a huge compliment and happily whipped up another cake. Two cakes, actually (they were small).

CCC Cake mini-side

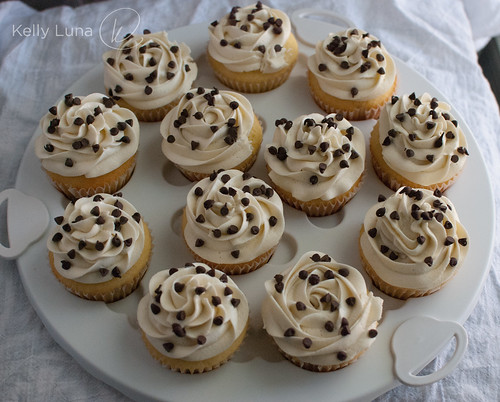
And 12 cupcakes.

CCC cupcakes-in carrier OH

Because I'm crazy.

The inspiration for this cake came from two very talented bakers and bloggers who both happened to be named Amanda. Over at Fake Ginger, Amanda not only bakes beautiful deserts and breads, she's also a wonderful cook with a large collection of delicious and easy recipes. She's a mom of three little boys, so this woman knows the importance of quick, tasty food!

It was Amanda's Cookie Dough Cupcakes that caught my eye. Beautifully photographed and, hello? Cookie dough cupcakes? Sign me up! Obviously the flavors and the no-bake dough are where I got the general idea. The cake part, though, came from another Amanda.

If you follow baking blogs at ALL, you already know Amanda at i am baker. You do know i am baker, right? Do yourself a favor and just scroll through any of her recipe archives. Your jaw will drop and your stomach will growl. This woman is an amazingly talented baker with a flair for making the most over the top incredible cakes that will blow your mind. I'm not kidding.

It was her Chocolate Covered Cherry Cake that became the inspiration for the assembly of this cake. Go take a look at hers, but promise to come back, OK?

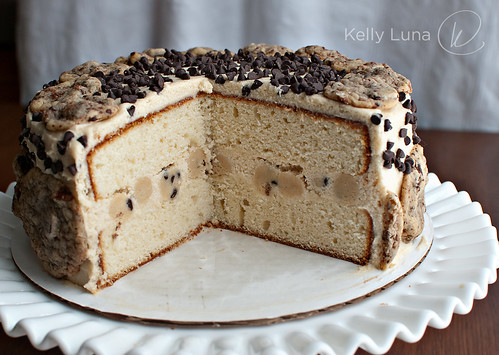
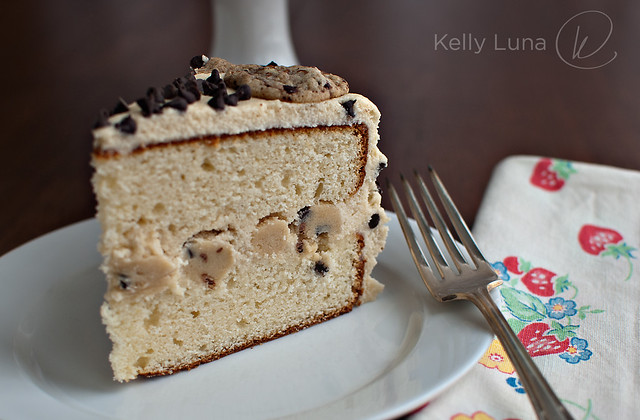
CCC Cake-cut

You start with a basic cake.

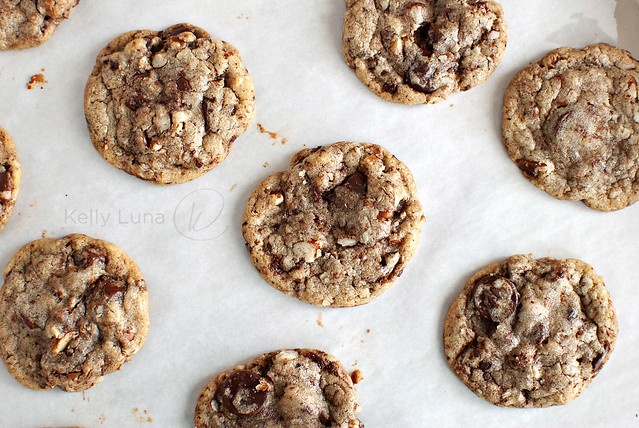
Wait! No, first you want to make cookies. Use your very favorite chocolate chip cookie recipe. My new fave is from David Lebovitz's Ready for Dessert. You can find the recipe here, but I highly recommend you check out the entire book. It's scrumptious.

CCC

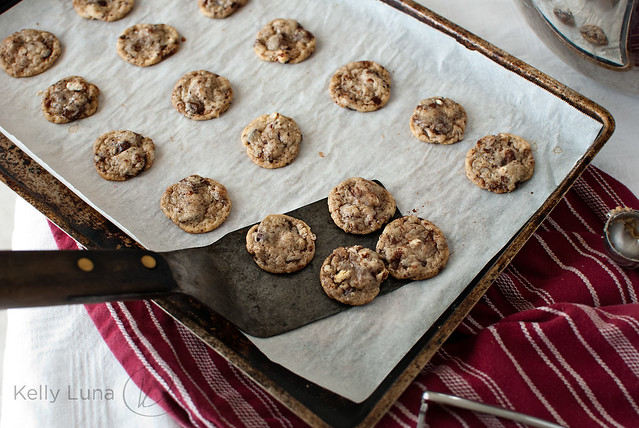
Make small and medium size cookies if you're making a full-size layer cake.

CCC-small

NOW let's make the cake.

After learning how easy it is to make cake from scratch, I almost always use the 1-2-3-4 cake** you've seen on here a number of times before. There's a reason I keep using it. I tend to be fickle with a lot of recipes, but not this one. I haven't looked around for a new one because this never lets me down. It's always delicious and I always get compliments on it. It's also sturdier than a box mix, so If you plan on making this cake, I would honestly suggest you make a scratch cake.

**PLEASE NOTE: This cake will require 2- 9" cake pans. The recipe link above is for a 9" and a 6" that are cut in half. This cake just uses 2- 9" cakes that are stacked, not sliced in half. Just level the tops with knife before assembly. My apologies for any confusion! 

CCC cake slice fork
(Unfortunately the frosting is the same color as the cake here, so it's nearly impossible to see the thick layer of frosting. Bummer. But this was a semi-failed attempt at a brown sugar frosting, so a white buttercream will show up better.)

Next you'll need a basic buttercream. You can use my go-to Best Ever recipe, or your favorite version.

Then you'll need the cookie "dough". Mix it right after you put the cakes in the oven so that it has a chance to set up a bit in the fridge. Makes it easier to form little balls of dough.

And here's where the magic happens. And where the Chocolate Covered Cherry cake inspiration comes in to play. I love the idea of a surprise center in a cake or cupcake and the idea of having the super thick frosting layer, so Amanda's cake stuck in my head and burst forth when I had the epiphany for this cake. Slather a thick layer of frosting in with a bunch of cookie dough balls. Sort of like cookie dough ice cream, but as the center of a cake.

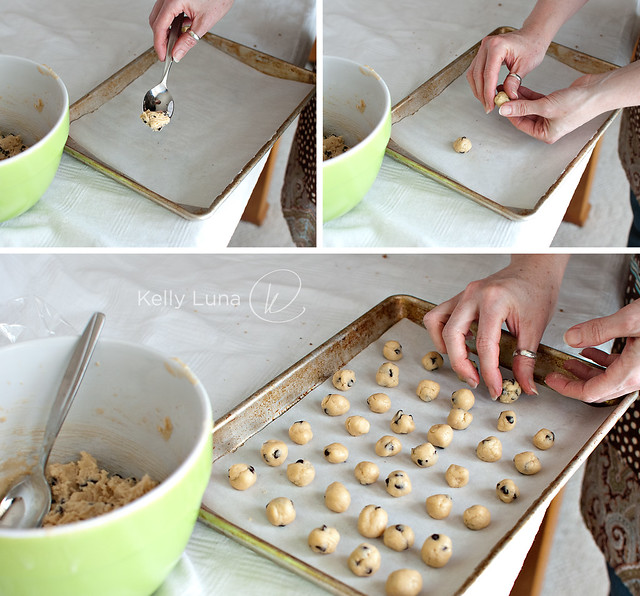
I took the chilled cookie "dough" and made a bunch of small balls.

dough rolling collage

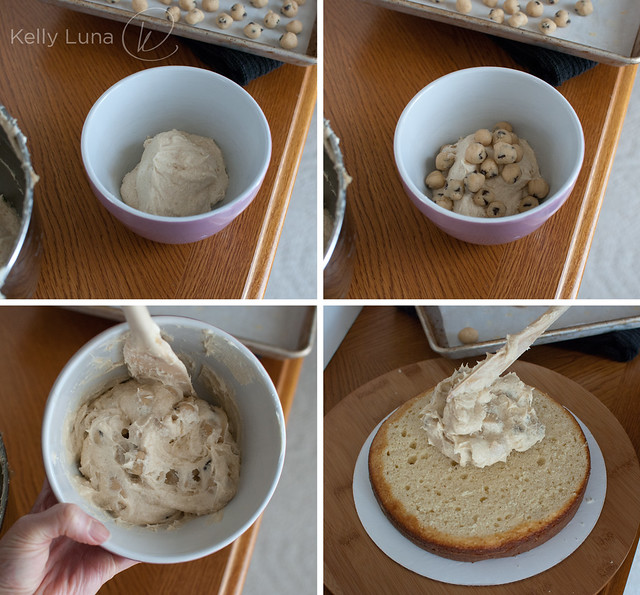
Then went to work assembling the cake. I put some frosting in a bowl, then added some dough balls, slapped it on the bottom layer.

CCC filling collage

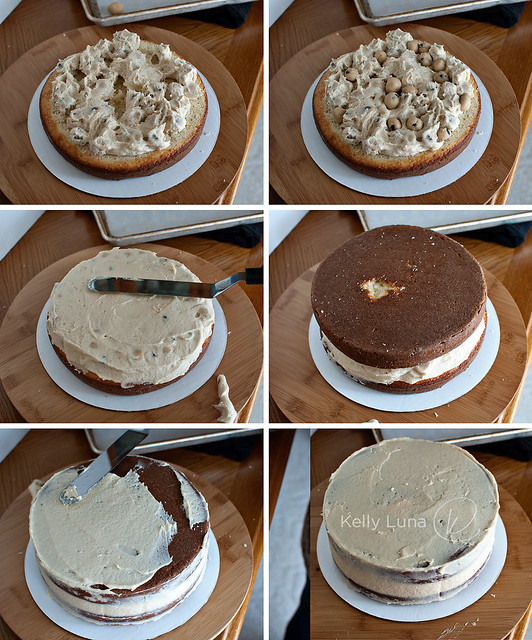
Added more frosting, filled the gaps with more dough balls then added the top layer...

CCC layering collage

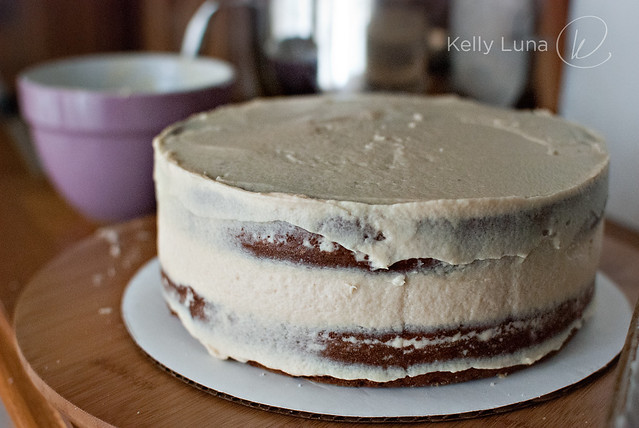
Then crumb coated the entire cake.

CCC crumb coat

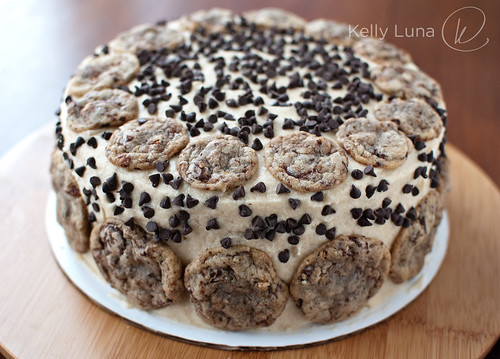
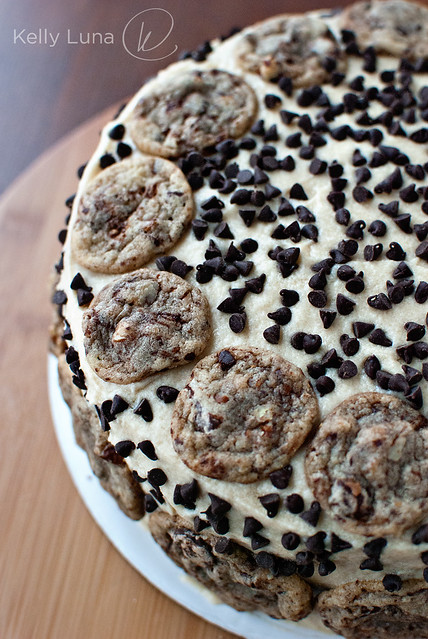
Popped in in the fridge to set up, then finished frosting it. I added medium size cookies around the base and small cookies along the top edge, sprinkled mini chips on the top and (literally) threw mini chips on the side. (It was a hoot. I was flinging chips all over the place.)

CCC cake OH

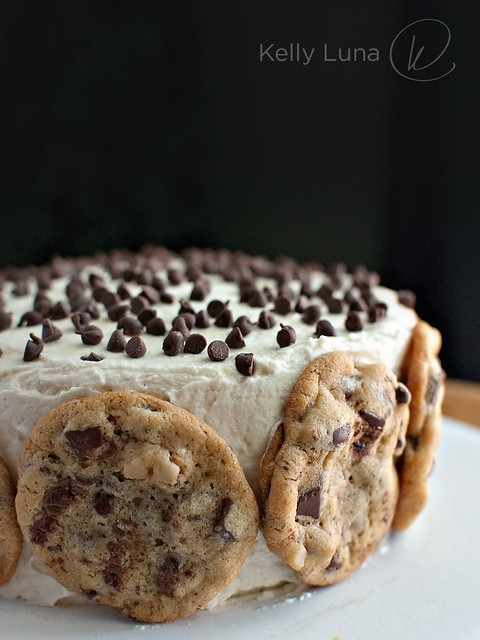
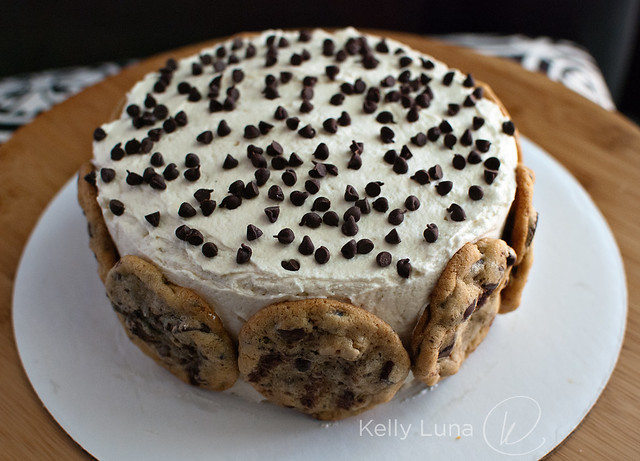
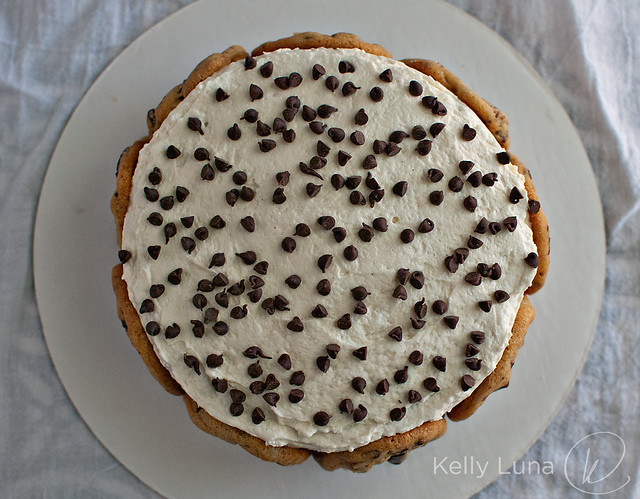
Some would stick, some wouldn't, but I just kept flinging until it was coated to my liking.  For the 6" cakes I made for my co-worker's birthday, I just used medium size cookies, which took up the entire sides, then sprinkled chips on the top.

CCC cake mini-topfront

CCC Cake mini-OH

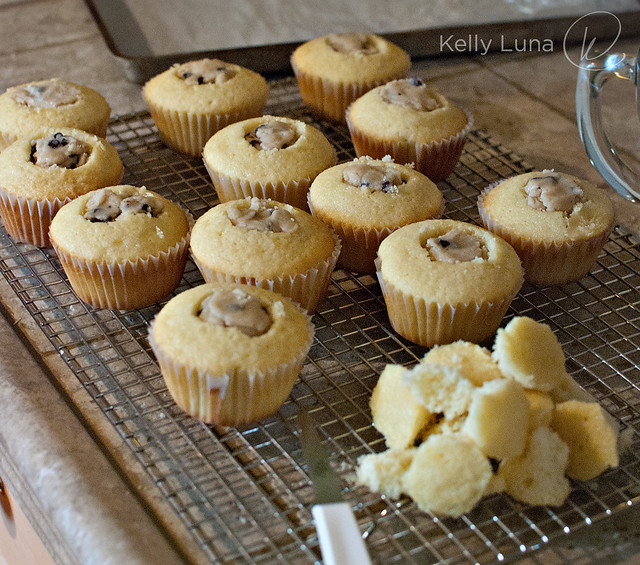
For the cupcakes, I just cut out a cone of cake, stuffed the hole with the no bake cookie "dough"...

CCC cupcakes filled
(I totally ate almost all of that pile of cake bits. I'm not going to lie.)

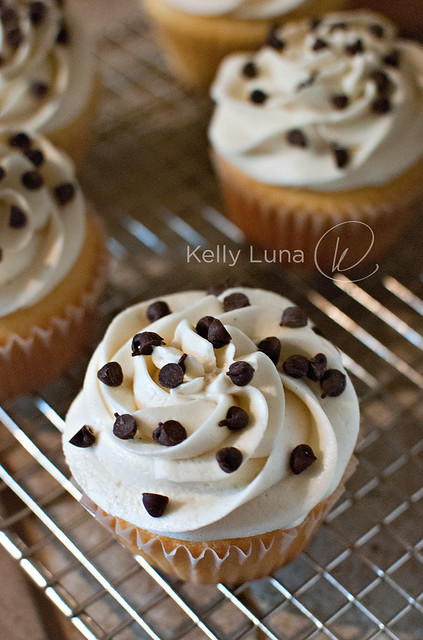
...and piped frosting over the top using the Wilton 1M tip, my go-to tip. (It's only about $2 - you totally need to have one, if you don't already. They make your cupcakes look super purdy.)

CCC cupcake single

Topped with mini chips, the cupcakes are ready to go.

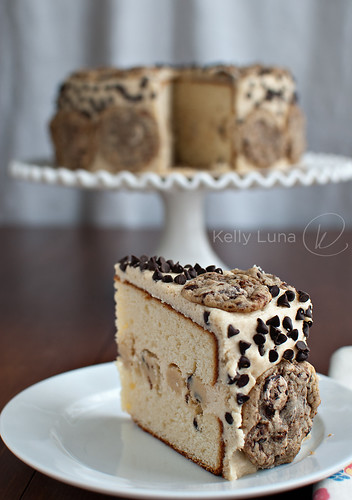
So what do you think? Pretty awesome, right? If you have a few hours to wile away on a weekend, give this cake a shot. Someone will probably tell you it's the best cake they've ever had. For reals.

CCC cake slice stand

Saturday, October 22, 2011

Pumpkin Yeast Bread — Three Ways

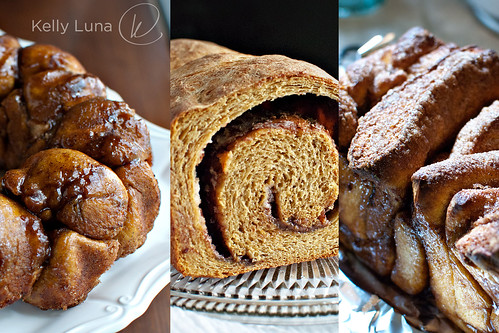
Pumpkin-allthree

One batch of bread dough, three different-yet-similar final breads. Brace yourself for a post of epic proportions. I'm not even kidding. This thing is LOOOONG. Ready? OK, good. Let's get to it.

I'll keep the words to a minimum because 1) I took a ridiculous amount of pictures so they'll take up a ton space and 2) let's face it, you'd *rather* look at (mostly) pretty pictures {I apologize in advance for the large number of blurry pics} and get to the good stuff, anyway — the recipes!

Let's start with the base — the dough.
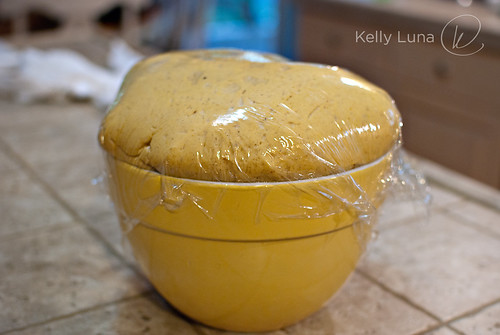
pumpking dough-overflowing

It's vigorous. I hope you've got a big bowl.
("I hope you've got a big trunk, 'cause I'm gonna put my BIKE in it." Name that movie.)


Pumpkin Yeast Bread
adapted from King Arthur Flour

Ingredients
1/2 cup warm water
2 Tbsp SAF instant yeast or 2 packets of rapid rise yeast
2/3 cup warm (NOT HOT) whole milk (or 2%)
2 large eggs, beaten
1-1/2 cups canned pumpkin (This is *almost* the entire 15oz can. I was tempted to just use it all. If you do, you'll just need to adjust the amount of flour needed.)
2 Tbsp vegetable oil
1/2 cup dark brown sugar (can use light if you want, I just wanted a more robust flavor)
2 tsp salt
1 Tbsp cinnamon*
1/2 heaping tsp ginger*
1/2 tsp cardamom*
1/4 - 1/2 tsp ground cloves*
1/8 tsp nutmeg*
4 cups bread flour
2+ cups whole wheat flour

*I'm very willy-nilly with my spices. I just sort of toss them in until it seems like the right amount, so these measurements are approximate. I know, not exactly helpful. Use what YOU like and how much you like. Remember this makes 2 LARGE or three good-size loaves, so what might seem like too much probably isn't. I LOVE cinnamon so I tend to go crazy with it. Disclaimer over.

Directions
In bowl of stand mixer, add 4 cups of bread flour, yeast, salt, spices. Mix until blended. Add water, milk, eggs, pumpkin, oil, and sugar. Beat well about 2 minutes. Add whole wheat flour, 1/4 cup at a time until the dough comes together and switch to the dough hook. Knead until the dough clears the sides (you'll need to scrape them down once or twice) adding just a little bit of flour at a time. The dough will eventually clear the bottom as well. The dough should be slightly tacky but not sticky and should be fairly smooth. This will take about 10 minutes all told.

Put dough in a large, oiled bowl, turning once to coat. Cover with plastic wrap (spray the wrap with oil so that the dough won't stick when it BLOWS UP. *ahem*) and put int a warm spot to blow up double, about 1 hour.

Get ready for the FUN to begin.

* * * * * * * * * * * * * * * * * * * * * * *
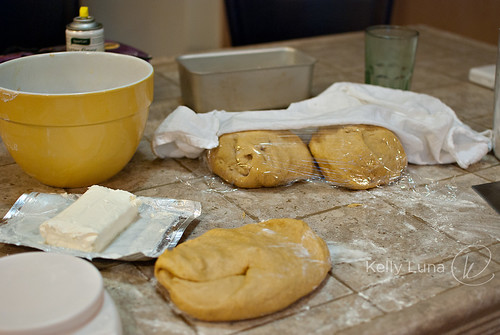
Pumpking dough-divided

I divided this beast into three pieces, each weighing in around 20.5 ounces.

With the first piece, I made the easiest of the three — pull-apart bread. (Keep the other two covered while you work so they don't dry out.)
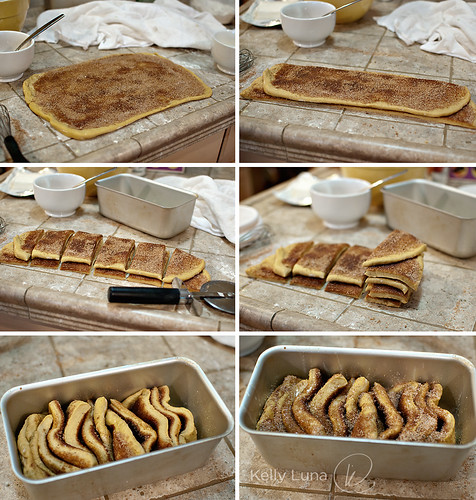
Pumpkin pull apart steps

Roll, slather, cut, layer, cut, stack, put in pan. Wait....
Pumpking pull apart-proofed

Told you it was vigorous. Here's the pan of pull-apart bread after about 45min to an hour. HUGE and ready for the oven.
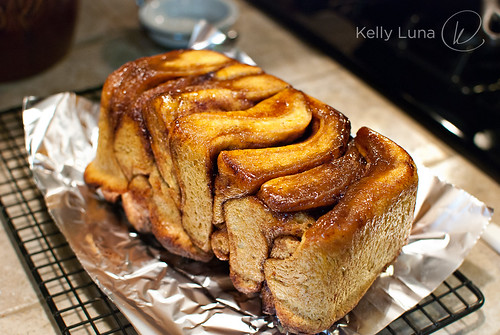
Pumpkin pull apart bottom

Oh, gracious. Would you LOOK at the bottom of that bread. Dreamy.
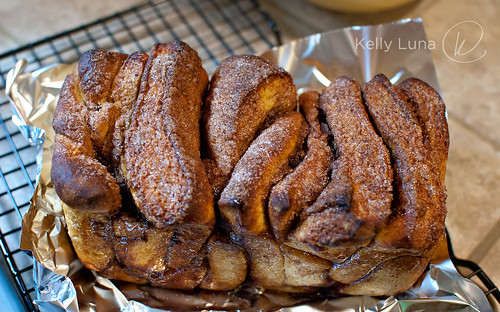
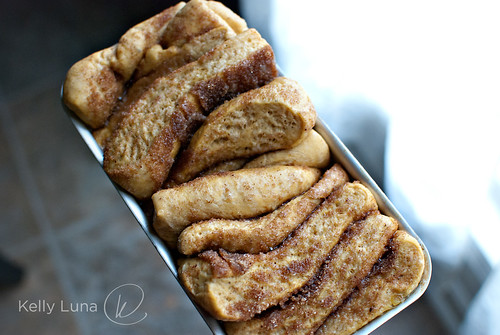
Pumpkin pull apart baked

And here's the crunchy, sweet, cinnamon-y top. Equally dreamy.

Pumpkin Pull-Apart Bread
Ingredients
1/3 pumpkin bread dough
1/4 cup brown sugar, loosely packed
1/4 cup granulated sugar
2 tsp cinnamon
6 Tbsp butter, melted, divided

Directions
Preheat oven to 350°F. Spray loaf pan with cooking spray, coating entire inside.
Using 1/3 of the pumpkin dough, pat into rectangle and roll out to approximately 18" x 10" or thereabouts. Mix together sugars and cinnamon in small bowl. Spread about 4 Tbsp of the melted butter over dough and cover completely with sugar mixture, reserving a tablespoon or two for topping.

Cut in half lengthwise and stack the two strips. Cut stacked strips in 2" sections. Stack these and place in well greased loaf pan. Drizzle remaining butter over the loaf and sprinkle reserved sugar over the top. Cover with plastic wrap and let rise until top crest the pan about 1/2" to 1", about 45 minutes.

Bake approximately 30-40 minutes, until internal temp of bread is 190°F. Top will get dark. Cover after 20 minutes to prevent it from burning or getting too dark.

Remove from oven and let rest on wire rack just a minute or two. Run knife around edges of pan to make sure it's not sticking, then turn out onto foil or parchment paper. Let it sit there for a minute or so to let the gooey goodness distribute a bit.  Flip again so the top is upright. Let cool slightly (5-10 minutes) before diving in. The sugar will be HOT and basically like caramel (oh, yeah) so it's easy to burn your fingers if you start devouring immediately. It'll be worth the wait.

* * * * * * * * * * * * * * * * * * * * * * *

Next up: Monkey Bread. But not just any old monkey bread. Oh, no. This is...

Cream Cheese Stuffed Pumpkin Monkey Bread

Did you're eyes just flutter and roll to the back of your head like you were going to pass out? It's ok. Mine did when I had the idea for this, then it was all I could do not to laugh like a mad scientist. "EUREKA! Bwah HA HA HAAAAAA!" *drumming tips of fingers together* I was just sure it was going to be amazing. I was right.

You're going to mix up a block of cream cheese with powdered sugar and spices.
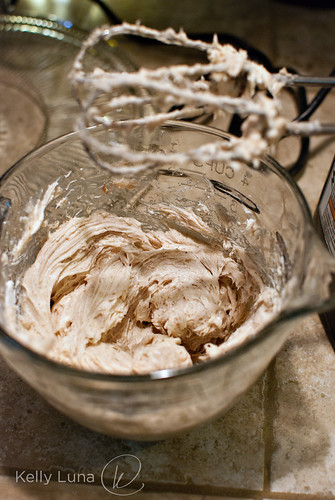
cream cheese mixture

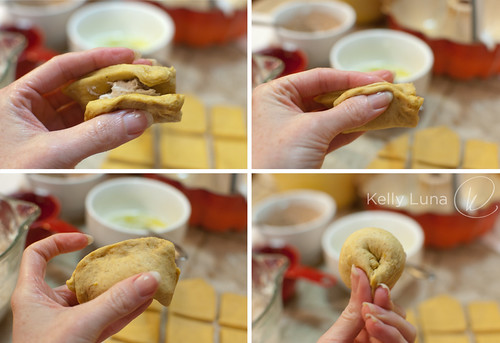
Then you roll out the dough in no particular size, just roll it to about 1/4" thickness but no more than that. Thinner is ok.
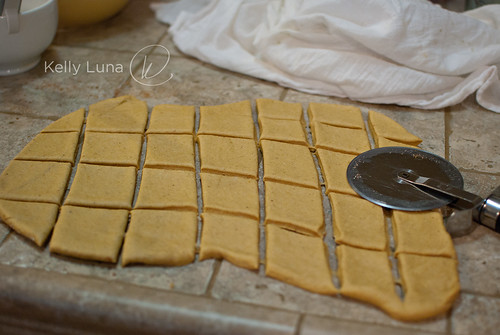
Pumpkin MB squares

Then cut into 1-1/2" to 2" squares. Cover most of the dough, then get to work. I'm not going to lie. This is time consuming, but oh so worth it.
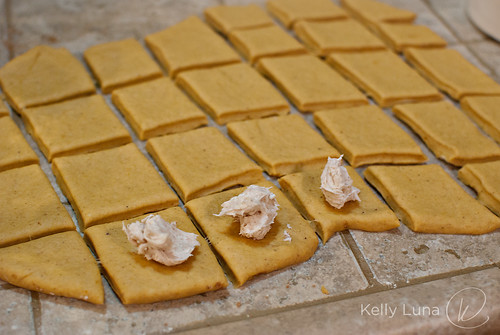
Pumpkin MB squares-cc filling

Shape...

Pumpkin MB shaping

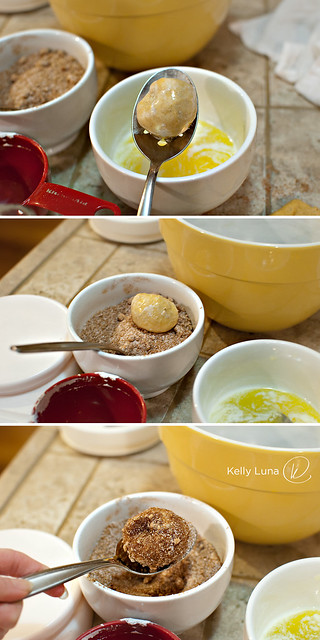
Dunk...

Pumpkin MB coating

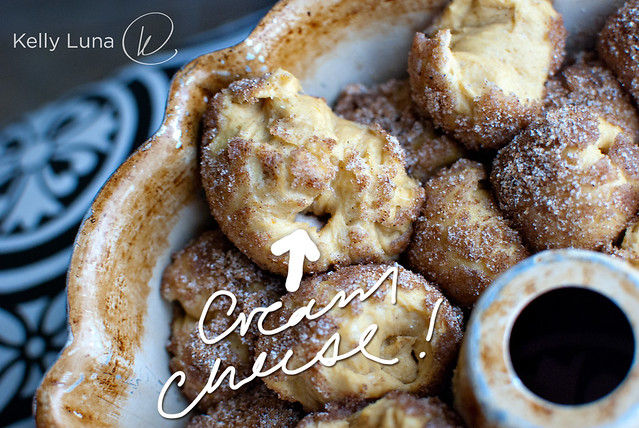
And repeat with all of the dough. Put in a greased bundt pan, cover and let rise...
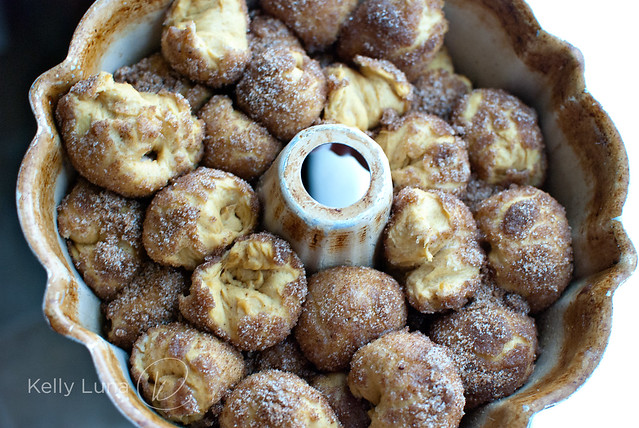
Pumpkin MB in pan-proofed
Pumpkin MB in pan-detail

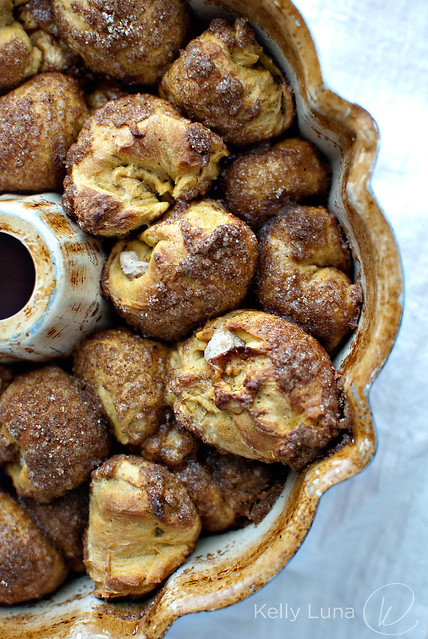
Bake...

Pumpkin MB baked-detail

Nearly pass out again when you turn this out onto a serving plate...
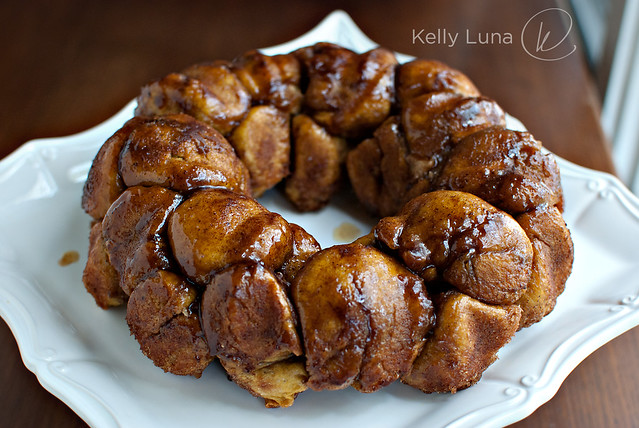
Pumpkin monkey bread

Then bliss out when you take your first bite...
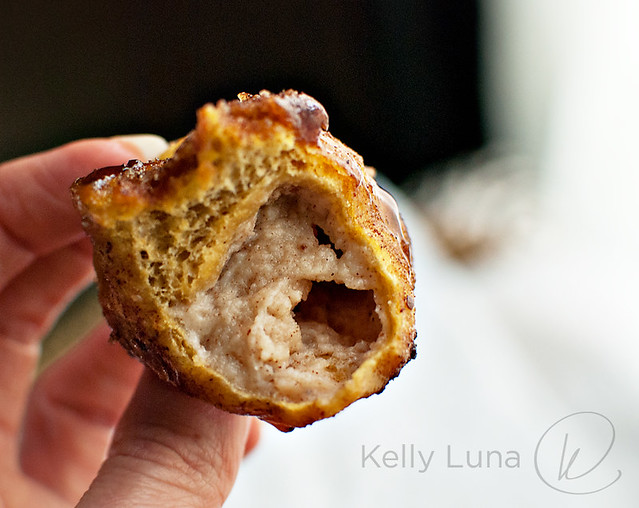
Pumpkin monkey bread-bite

It's best cooled to warm-not-hot. So, if you can resist, let it sit about 30 minutes.
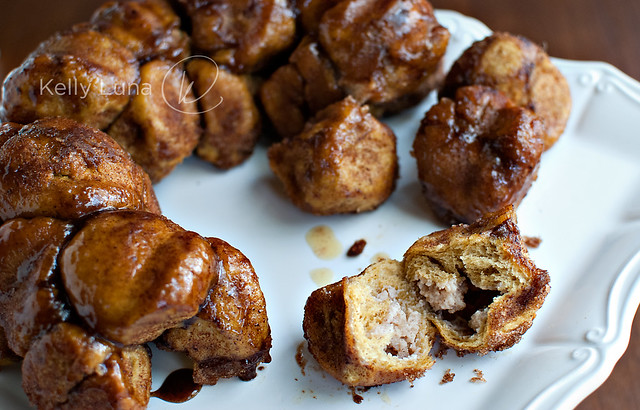
Pumpkin monkey bread-crumb

Cream Cheese Stuffed Pumpkin Monkey Bread
Ingredients
Filling
8oz (1 pkg) cream cheese
1 cup powdered sugar
1 heaping tsp cinnamon

Coating
1/3 pumpkin bread dough
1/2 cup brown sugar, packed
1/4 cup granulated sugar
2 tsp cinnamon
dash nutmeg
any other spices you like - ginger, cloves, cardamom - go crazy
1 stick butter, melted

Directions
Spray bundt pan with cooking spray, coating entire insides well.
Filling: In medium bowl mix all ingredients until smooth. I used my hand mixer, but you can mix by hand with a spoon, just make sure the cream cheese is room temp - it'll be easier that way.
Coating: Melt butter in small bowl. Mix sugars and spices in another small bowl. Grab a slotted spoon and a large regular spoon.
Roll dough to approx 1/4" thick but not more than that. Thinner is ok. Cut into squares, covering dough as you work. Place a dollop of cream cheese mixture in the center of the square then pull edges of dough around the filling, sealing as best you can. Roll into smooth-ish ball shape and put in butter. Scoop out with slotted spoon and tap on edge of bowl to drain excess. Drop into sugar bowl, turning to coat with regular spoon. Place in prepared bundt pan. Repeat with remaining dough layering the coated pieces as you go. You'll end up with extra cream cheese, butter and sugar mix. No worries. You'll use them in the next bread. OR if you're only making this bread, save them to slather on pancakes or toast!

Drizzle a little bit of butter over the pan of dough and sprinkle on a bit more sugar, too. Cover and let rise about 45 min.

Bake in 350°F oven 40-45 minutes or until internal temp is 190°F. Cover the pan with foil if it's getting too dark.

Remove from oven and run knife around all the edges. Grab a large plate or serving platter. Place on top of the bundt pan. With one hand on the bottom of the plate and the other holding the pan (with an oven mitt or towel) flip them together keeping bundt pan on top of the plate. Let the weight of the bread pull it it from the pan. You might need to tap it a bit. Slowly pull the pan off the bread and marvel and what you've just created. TA-DA!!!

Let cool about 30 minutes before eating. I know you're not going to, but that's OK. I didn't either. But it DID taste better once it cooled a bit. Bring this to Thanksgiving or your next get together. Be prepared for the deluge of compliments and the "OMG-this-is-amazing" you'll receive.

* * * * * * * * * * * * * * * * * * * * * * *
Are you still with me? I'm so glad. We're almost done and this one is super simple because we've got everything ready to go since we're using the leftovers from the other bread(s).
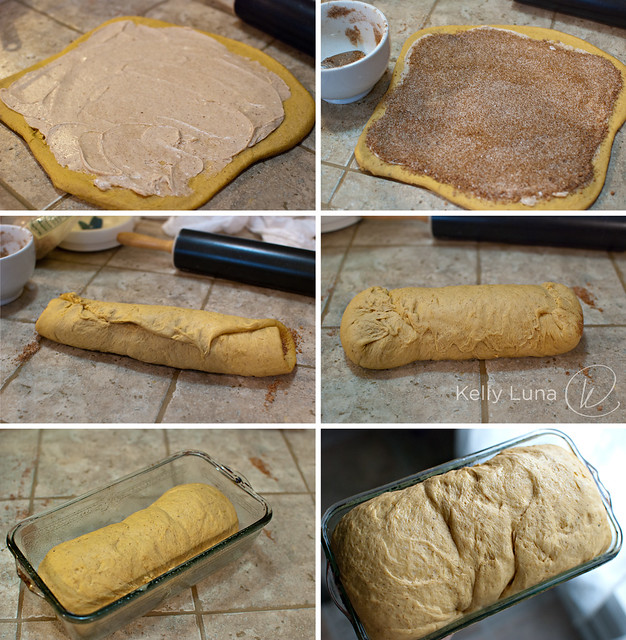
Pumpkin Cinn Swirl bread-shape

Roll, slather, sprinkle, rollup, seal, plop in pan, wait...

Bake...
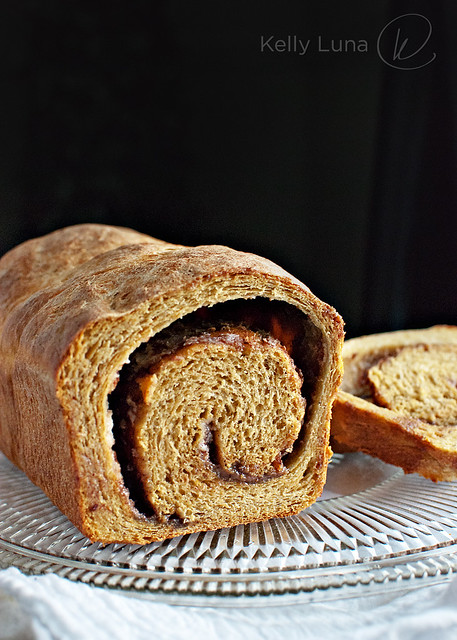
Pumpkin Cinn Swirl bread-crumb

Realize you didn't roll the dough tightly enough...
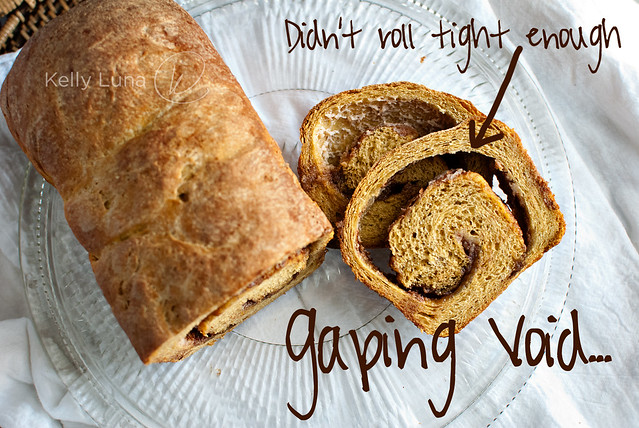
Pumpkin Cinn Swirl bread-void

Then shrug your shoulders and eat it anyway 'cause it's AWESOME.

Cinnamon Cream Cheese Swirl Pumpkin Bread
Basically, this is a straight up cinnamon swirl bread but you use the cream cheese mixture in place of butter. Easy peasy. So if you take away anything from this post, just try this with your favorite cinnamon swirl bread recipe. You'll thank me.

Ingredients
1/3 Pumpkin bread dough
Cinnamon Sugar mix
Cream Cheese mixture (cream cheese, powdered sugar, cinnamon)

Directions
Preheat oven to 350°F.
Spray loaf pan with cooking spray.
Roll out dough to approximately 10" x 10". Smooth cream cheese mixture over dough then evenly sprinkle cinnamon sugar mix. Roll dough pulling tightly to avoid gaping voids. Smooth edge into roll then pinch the ends to seal and tuck under. Place in greased pan, cover and let rise about 45 min or until dough crests edge of pan. Bake until internal temp is 190°F about 35-40 minutes, or until it sounds hollow when tapped on the bottom.

Remove and place on cooling rack. Immediately turn out of pan on to rack. let cool before slicing and serving. Bread will smash and mush if you try to cut it while hot. This is really good toasted and I'm guessing it would make out-of-this-world French toast. Give it a shot!

WHEW! You made it all the way through. What a trooper. If you try any (or all) of these recipes, please let me know. I'd love to hear about it in the comments or shoot me an email.


ADDENDUM: I've linked this post up to the Red Star yeast Holiday Recipe Swap. Come join the fun at the My Baking Addiction and GoodLife Eats Holiday Recipe Swap sponsored by Red Star Yeast.
Related Posts Plugin for WordPress, Blogger...