Showing posts with label holidays. Show all posts

Wednesday, December 21, 2011

Wordy Wednesday — Christmas Baking

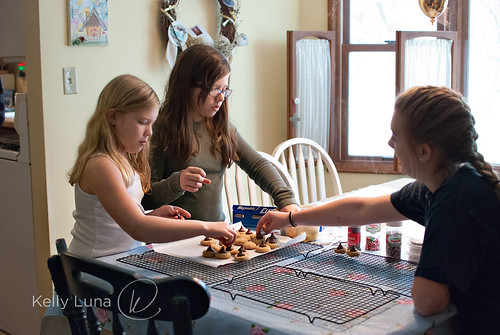
So I did some baking this past weekend. Lots of it. On Saturday, I went to my mom's to bake with her, my sister and my nieces.

3helpers

We had fun and managed to bake a ton of cookies in a fairly short amount of time.
cookies from moms
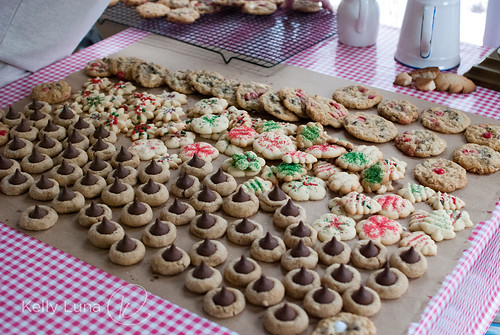
This was about half of what we made that day.

My mom had made some dough ahead of time and baked the sugar cookies, so between that and the cookies we mixed on the spot, we were the model of efficiency. Fun and productive. Win-win!
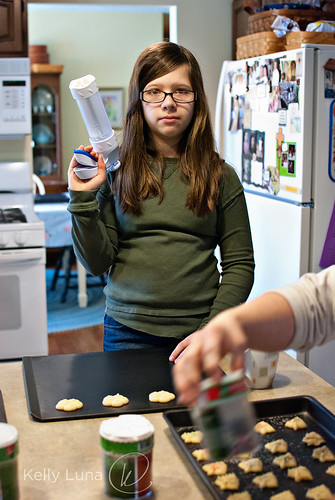
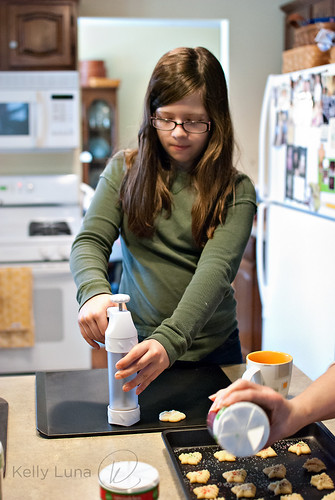
cookiepress
Have cookie press. Will travel.

cookiepress2

Quick! Look! They're getting along. Aww...
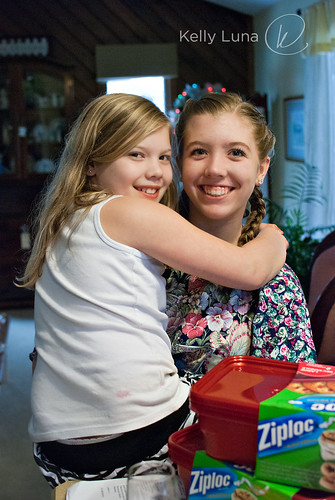
sisters

Hooray for making cookies - and memories.

* * * * * * * * * * * * * * * * * * * *

Sunday was all me. I'd also made all my dough ahead. I knew I had too much to do to try and accomplish it all in one or two days, so the weekend prior then a couple of times through the week, I mixed up batches of cookie dough. All that was left was the baking (and cooling and picture taking and packaging...) and it worked out so nicely that I plan to do future epic baking sessions like that as well. No messing with mixing bowls, measuring cups, ingredients everywhere - then having to clean them to repeat the process. Just lining up pans and baking all day. Awesome.

So here's most of what I made. Links for recipes below photos.
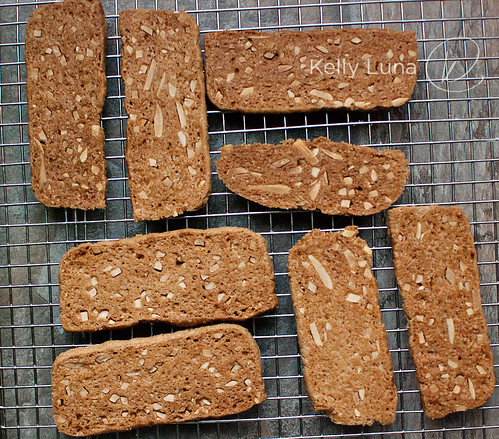
almond shortbread-baked

My favorite of the day — Pain d'Amande from Flo Braker (via David Lebovitz). Crispy, nutty, sweet with subtle but noticeable cinnamon. So easy and one of my new favorite cookies. You can keep this dough in the freezer to slice and bake whenever the urge strikes. I love how these looked when the light hit them as I sliced the dough.
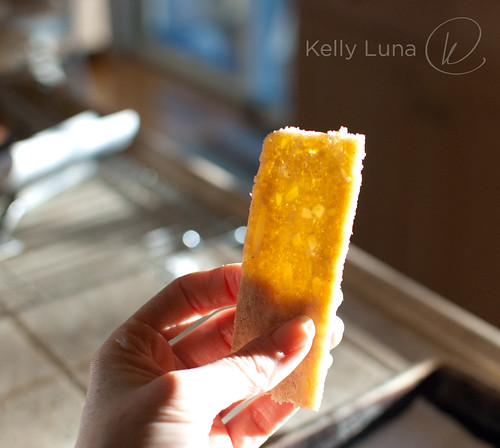
almond shortbread-trans

Next up...

molasses ginger cookies

Molasses Ginger cookies from Farmgirl Fare —Big, chewy, super spicy and a close second to the almond cookies. This was the recipe one of my coworkers had to have. They're good. Really good.

Also from Farmgirl Fare...
shortbread bites2

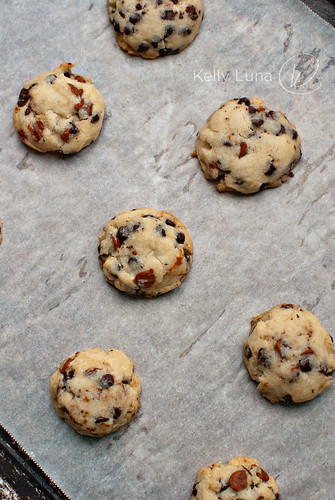
Chocolate chip shortbread cookies — she uses toffee bits, but I didn't have any, so I threw in some cinnamon chips along with the mini chocolate chips. Buttery, melt-in-your-mouth, not too sweet bites of bliss.

On to a pinterest find...
lemon cherry crinkle cookies

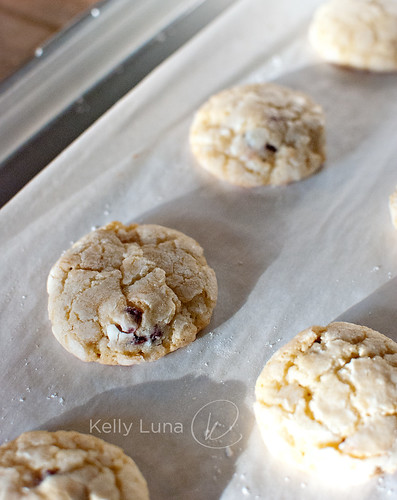
Lemon crinkle cookies — I wanted to "holiday" this up a bit, so I added cherry flavored dried cranberries. The texture of these is out of this world — slightly crunchy on the outside, super soft and chewy on the inside. I really liked the cranberries in these, but the lemon was too subtle for my taste. I even aded a bit of lemon extract, but I'd double the lemon next time. Still, these were excellent.

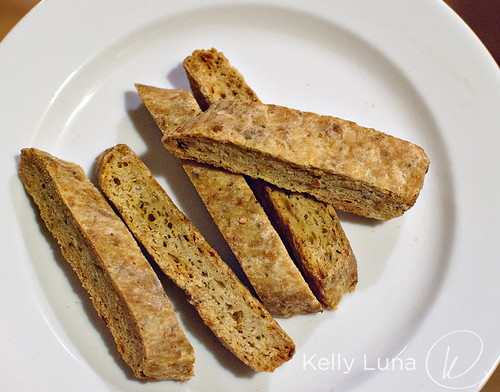
And the final one I'm sharing is the savory one of the bunch (apologies for terrible pic)...
parmesan biscotti

Parmesan-Herb Biscotti — I used this recipe after doing a search for "savory biscotti". I love homemade cheesy crackers, but they don't stay crisp or keep very long, but I knew biscotti held up so I figured there had to be a savory version. The original recipe doesn't call for herbs, but I added some Italian spices along with a pinch of red pepper flakes. A nice little kick to go with the cheese and crunch. I halved the recipe. I did make this from start to finish on Sunday, the only dough mixing of the day.

* * * * * * * * * * * * * * * * * * * *

I also baked snickerdoodles, but can't recall where I found the recipe, so I didn't bother taking pics. It's just your basic snickerdoodle. I also made Browned Butter Rice Krispie Treats that I found at Smitten Kitchen. NOT just your basic treat. So good and so easy. Browned butter makes everything better.

* * * * * * * * * * * * * * * * * * * *
care package

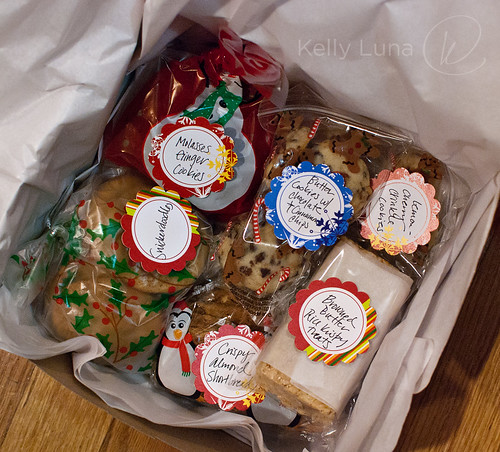
I packaged everything up and got them ready for gift-giving. I hope you are all having fun with YOUR holiday baking!

Sunday, September 25, 2011

Halloween Canvas

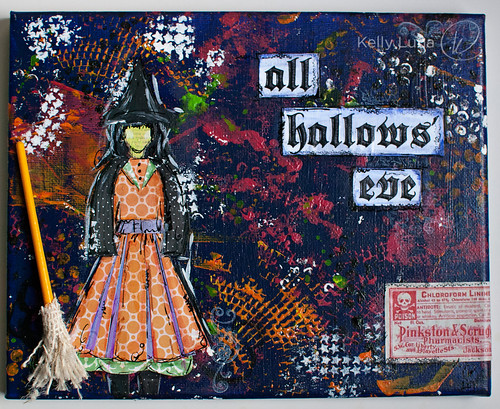
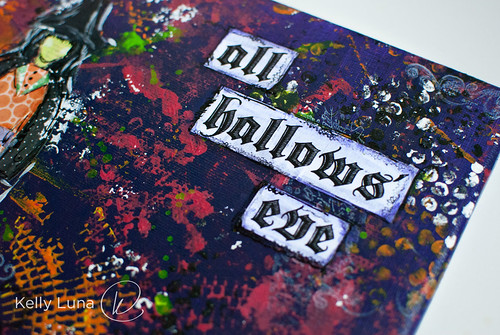
Halloween canvas-all

Although I'm behind on just about everything else going on in my life, I somehow managed to get ahead of the game on this one thing — my Halloween Witch mixed media canvas.

I had the background, or at least some of the background, done for some time. I had a purple canvas and some leftover paint. I combined them, knowing it would be a fun start to a Halloween background, then set it aside. A few weeks ago, I went back to that canvas and finished it up.

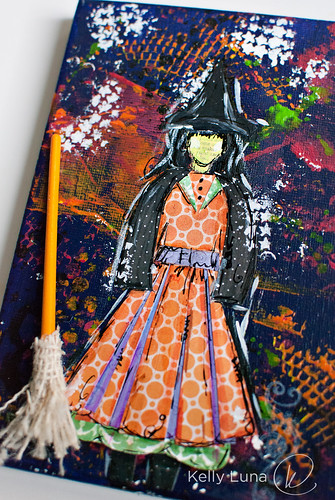
Halloween canvas-witch2

Using techniques I learned in the She Art Workshop, I came up with the witch, then used some newly purchased burlap and the end of a ruined paintbrush to make her broom. The paintbrush handle was already that bright yellow, so I just left it that way. The burlap is just frayed, wrapped around the end and hot glued. Then I took a strip of non-frayed burlap and wrapped it around the top to finish it off.

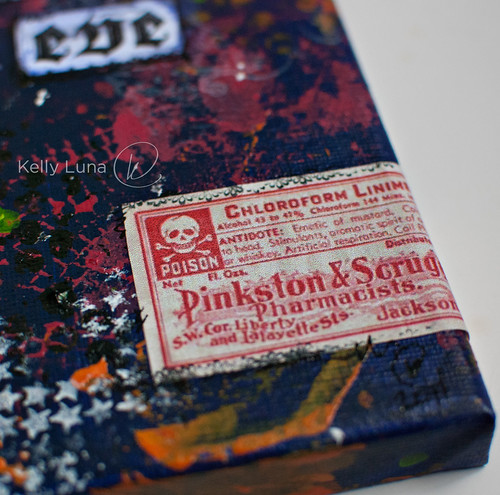
Halloween canvas-label

The poison label is one I found on Flickr here. Flickr is a wonderful resource for finding free printables and ephemera. Just do a search for whatever key words you're looking for, and loads of images are available. Check with each to see what permissions you have regarding use. To find this label, I searched for "free Halloween ephemera". Change to "free Halloween printable" and all sorts of other fun images come up. Pinterest is another great resource for free printables.

Halloween canvas-words

I found the font I used at dafont.com. I love that site and use it ALL the time for work and for personal use. They have tons of fonts all separated by category so it's pretty easy to find what you want. I found this font — Deutche Zierschrif — under "Gothic > Medieval". While dafont is my personal favorite, there are a number of other free fonts sites as well, such as Urban Fonts, Font River, and 1001 Fonts, just to name a few.

I'm mostly really happy with how this turned out. Now I just need to go finish all of the other half-started projects I have scattered around. I'm really good at starting things. Finishing is the real trick!

Saturday, January 1, 2011

Happy New Yaer!

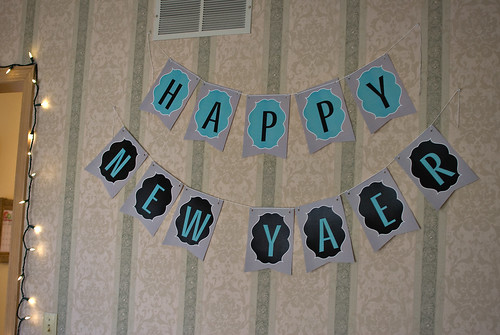
NYESign

Yes, this is the banner I made for New Year's Eve using free printables from Love The Day which I found thanks to Tidy Mom. I was in a hurry and clearly wasn't paying close enough attention - I hadn't been drinking or anything! I was finished with it before I noticed. Being 1) pressed for time 2) lazy and 3) completely amused by the typo (a Kelly trademark move), I left it as is. It totally cracks me up.

I wish I'd taken a couple of minutes to take a picture of the decorated table (I took these pictures today). It looked really pretty, with all three of my white cake stands loaded with food, white Christmas lights snaked around the various plates and stands, and I was able to make use of many of my favorite glass dishes. It was just us and another couple, but I couldn't help myself and had to make it a bit special. I made far too much food, but that's pretty typical for me.

I hope all of you had a fun New Year's Eve. Here's to a fantastic 2011.

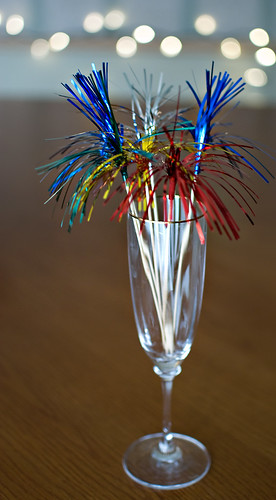
NYEGlass

Friday, December 24, 2010

Merry Christmas!

I thought I'd share with you my favorite quote of the season. It comes from my youngest niece.

C last Christmas


C just turned nine on November 30 and she still believes in Santa, which I think is awesome. The longer kids hold on to that kind of optimism, the better I feel about the state of the world. So a few weeks ago, she came home and was talking to her mom about what the kids were saying at school about Santa.

"Some kids are saying that Santa is just parents, but I don't think so. I mean, there is NO WAY parents could afford to buy all those presents!"

Love it, for a couple of reasons. First, that she just dismissed the rumors and stuck to her guns. And the other, that she realizes what a big deal all of those presents are. Pretty cool, eh?

This is most likely the last Christmas my sister will have a Santa believer in the house, so she's holding on to it, begging the other two girls to play along and let C have this last one.

If you'd like to experience the optimism a nine year old has, head over to this post on The Bloggess. It just might restore your belief in Santa – or at least the goodness of people. It's easy to see, hear and read about all of the bad things going on, so it's nice to see the other side, too. Regular people helping other regular people, strangers helping strangers through this crazy little thing we like to call The Internets.

Merry Christmas everyone! I hope you are happy, healthy and with the people you love and who love you.

Christmas 2009

Monday, November 1, 2010

Halloween 2010

halloween-all

For whatever reason, my hometown decided to have trick-or-treating on Saturday the 30th instead of on Halloween. Turns out it was a great idea. The weather on Saturday was as good as you can hope to expect in the final days of October in northern Indiana and while Sunday's weather was decent, nothing beats having a relatively mild and clear evening for the kids (and adults) to have some fun.

We get our fair share of trick-or-treaters, and my sister and her husband take their kids around our neighborhood and have since we've lived here. I'm pretty sure this was the first time all of them stayed out until the very end. They had a great time.

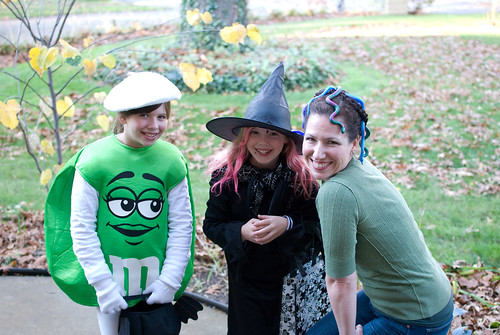
halloween10-M-C

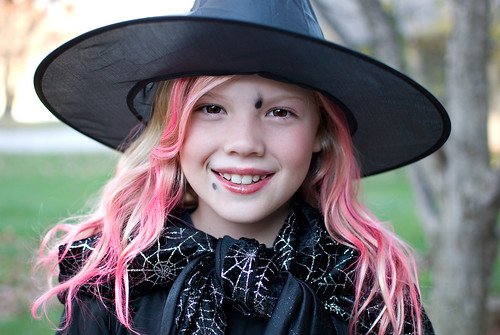
M was dressed up as an M & M and C was a witch. 

m-halloween10-closeup
C-halloween10-closeup

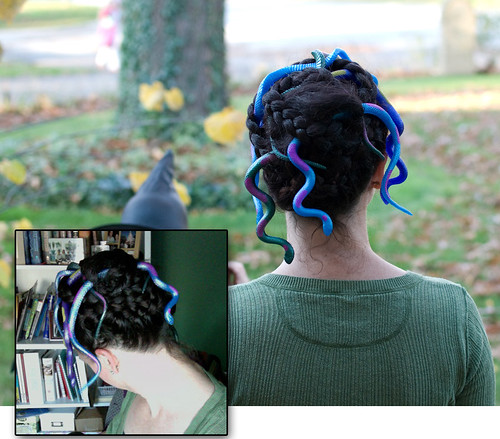
I decided to do a quick "costume" after seeing the no sew ideas on marthastewart.com

Medusa!


I took a chance and stopped by Dollar General on my way home. Sure enough, I found what I needed—rubber snakes and fake hair. I bought two synthetic hair pieces—the quality you would expect for "hair" that cost $2—as the instructions suggested, but I ran out of time to braid and pin the second one to my head. So what you see is my hair, braided, plus a long plait of fake hair wound around the top, with 50¢ snakes scattered throughout.

medusa-back-comp

It was so much fun. I got many compliments. And one girl (she was probably 12-years-old or so) wouldn't even come up to me, she was so freaked out by the snakes. Success!

I hope you all had a fun and safe Halloween and are now basking in the glow of a kickin' sugar high.

Sunday, March 14, 2010

St. Patrick's Day Baking Extravaganza

spd collage

Hang on. It's going to be a photo-filled post! Don't say I didn't warn you.

I actually planned ahead for St. Patrick's Day. Hey, it's as much of a shock to me as it is to you, trust me. I had a hankerin' to make sugar cookies and knew I wanted to send some to friends hither and yon, so I got to baking last weekend.

I knew which recipes to use and that I wanted to make shamrocks, but wasn't sure about how to decorate them. So I did some looking around and found this:

So cute! Now I had my inspiration, just had to execute. First, the recipes:

The Best Rolled Sugar Cookies
Allrecipes by Jill Saunders

Note: I halved this.

Ingredients
1 1/2 cups butter, softened
2 cups white sugar
4 eggs
1 teaspoon vanilla extract
5 cups all-purpose flour
2 teaspoons baking powder
1 teaspoon salt

Directions
In a large bowl, cream together butter and sugar until smooth. Beat in eggs and vanilla. Stir in the flour, baking powder, and salt. Cover, and chill dough for at least one hour (or overnight).
Preheat oven to 400 °F. Roll out dough on surface sprinkled with powdered sugar (won't make the dough tough like flour will) 1/4 to 1/2 inch thick. Cut into shapes with cookie cutter. Place cookies 1 inch apart on parchment lined cookie sheets.
Bake 6 to 8 minutes until JUST turning golden on the edges. Cool completely on racks before decorating.
If you want to keep these simple, just sprinkle them with decorator sugar, non-pareils or other decorating sprinkles before baking. These cookies are very good all on their own!


Royal Icing
Dries hard - makes for easy transport. Mine held up through a UPS trek to NY 

Ingredients
3 tablespoons meringue powder
4 cups confectioners sugar
1 teaspoon pure vanilla extract (or other flavoring of choice - watch color though, it will tint the frosting)
6 tablespoons water (less for really thick icing, more for thin)

Directions
Combine all ingredients in mixing bowl. Beat on high for at about 10 minutes or until stiff peaks form.
Divide and color as desired. Add more water as needed for flooding or more sugar if you get a little heavy handed with the water.

Now for the pictures:
green icing bowls
I divided the icing into thirds, keeping one white. The other two are as you see.
ltgrn outline
I outlined some in light green...

dkgrn outline2
And some in darker green.

Here's a handy tip for filling bags. (I just use sandwich bags instead of decorator bags. Snip the corner and you're good to go.) Place the bag in a small drinking glass, pulling the edges over the sides. Fill with icing, twist the top, snip the corner and decorate. The icing is pretty runny though, so work quickly and try to keep the end pointed up.
filling bag-1
filling bag-2
Also, keep the bowls covered with damp towels. It will keep the icing from drying out. It will form a crust pretty quickly!

After the outlines have dried, it's time to flood the insides.
dk green-flooding
Smear it around with a tooth pick to get the icing to all of the edges.
dk green-flooding-done
ltgreen-flooding done
white flooding

Once the flooding dries,  it's time to decorate. Rember the idea cookies? I loved the swirly one, but...
swirls
Hm. Not exactly like the picture, eh? I laughed and laughed, then moved on to a different attempt. I stuck with a checkerboard and dots. Even with just three colors and two "designs", I ended up with a nice looking mix.
finished cookies2
finished cookies1

Then I wrapped each one in plastic wrap, nestled them in a bed of crinkly paper and shipped them to well-deserving folks.
cookies-packaged

Round One COMPLETE!

This weekend was Round Two.

I knew I wanted to do cupcakes and quickly got my inspiration from Bakerella. I didn't use her recipe, but loved the GREEN!

Green Velvet Cupcakes
Slightly modified from Joy of Baking

Ingredients
2 1/2 cups sifted all purpose flour
1/2 teaspoon salt
2 tablespoons Dutch-processed cocoa powder
1 cup unsalted butter, at room temperature (original called for 1/2 cup - I had 2 sticks ready so I used both. Stick with original for lower fat option.)
1 1/2 cups granulated white sugar
2 large eggs
1 teaspoon pure vanilla extract
1 cup (240 ml) buttermilk (I used powdered buttermilk. Add powder to dry ingredients, add water when adding wet)
1 oz (one bottle) liquid green food coloring (see pic below)
1 teaspoon white distilled vinegar (used white wine vinegar-didn't have any distilled on hand)
1 teaspoon baking soda

Directions
Preheat oven to 350°F.
Combine flour, cocoa and butter in medium bowl. Set aside.
In mixing bowl, beat butter until smooth and light. Add sugar. Beat until fluffy. Add eggs one at a time, beating well between each and scraping down sides of bowl. Add vanilla. Add food color to buttermilk (or water if using buttermilk powder).
Alternately add flour mixture with buttermilk/color beginning and ending with flour, beating well each time. Mix SLOOOWLY to start when adding the liquid. Otherwise it will splash and get green food color everywhere. (It's a good idea to wear an apron or at least something that won't be ruined if you get food color on it.)

In small bowl or measuring cup, dissolve soda in vinegar. It will bubble (yay, chemistry) quickly add to batter, just folding in until incorporated - don't beat in.

Divide into 2 prepared 9" cake pans or cupcake liners. I got 12 cupcakes and a single 9" layer.

Bake cake approximately 25 minutes or until toothpick comes clean. Cupcakes will only take about 15 minutes. Ovens vary, so keep an eye on them. The might need more or less time. Cool in pans about 10 minutes then transfer to racks. Cool completely before decorating (or turning into cake pops).

The Best Buttercream Frosting EVER
I used this on my niece's birthday cake. It's da BOMB.

SPD-cupcakes-foodcolor
spd-cupcakes-soda vinegar
Woo-Chemical reaction in progress! And really, that's what baking is all about.

SPD-cupcakes-batter
Now THAT's green!

SPD-cupcakes-scoop
The large Pampered Chef scoop works great for cupcakes.

SPD-cupcakes-filled
SPD-cake
SPD-cake&cupcakes-cooling
SPD-cupcakes-1st decorated
I used plain white frosting first, but decided I need a bit of color to make the white sprinkles show more.
SPD-cupcake-dye icing1
SPD-cupcake-dye icing2
SPD-cupcake-dye icing-mixed
Dip a clean toothpick in the gel color, smear into the frosting and mix. A nice, pale green, just what I wanted. Obviously you can add more if you want a deeper shade. Go crazy!

SPD-cupcakes-decorated1
Better! And I got to use my cupcake stand - so fun.
SPD-cupcakes-onstand

Next up — CAKE POPS!

Take the 9" cake, crumble, add frosting (about a 3/4-1 cup), mix, scoop.
spd-cakepops-mixing collage-sm

Roll.
SPD-cakepops-ball
SPD-cakepops-trayfull

Melt.
almond bark

Skewer.
SPD-cakepops-sticks

Dip.
SPD-cakepops-dipped

Decorate.
SPD-cakepops-in sugar
SPD-Cakepops-overhead

Eat.
SPD-cakepops-bite1

If you didn't get enough pictures here, head over to my Flickr photstream for even more. (Yes, there are more!)

And if you're wondering about the wood stand in the group cake pop photos, stay tuned. I'll be posting a "How-To" on that later this week.
Related Posts Plugin for WordPress, Blogger...