Sunday, January 30, 2011

BBA Challenge Bread #42—Potato, Cheddar & Chive Torpedoes

PCC-crumb2


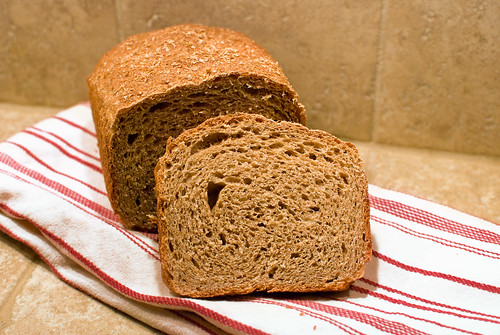
Oh, that sly Mr. Reinhart. He saved some humdingers for the final two breads in The Bread Baker's Apprentice – "the final grace notes" recipes. We've made it to the second to last – Potato, Cheddar, and Chive Torpedos – and they're wonderful. Let's take a look.


I'm baking my way through Peter Reinhart's award winning book, The Bread Baker's Apprentice, along with a number of other amateur bakers. (I'm not sure how many are still with us. Many have finished - and some are just starting). Want to learn more about it? Check out the following links:

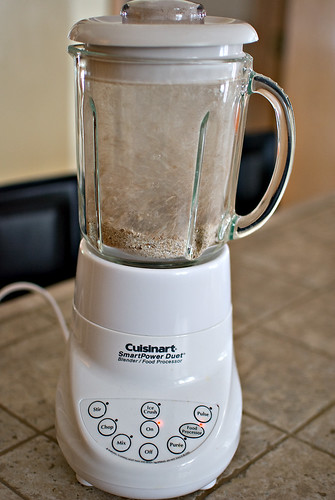
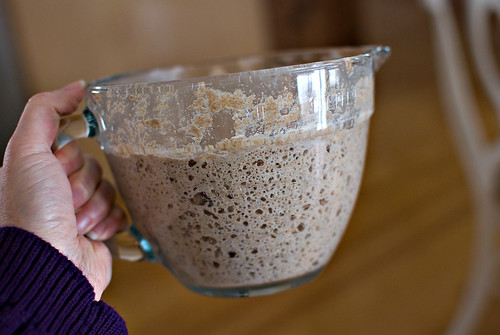
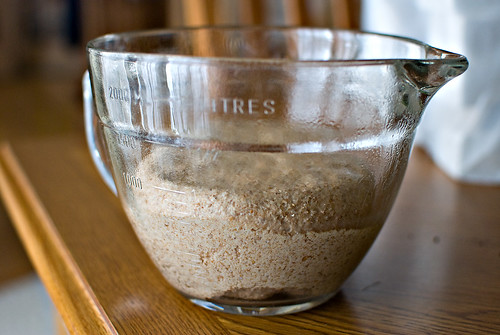
Technically, this bread is meant to be a mixed-method formula, meaning it combines a wild yeast starter with commercial yeast. As I mentioned in my BBA bread #35, I managed to lose my starter and I never bothered to make another. I kinda sorta thought about giving it another whirl, but never got around to it. So when it came time for this bread, I diverged from the formula as written and replaced the barm (or starter) with poolish, a standard preferment we've used at various points throughout the book. 

PCC-poolish collage

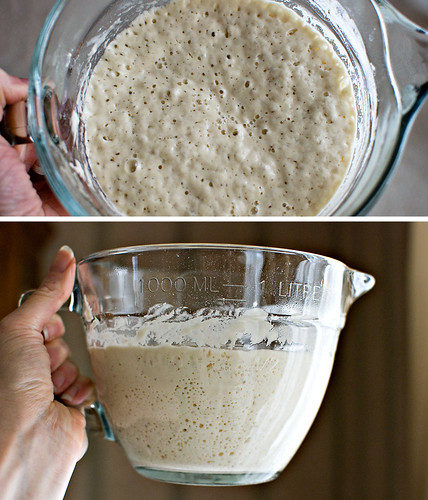
I made a half batch of the poolish formula in the book which would yield a bit more than I needed, but I wasn't concerned about that. I mixed it up on a Friday evening and let it sit out until I used it the next day. I didn't bother to refrigerate it, so all told, it was bubbling away for about 18 hours.

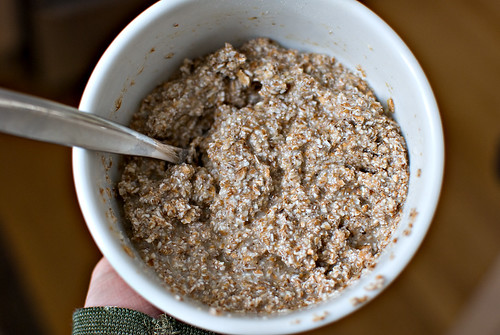
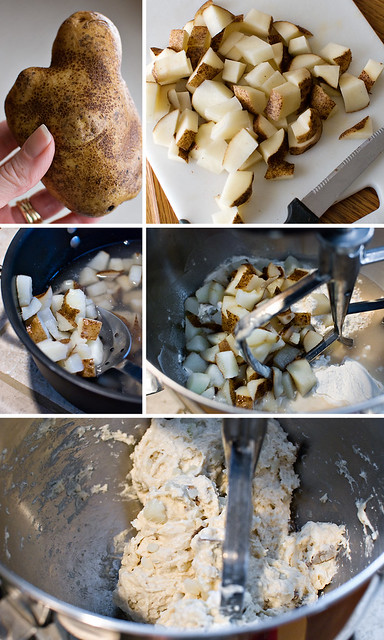
Before I put the preferment to use, I cooked up the potato, let it cool, then added it and about 3/4 cup of potato water to some flour, yeast and salt. 

PPC-potato collage

This recipe calls for fresh chives which is the one herb I actually DO successfully grow, but mine was under a foot of snow. Gah. If I'd picked up the pace last year, I could have used some, but alas, it didn't happen. Instead, I used this.
chives collage

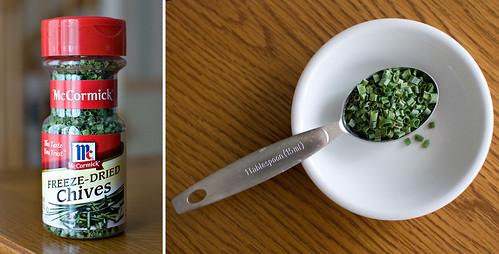
I would have picked up some "fresh" chives at the store, but they were ridiculously expensive for what you got, so I made peace with it, and bought the dried. The recipe called for 1/4 cup of fresh, so I guestimated on how much to use of the dried and went with one tablespoon.

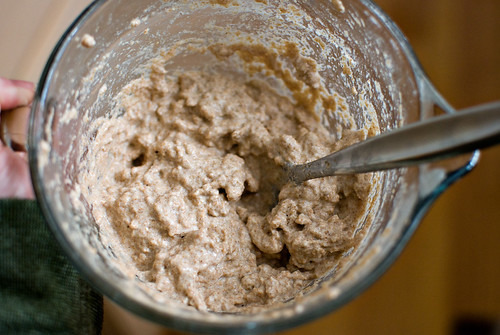
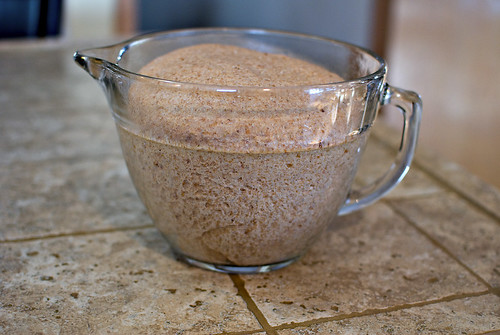
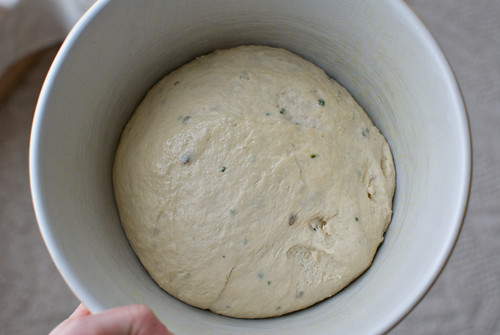
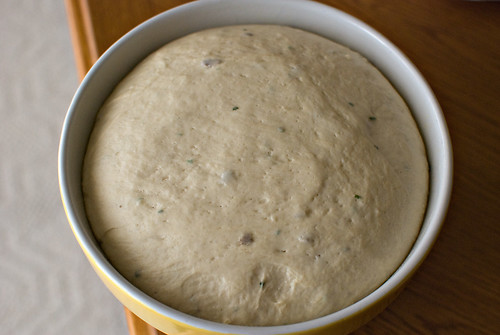
Chives were incorporated, dough was kneaded and placed in an oiled bowl, ready to ferment to double in size. It did me proud.

PCC-pre
PCC-post

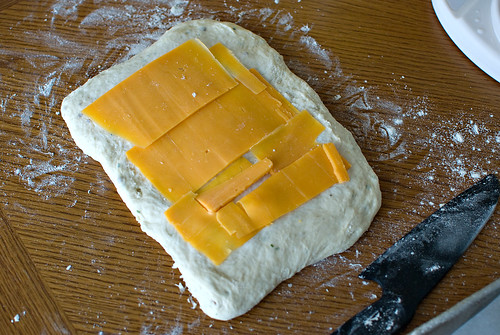
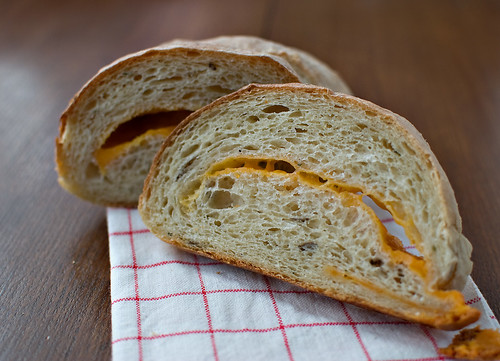
The it was time to shape. I had my sharp cheddar sliced, weighed and ready to go.
PCC-prep for shaping

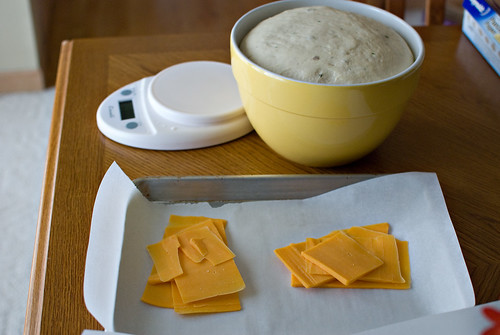
I divided the dough, patted into a small rectangle, layered on the cheese and rolled into a log. Then you push down and roll the ends into slight tapers to give it the torpedo shape.

PCC-cheese layer
PCC-rolled
PCC-tapered

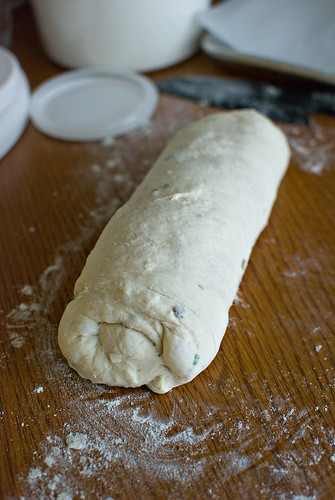
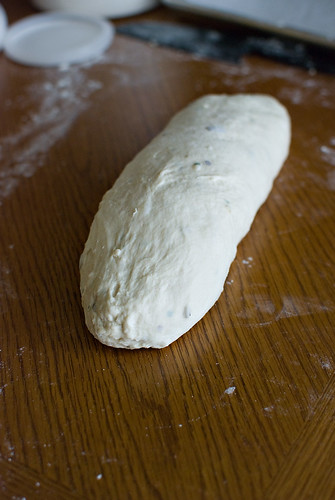
I put the two shaped loaves on the parchment lined, cornmeal dusted sheet and let them proof about 90 minutes.

PCC-2 shaped

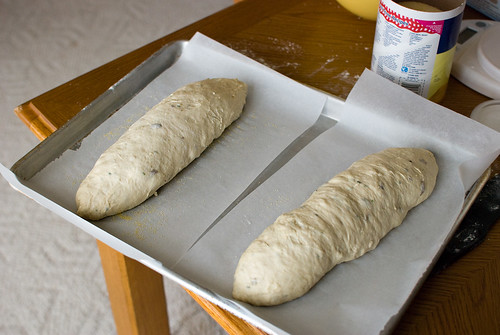
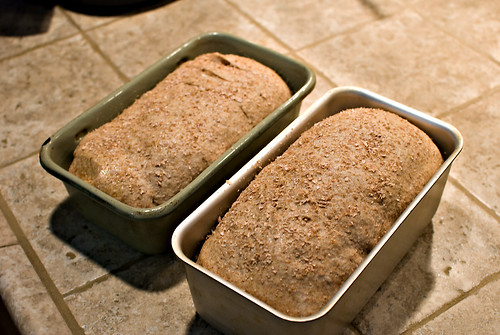
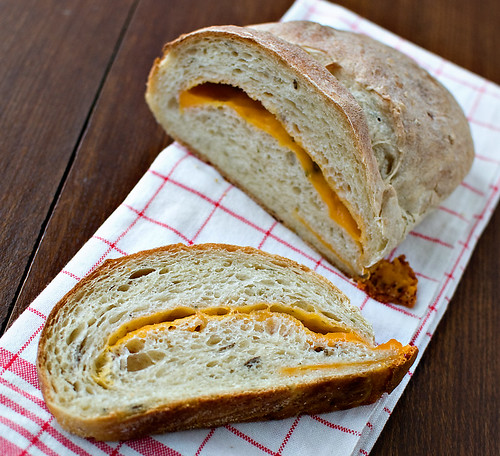
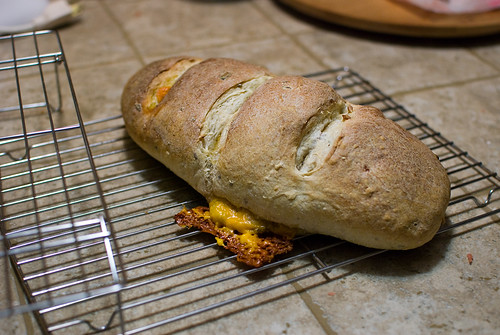
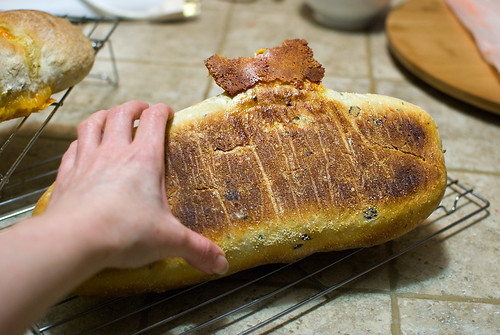
By the time the loaves finished baking, it was dark so the next photos aren't the greatest, but you get the idea. Unfortunately, I didn't roll these tightly enough and they both oozed cheese out the side at the bottom. The cheese is *supposed* to ooze out of the slashes at the top, but I didn't have much luck with that.
PCC-cheese ooze
PCC-bottom

Appearances didn't matter, though, because the bread was delicious. I kept coming back for slice after slice until I realized that I was way too full to eat any more. 

PCC-crumb

There are only three things I'd change. 
1) I'd add more dried chives, probably double the amount.
2) I'd divide the dough in thirds so that I could pat it out thinner and add more cheese (more cheese is always good)
3) I'd roll it nice and tight and keep the seem side up just to be safe. 

These are all minor, nit picky kinds of things. Overall it was fantastic and in my top 10. OOH! I just thought of something. You know what would be amazing?! Combine bread #28, potato rosemary bread with roasted garlic with this. *heaven*

Saturday, January 29, 2011

Fun with Photo Booth a.k.a. I'm a goofball

Yeah, so I'm gathering and editing the RAW pics for my next Bread Baker's Apprentice Challenge post, and got distracted by something — not something shiny but something silly.

If you're on a Mac, you probably already know about Photo Booth, the built in app that uses your computer's camera to take snap shots. Over the years, Dwight and I have had entirely too much fun with it.

These are some of the first we ever took, way back when Dwight bought his laptop. (These were taken at work, hence the horrible drop ceiling and fluorescent lights. For those that don't know, Dwight and I work at the same company.)


And these are some of my youngest niece and me (with Dwight in the background) when she spent the night back in April of last year. We had a ball.


And these are ones I took about 10 minutes ago. I was laughing so hard, I was crying. Man, I crack me up.


You're welcome.

Thursday, January 27, 2011

Guest Post at Culinary Covers – Molten Chocolate Cakes

WDFeb11CvrClone-crop

Once again, I've written a guest post over at Culinary Covers, the cover recipe only site of Lori Lange, a.k.a RecipeGirl. I chose the cover of the February issue of Women's Day.

WDcover1

You can find the recipe, notes and review over at Culinary Covers, but I wanted to share some of the progress photos here.

CC-WD-miseenplace

Here's everything ready to go. Only 5 ingredients in this recipe - super simple.

CC-WD-batter

Mixed, poured and ready to bake.

CC-WD-baked

Out of the oven and ready to turn out on the plate. I did not bake them on this sheet. The ramekins were right on the oven racks. I just used the baking sheet to transport the hot dishes to the photo shoot.

CC-WD-setup

Ready and waiting...

Monday, January 24, 2011

DIY Necklace Holder

necklace-holder-front

I've been wanting to get or make some sort of necklace holder for a little while now. Dwight likes to buy me necklaces and I let him, so I've managed to accumulate quite a few. I have two jewelry boxes but neither are ideal for necklace storage. They were becoming a bit of a jumbled mess.

I tossed around a few ideas but landed on this one when I saw the thread holder in the Wal-Mart craft section and a light bulb went off. I snatched up the holder and knew just what to do with it.

necklace-holder-side-detail

I decided to paint it the same color as the wall to make it blend in, but after seeing it up, I think a complimentary color would have worked, too.

This isn't an ideal solution because the pegs from lower rows are in the way, but it's a far cry from the pile of necklaces I was dealing with. One of the requirements for a hanger was that it would be out of kitty reach. I couldn't even think about getting something to put on my dresser – or hang anything too close to it because the cats would be able to reach it. And like me, kitties are easily distracted by something shiny. They'd see a dangling row of sparkly things and think. "TOYS!" So I hung the rack on the blank spot between the vanity area and the closet.

necklace-holder-side

All in all, I'm happy with it. Once I live with it for a while, I'll see if the idea holds up to real life use.

p.s. The rack came with flip out arms on the back so that, if you wanted to, you could have this sitting on a desk or dresser. I removed those and added hangers to the tops of each vertical arm. The little hanger things were part of a multi-pack, multi-purpose hanging kit. It was a circle with a bar across the bottom that had two pointy ends that you tap into the wood in lieu of a little nail or screw. Super simple and easy to install.

Friday, January 21, 2011

BBA Challenge Bread #41—Whole-Wheat Bread

WW-crumb
(probably my worst crumb shot ever - most humble apologies)

Hey, it's January. New Year's resolutions are still fresh in our minds, many of us are vowing to eat better, so if you haven't given up carbs entirely, whole wheat bread is your ticket, right? So long as it tastes good! Let's find out if this formula fits the bill.


I'm ALMOST DONE baking my way through Peter Reinhart's award winning book, The Bread Baker's Apprentice, along with a number of other amateur bakers (I'm not sure how many are still with us. Many have finished - and some are just starting). Want to learn more about it? Check out the following links:

I haven't always been a fan of whole grain bread, and let's be honest, who can blame me. There are some seriously terrible "whole grain" breads lining the shelves of grocery stores everywhere. Dry, tough, full of mystery sticks and twigs as well as a whole host of artificial ingredients and/or fillers. Blech. As a kid I have to admit that I liked the generic, really bad for you white bread – not Wonder bread, we bought off brands or the store brand. My mom would buy the wheat bread and we grudgingly ate our whole wheat PB & J sandwiches for lunch. 

But good wheat bread – REAL wheat bread, not a stripped-down version of it – can be exceptional, and I've had my share of out-of-this-world whole grain breads. So I was hopeful yet cautions about Peter Reinhart's whole wheat formula. I've made some bricks during this challenge and hoped against hope that this wouldn't be another.

This bread begins with two separate pre-fermets, a poolish and a soaker. The poolish is a combination of high protein whole wheat flour, yeast and water. The soaker is a just coarse grains and water. I chose to use coarse ground rye, of my own "grinding." 

I still had (and have) plenty or rye flakes left over from my pumpernickel rye bread so I decided to grind some up for the soaker. I used my blender as it works WAY better than my food process for this.

WW_blender

I weighed it (and manage to grind just about the right amount), added the 3/4 cup of water and gave it a good stirring.

WW-GrndRye
WW-pouring
WW-soaker

It soaked the water right up. That got covered and was left out all night for use the next day.

The other pre-ferment, the poolish, is meant to be thick, but more like a paste. It's mixed then covered and left to ferment for 2 to 4 hours or until it starts to bubble. After I added the amount of water called for in the recipe, I quickly decided that this was N E V E R going to "bubble" – it was far too thick.

WW-poolish-dry

It was all I could do to get all of the flour hydrated. So I made an executive decision based on the knowledge I'd gained from this challenge (yay, knowledge!) and added enough water to make it paste-like. Much better.

WW-poolish-wet

I let it do it's thang and it rewarded me with this:
WW-poolish-ferment
Lots of lovely bubbles, telling me that this poolish was a winner!

I popped it in the fridge and went to bed, ready to put it all together the next day.

To the soaker and poolish were added more flour, yeast and water along with salt, a bit of honey and an egg, both of which were optional, but I knew the honey would enhance the flavor and the egg would help the texture. After some time in the mixer and on the counter, I put the kneaded dough in a bowl and let it ferment about 2 hours.

WW-kneaded

WW-1strise

I divided it, shaped it, and popped it into two loaf pans and let those rise about 90 minutes. I spritzed them with water and sprinkled some wheat bran over the top for a bit of texture and visual appeal.

WW_proofed

The loaves got zero oven spring, but were NOT bricks. HOORAY! In fact, the texture was excellent. Somewhat open, a bit soft and pleasantly chewy. But the taste... well, I'm sorry to say that it was lack luster. It benefitted from toasting and a smear of peanut butter, but was bland and boring on it's own. Bummer. I ate one loaf but decided to put the rest in the freezer for now, hanging out until I put it to another use. I think it will make excellent bread crumbs, so certainly not a bad thing. 

If (and that's a pretty big "if") I decide to make it again, I'll add more honey and possibly some butter to help with the flavor. Chances are, though, I'll break out one of my other bread books and see what their whole wheat tastes like. Whole grain breads can be tricky, no question. Remember the 100% sourdough rye?
SDR-brick
 *ouch* That was tragic. 


Saturday, January 15, 2011

And the Winner is...

Last night, with the help of a little wine and my husband, I drew a number for the Penzeys spice giveaway winner.


From the bowl, Dwight drew #2 — Lisa!


Congratulations, Lisa. I'll be contacting you momentarily.

Thank you to everyone who entered. I hope to do more of these types of little giveaways in the future, so stay tuned!


Saturday, January 8, 2011

Lake Effect Snow

snow-berries

If you live anywhere near the Great Lakes, you'll know what I mean when I talk about lake effect snow. For the rest of you, I'll give the Something Shiny Reader's Digest version of this weather event.

When especially cold air crosses over a large body of water, in my case Lake Michigan, it warms up as it passes over the relatively warm lake water. By most standards, the water is hardly "warm" but 45°F is significantly warmer than the air temperatures this time of year (generally speaking). This now warm-ish air then passes back over land — and this is when the fun begins.

Clouds form over the water and when they hit land and cool down— BAM! You've got snow. People right at the lake's edge remain unscathed because the air hasn't had time to cool just yet. A few miles out, though, they get nailed.

The really fun thing about lake effect snow is that it's unpredictable. It can change pretty much whenever it wants to; you're at the mercy of wind speed and direction. I live about 50 miles east of Lake Michigan about a mile south of the Indiana-Michigan border. I'm close enough to experience plenty of lake effect snow, but far enough away to not get completely blasted by it. Go 10, 20, 30 miles west of here and it's a different story each place. Now, that all depends on the direction of the wind, but they're pretty much in the  "sweet spot" when it comes to lake effect snow.

If the wind comes directly from the north rather than northwest, which is the most common, we won't even see lake effect here. Ah, the power of nature.

snow-measure

Over the last 36 hours or so, we've been dealing with lake effect snow, most of it happening overnight. We had a couple of inches when I came home from work around 6:00 pm, but by this morning we had close to 8 inches. Dwight and I went out to shovel around 9:15 this morning. It looked like this:

snow1

snow2-backyard

After about 15 minutes, the snow really picked up again.
snow3

Dwight and I were covered and what we'd already shoveled was piling back up with fresh snow. The one good thing about it being so cold is that the snow is nice and light. None of that heavy, wet stuff that is a pain to shovel.

But three minutes later, the light started to change. "I think the sun's coming out." I turned to look at the sky and sure enough, it started looking like this:
snow4-bluesky

The snow you see falling isn't from the sky, it's from the tree branches. The air had been completely still but the tiniest whisper of wind made the snow come tumbling out of the branches. As I said, this is really light snow and doesn't take much encouragement to blow around.

Then, 6 minutes later, it was brightening up even more.
snow5-sun
And looking very pretty.
snow5b-sun

I put down the camera once again and got to work re-shoveling the walk up to the house. In that 20 minute span, we'd gotten another 1/2 in or so.
snow6-reshovel

And it just kept getting prettier and prettier until it's was downright gorgeous out.
snow7-fullsun
I'm no fan of snow, but you can't argue with how beautiful it can be in the right conditions. It cleans things right up, like a fresh coat of paint on a dingy wall.
snow9-branches

snow-backyard-sun

It stayed sunny for a few hours, but it's snowing again now. I can't see the driveway anymore. And so it goes...
Related Posts Plugin for WordPress, Blogger...