If you want something sweet, quick and adaptable to whatever you have on hand, this is your recipe. You can even make it all in one bowl, depending on your preferences and flavor combo. I ended up using a small sauce pan and a bowl, because my theory is, if you're going to melt butter for a recipe, you might as well brown it. It means a longer prep time, though, so skip it if you're in a real time crunch. (The original recipe only calls for melted butter, not browned butter, so it's baker's choice.)
The first time I made these, I added macadamia nuts, mini chocolate chips and coconut — awesome. White chips would have been even better. I recently picked up some toffee bits, and since the browned butter adds a caramel-y flavor, I figured it would be a great add-in. I thought "toffee mocha" sounded divine, so I added semi-sweet chocolate chips and some espresso powder. Boom. Done.
Toffee Mocha Blondies
adapted from Smitten Kitchen who adapted it from Mark Bittman, How to Cook Everything
Makes 16-25 or however big you decide to cut them!
Ingredients
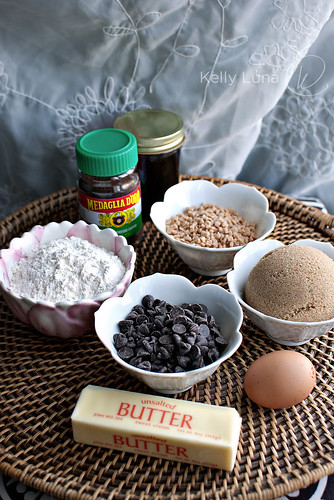
1 stick (4oz) butter, browned*
1 cup (200g) light brown sugar, packed
1 large egg
1 tsp vanilla extract (homemade, if you've got it!)
1 cup (130g) all-purpose flour
2 Tbsp instant espresso
1/2 cup toffee bits
3/4 cup semi-sweet chocolate chips
Directions
Preheat oven to 350°F. Spray 8" x 8" pan with cooking spray.
Cook butter in small sauce pan until fragrant and the solids at the bottom turn slightly tan. It's best to use a stainless pan so you can see the color! This will take about 5 minutes. Stir constantly. Cool 5 minutes then pour into heat resistant bowl. I use my large Pampered Chef batter bowl. Add brown sugar, stirring until all is incorporated into the butter. It will be gritty, not smooth. Add egg and vanilla and stir vigorously. Add flour, espresso, toffee bits and chocolate chips. Stir only until all dry flour is absorbed–don't over mix. Batter will be thick and greasy-looking. Spoon into prepared pan and spread evenly.
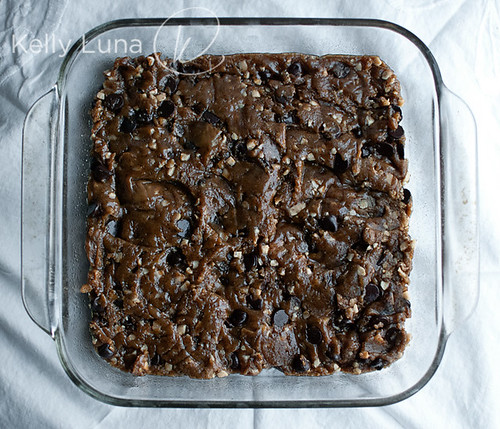
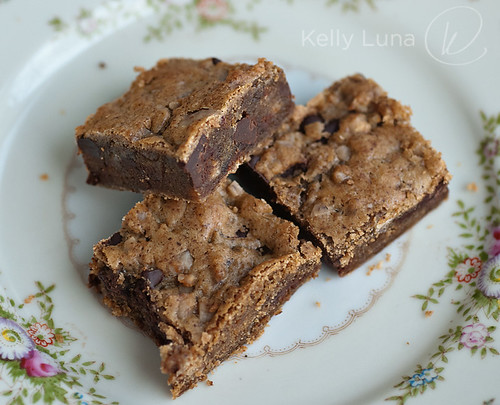
Bake 20-25 minutes depending on your oven and desired doneness. If you like gooey, go with a shorter bake time, but bake until center is set. I baked these exactly 20 minutes. They were super gooey and seemed almost undone when warm but set up after completely cooling. If you just can't possibly wait, feel free to dig in after a brief cool-down, but I recommend waiting at least 30 minutes. The flavor will develop as they cool.
Remember, you can adapt this any way you want. Possible add-ins include coconut, cinnamon chips, peanut butter chips, white chocolate chips, any kind of nut, dried fruit, even peanut butter cups, M&Ms or other candy. Substitute any flavor extract for the vanilla. Booze, even. GO WILD!
A quick shout-out to one of my most loyal readers, Ed Wynn. Sorry it's been so long since I've posted a recipe. :)
*browning the butter is completely optional, but I love the depth of flavor it adds.
EDITED 4-25
I made these last night with regular melted butter (Browned butter - I ain't got time for that), approx 3/4 cup finely chopped pecans and approx 3/4 cup cinnamon chips. I substituted the vanilla for maple flavoring. I served it still a bit warm with a scoop of butter pecan ice cream. Holy WOW, people. It was freaking awesome.