Sunday, July 29, 2012

Bourbon Date Blueberry Cinnamon Rolls

roll-plated

Inspired by the über-talented Barb over at Creative Culinary, I just *had* to make these rolls. You see, she tweeted about the bourbon date cinnamon rolls she was making and I couldn't get them out of my head. I knew I had the ingredients on hand, so when I got home, I immediately set to making them.

I'm not going to include a proper recipe in this post because I was seriously winging it, but I'll let you know what I did so you can give it a go. What I would suggest is going over to Barb's blog and check out her recipe. I'm sure it is phenomenal as everything I've made of hers — and there have been MANY – are keepers.

rolls in pan

I used Peter Reinhart's cinnamon roll recipe for the dough, with the exception of the egg. Oops. I completely spaced it when mixing the dough, hence the reason for a properly assembled mise en place!

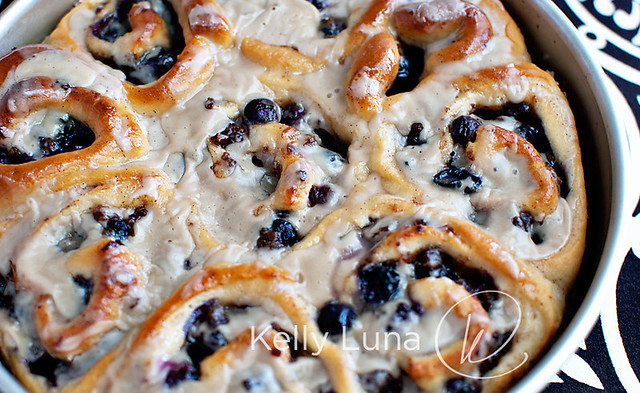
I roughly chopped some dates and put them in a bowl, poured some bourbon over the top and let them soak while the dough was rising. When it was time to assemble the rolls, I ran the dates and bourbon through my food processor to create a lovely and fragrant paste. I added about 1/4 cup of sugar (could have used more, but the sugary icing made up for the lack) and 2 heaping teaspoons of cinnamon. Mixed that all together and spread it over the flattened dough. I then sprinkled about a cup and a half of fresh blueberries over that, rolled it up and cut them into rolls.

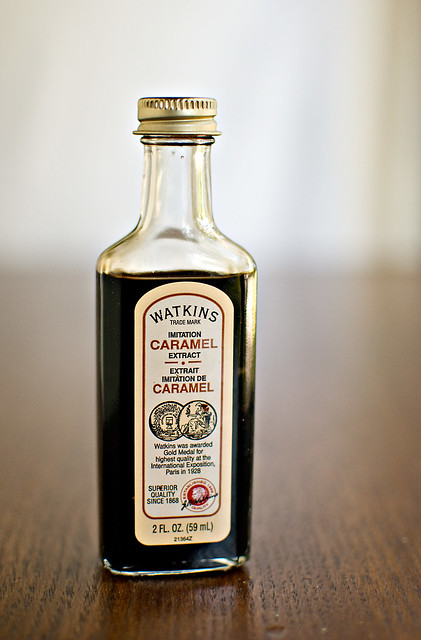
I decided to go with a simple powdered sugar and milk icing but added a half teaspoon of vanilla extract, seeds from one vanilla bean, and half a teaspoon of caramel extract. (I LOVE this stuff, and you might remember that I've used in around here before in these cookies, oh and these, too, among other things.)

caramel flavoring

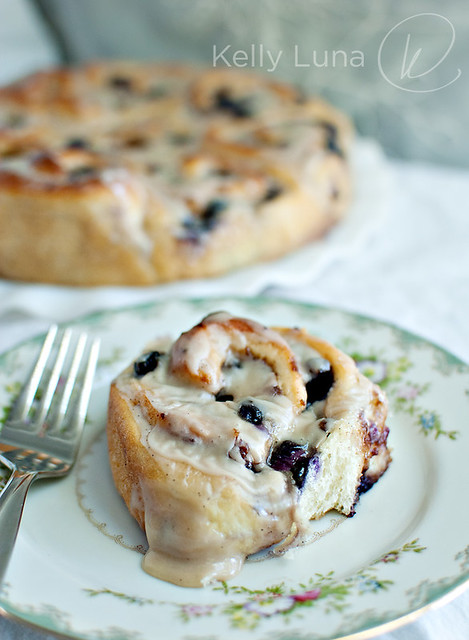
I used at least a cup and a half (probably more like two) of powdered sugar, then just added enough milk to make it the correct consistency, and drizzled it over the tops of the rolls, being rather generous with my "dripping." Nothing wrong with that!

roll-plated-fork

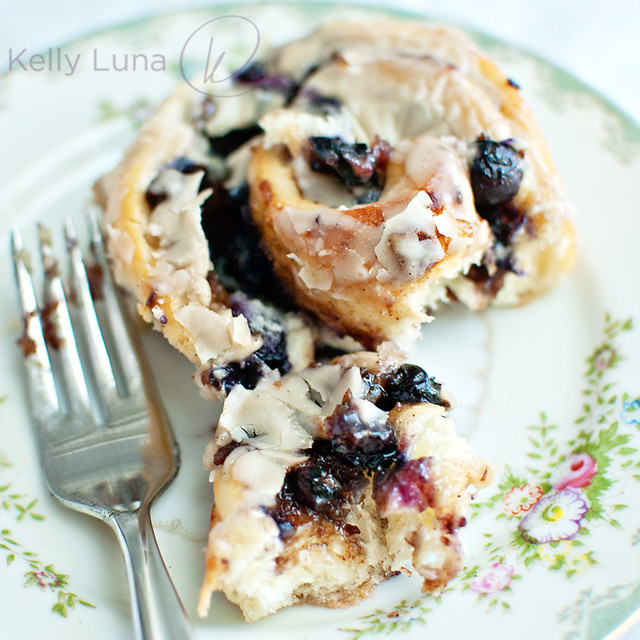
The verdict: gooey, sweet, fresh rolls begging for a cup of coffee or a tall glass of milk.

Remember, you can get the recipe for Barb Kieble's amazing Date, Walnut and Bourbon Cinnamon Rolls (with cream cheese frosting - OH MY!) over at Creative Culinary.

Sunday, July 22, 2012

Workshop Journaling – "Never Stop Growing"

7-23-12 Art Journal-Growing

So I have this bad habit of signing up for workshops and puttering out about 3/4 of the way through - or sooner. In this case, much sooner. I signed up for the Art of Wild Abandonment class with Junelle Jacobsen and Christy Tomlinson, and it's SO PACKED with information that I got a rather overwhelmed and stopped watching the videos and doing any work with the workshop assignments. It's a good problem to have in a workshop, I admit - so much information. I've loved everything we've done so far and I'm not even through week 2. It's a 3 week class, but don't let that fool you. There are at least 3 projects each week and about 10 videos. Each. Week. You might see how I got behind!

7-23-12 Art Journal-branch

ANYway. I made a promise to myself to get back to the videos and get messy again with my art journal. I've neglected it in a terrible way. I want to create more often (every day!) and want to practice lots of different techniques, and one of the ways to do that is dust off my art journal, grab my laptop and supplies, and get the most from the Art of Wild Abandonment workshop.

7-23-12 Art Journal-branch

Today I did just that and had the MOST fun with this page. Ahhhh. It's good to be back.

Materials used:
Gesso
Inktense pencil
Acrylic craft paint
Pen
While poster paint pen (Sharpie brand)
Distress ink
Roller word stamp
Various papers
Brown paper bag
Punchinella/sequin waste

Saturday, July 14, 2012

Quick Tip – Using Partially Dried-out Modeling Paste

stamped paste group

This is something I accidentally discovered today when I went to use my modeling paste on a work in progress. There was a big blob of paste on the edge of the jar left from the last time I'd used it where I'd scraped the leftover paste. Obviously I should have stirred the leftovers back down into the jar because that blob had dried out... but not all the way. I pulled it out to throw it away, but when I grabbed it, I realized it was the consistency of clay or play-dough.

light modeling paste

paste-consistency

*lightbulb*

paste ball

stamping paste

word stamped

I squished it together, grabbed a stamp, and pushed it into the paste. I'll let it air dry then have it on hand for a future project. Ta-da! Fun dimensional piece using materials I had on hand and was just going to throw away.

flower-paste
This is the original stamped piece I made with the large blob of paste. The one with the word stamp was done with paste I scraped from around the top edge of the jar using a pallet knife. As you can see, I use paint on my stamps and don't clean them very much. Ahem.

So, if you happened to have some mostly dried-out bits of modeling paste, give this a shot! You can attach the dried piece to a canvas or journal page, paint over it, layer with it - whatever you want.

*Just be sure you use LIGHT modeling paste because it will be flexible when dried and much easier to work with than regular or "heavy" modeling paste – that kind is very brittle when dry.


Friday, July 6, 2012

Finished — "Life"

16x20-7-finished

So I actually named this one. I don't think I've titled any of my pieces, mostly because I have no idea what to call them, but this just came to me so I went with it.

"Life"
20" x 16" acrylic on canvas
Started 4/15/12; Finished 7/1/12

As with virtually all of my paintings, I wasn't sure how this was going to turn out, but I love it. It ended up even better than I'd hoped and I'm so pleased with the final results. I branched out a bit from my normal pallet, throwing some bold yellows and some red in the mix, not to mention going with a landscape orientation. Very much in a happy place with this piece.

Here are some detail shots. At the end, I have a short video showing the evolution of the piece. Enjoy!

life-lowerleft
life-upperleft1
life-center
life-middleright
life-upperright


Sunday, July 1, 2012

Expressing my Inner Jackson Pollock

A.K.A Making a Mess:

I was in a "smear a bunch of thick paint on a canvas" mood then followed it up with a "how about flinging some paint" mood.


This is what I like to call the Full Of Possibilities stage.

Oh who am I kidding? This is just me making a mess. It's fun; you should try it some time!


Red, White and Blue

Brought to you by nature...
red roses

white peony

iris

red lily

butterfly weed-ants

vinca flower

Take some time this week to notice all of the amazing colors found in nature. It's breathtaking!
Related Posts Plugin for WordPress, Blogger...