Showing posts with label cookies. Show all posts

Sunday, April 21, 2013

Toffee Mocha Blondies

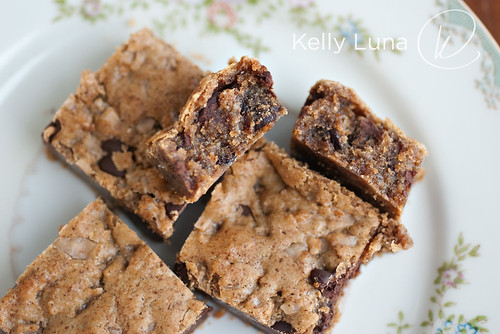
blondies-plate-close

If you want something sweet, quick and adaptable to whatever you have on hand, this is your recipe. You can even make it all in one bowl, depending on your preferences and flavor combo. I ended up using a small sauce pan and a bowl, because my theory is, if you're going to melt butter for a recipe, you might as well brown it. It means a longer prep time, though, so skip it if you're in a real time crunch. (The original recipe only calls for melted butter, not browned butter, so it's baker's choice.)

The first time I made these, I added macadamia nuts, mini chocolate chips and coconut — awesome. White chips would have been even better. I recently picked up some toffee bits, and since the browned butter adds a caramel-y flavor, I figured it would be a great add-in. I thought "toffee mocha" sounded divine, so I added semi-sweet chocolate chips and some espresso powder. Boom. Done.
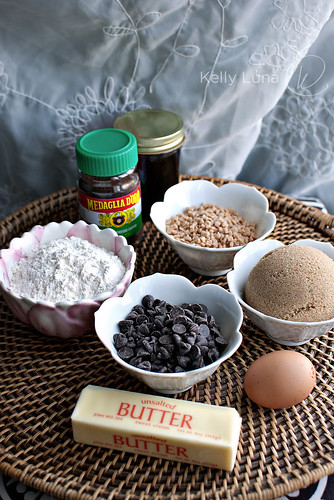
blondie ingredients2

Toffee Mocha Blondies
adapted from Smitten Kitchen who adapted it from Mark Bittman, How to Cook Everything
Makes 16-25 or however big you decide to cut them!

Ingredients
1 stick (4oz) butter, browned*
1 cup (200g) light brown sugar, packed
1 large egg
1 tsp vanilla extract (homemade, if you've got it!)
1 cup (130g) all-purpose flour
2 Tbsp instant espresso
1/2 cup toffee bits
3/4 cup semi-sweet chocolate chips

Directions
Preheat oven to 350°F. Spray 8" x 8" pan with cooking spray.

Cook butter in small sauce pan until fragrant and the solids at the bottom turn slightly tan. It's best to use a stainless pan so you can see the color! This will take about 5 minutes. Stir constantly. Cool 5 minutes then pour into heat resistant bowl. I use my large Pampered Chef batter bowl. Add brown sugar, stirring until all is incorporated into the butter. It will be gritty, not smooth. Add egg and vanilla and stir vigorously. Add flour, espresso, toffee bits and chocolate chips. Stir only until all dry flour is absorbed–don't over mix. Batter will be thick and greasy-looking. Spoon into prepared pan and spread evenly.
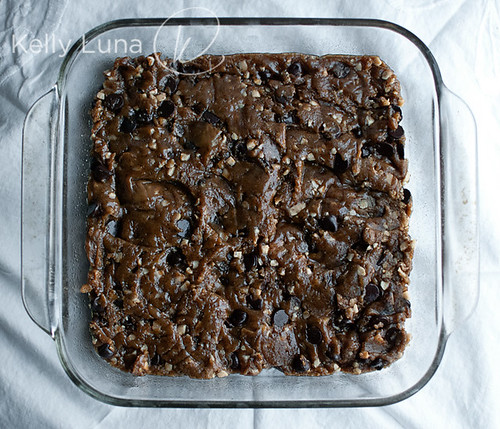
blondies-in pan

Bake 20-25 minutes depending on your oven and desired doneness. If you like gooey, go with a shorter bake time, but bake until center is set.  I baked these exactly 20 minutes. They were super gooey and seemed almost undone when warm but set up after completely cooling. If you just can't possibly wait, feel free to dig in after a brief cool-down, but I recommend waiting at least 30 minutes. The flavor will develop as they cool.
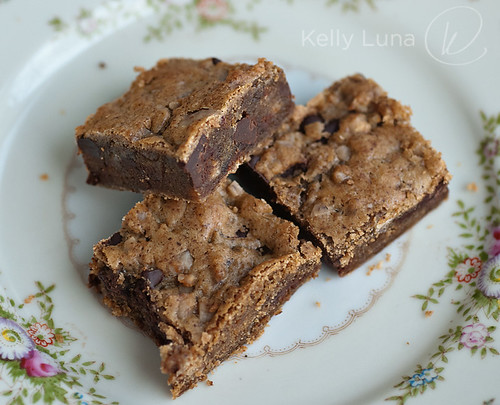
blondies-plate

Remember, you can adapt this any way you want. Possible add-ins include coconut, cinnamon chips, peanut butter chips, white chocolate chips, any kind of nut, dried fruit, even peanut butter cups, M&Ms or other candy. Substitute any flavor extract for the vanilla. Booze, even. GO WILD!

A quick shout-out to one of my most loyal readers, Ed Wynn. Sorry it's been so long since I've posted a recipe. :)

*browning the butter is completely optional, but I love the depth of flavor it adds.

EDITED 4-25
I made these last night with regular melted butter (Browned butter - I ain't got time for that), approx 3/4 cup finely chopped pecans and approx 3/4 cup cinnamon chips. I substituted the vanilla for maple flavoring. I served it still a bit warm with a scoop of butter pecan ice cream. Holy WOW, people. It was  freaking awesome.

Sunday, April 29, 2012

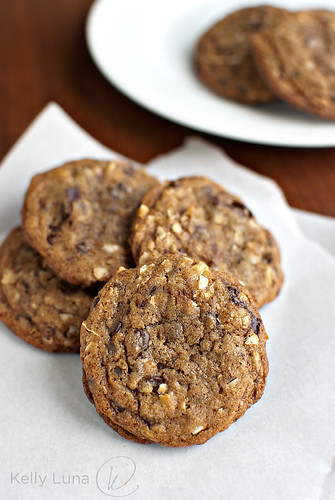
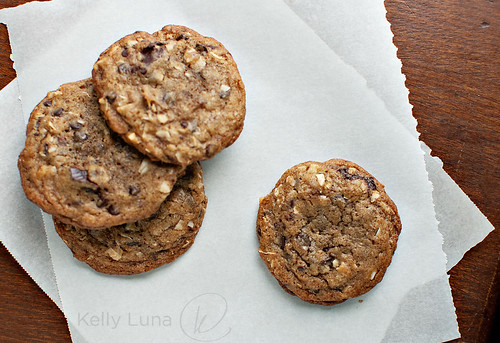
Chocolate Chip Coconut Coffee Cookies


CC Coconut Coffee cookie-3

I'm a fairly recent convert to coconut. Up until a year or so ago, I would have told you that I could kinda-sorta tolerate it, but hated the texture. I'm not sure what happened between then and now, but I'm pretty sure this cake began the conversion...
GermanChocCake-full

And this bread sealed the deal.
coconut bread-crumb

So when I saw Bakergirl's coconut coffee chocolate chip cookies post show up in my reader, I immediate pinned the recipe and made them the next weekend. While they were very good, I wanted to amp up the coffee flavor and make them chewier. I took her concept, combined it with my go-to CCC recipe, and came up with this. I still think the coffee flavor could be enhanced even more, but they're awesome, regardless. It's a CCC with some extra oompf, since the coffee really gives the chocolate an added boost.

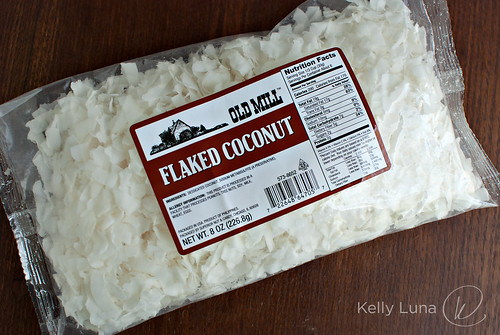
I didn't have the usual shredded, sweetened coconut you find at the grocery store, but I had this unsweetened flaked coconut I found at Menards, of all places. 
flaked coconut

Really. In their grocery section—which is just weird to have in a hardware store, but whatever, because the have an entire row of throw-back style candy {Boston baked beans, burnt peanuts, things like that} as well as various baking chips — and I'll take it where I can find it!

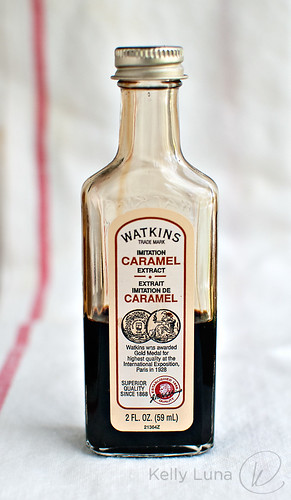
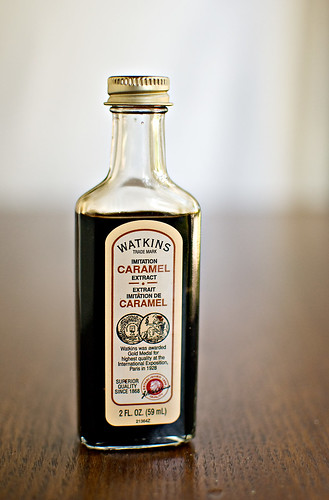
I also use this extract from Watkins. I found it at the farmer's market since a women there has a Watkins both. I assume you can order it online or find another maker of caramel extract/flavoring. 

caramel extract

I like the combination of chocolate, coffee and caramel. Oh and coconut. Sounds like a Starbucks drink, right? Great, now I want a frappuchino. I'll settle for this cookie, though!

CC Coconut Coffee cookie-2

Chocolate Chip Coconut Coffee Cookies
Inspired by Bakergirl (buddingbaketress.blogspot.com)

Ingredients
2-1/2 cups (350g) All-purpose flour 
1 tsp baking soda
1/2 tsp cinnamon (optional, but I love a hint of cinnamon in my CCC)
2 Tbsp instant expresso, such as Medaglia D'Oro
1 cup (225g) butter, room temperature
3/4 cup (150g) granulated sugar
1 cup packed (215g) brown sugar
2 eggs
2 Tbsp coffee liqueur, homemade or something like Kahlua 
1 tsp caramel extract
4 oz bittersweet baking chocolate, chopped (like Ghiradelli)
1 cup (170g) mini chocolate chips
1 cup coconut, shredded, or flaked that's been chopped into finer pieces) - sorry - forgot to weigh this

Directions
(preheat oven to 350°F if baking right away)
1. Combine flour, soda, expresso, and cinnamon in medium bowl. Whisk and set aside.
2. In bowl of stand mixer or large mixing bowl, beat butter and sugars until well combined. Don't beat until "pale and fluffy" - you just want it smooth. 
3. Add eggs one at a time, beating well between each and scraping bowl as needed. 
4. Add coffee liqueur and caramel extract. Mix until incorporated.
5. Add flour mixture - all at once - and mix until just incorporated. Add chips, chopped chocolate and coconut and mix until distributed throughout batter.

At this point, you can bake the cookies and they still taste great, but for best flavor and texture, refrigerate at least an hour before baking; overnight is best. Or do what I did - bake a sheet of them NOW, then wrap up the rest for later. It's a total win-win.

If baking immediately, use cookie scoop or spoon to form 1" - 1-1/2" balls. Place on parchment-lined baking sheets, spacing them 3" or so inches apart to allow for spreading. If refrigerating, divide dough into 4 portions and form a log on a length of wax paper. Roll up tightly and refrigerate overnight. You can also put these in freezer bags and keep them handy for cookie emergencies. Come on, we've all had them, amiright??

When baking refrigerated or frozen dough, simply slice in 1/2" portions and space on baking sheet, baking as normal.

Bake 9-10 minutes, depending on your oven and preferred "done-ness". If you like a softer, gooier cookie, keep to the low end. Because the dough is kind of dark from the espresso and caramel flavoring, it's kind of hard to tell doneness, so keep an eye on them and make sure they're no longer glossy and just slightly darker on top.

Let them cool on the baking sheets about 5 minutes before moving them to a cooling rack. 

These are the perfect coffee break cookie. The coffee flavor is not very strong, but you can tell it's a CCC with some oompf.  I think pecans would be an amazing addition to these - definitely doing that next time. I think adding expresso powder to all of my CCC recipes is going to be a given from now on. 

Enjoy!

Tuesday, January 17, 2012

Soft Sugar Cookies

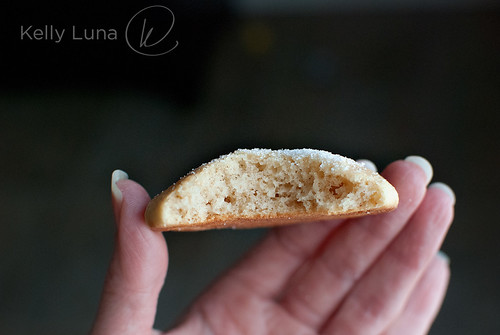
bite

These aren't THOSE soft sugar cookies, the ones going around duplicating the grocery store cookies (although I DO want to try those). These are the soft sugar cookies my mom would make when I was a kid. She got the recipe from a neighbor who got it from... who knows. Basically, this is what I consider our family recipe. I've been wanting to share it with you for a couple of reasons. 1. Because they're awesome. 2. Because they're easy. And 3. Because I haven't had them in YEARS and I really needed to make them.
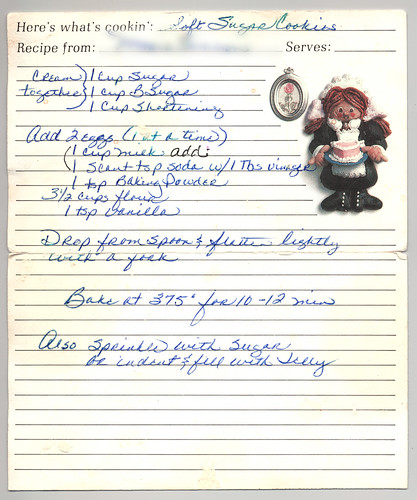
soft sugar cookies-card
Doesn't my mom have pretty handwriting?

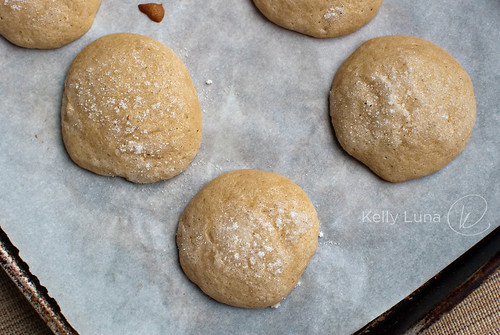
These are not pretty cookies.

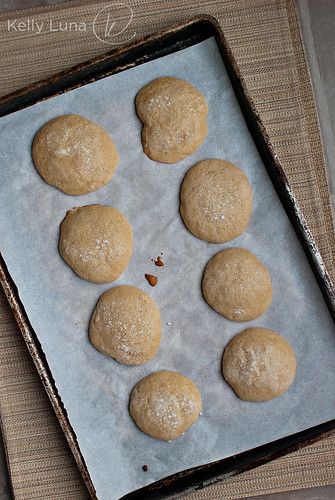
baked-onpan

They're not going to win any cookie beauty contests, but I'm betting they'll win your family and friend's seal of approval. They're light and fluffy and it's really easy to eat three of them and not even realize it. Wait. Ok, so that's probably NOT an endorsement if you're looking to avoid sweets. Feed 'em to your kids, co-workers and neighbors. They'll gladly take them off your hands. So let's make them, shall we?

What gives these their unique texture and taste is some fun chemistry. (Kids love this - I always did, and still do!)

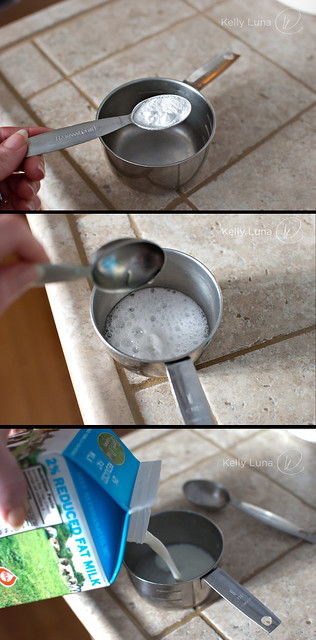
You take a scant teaspoon of baking soda, put it in a one-cup measuring cup, add a tablespoon of white vinegar and watch the magic. Swirl it around to dissolve completely, then fill the cup with milk. Any kind is fine. We grew up drinking 2% but I don't see why skim or whole wouldn't work.

soda-vinegar-milk

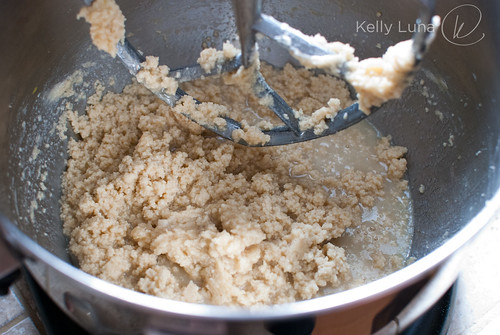
After you cream the butter and sugar, add the eggs and vanilla, you add the milk mixture. It's going to get ugly.

batter-aftermilk

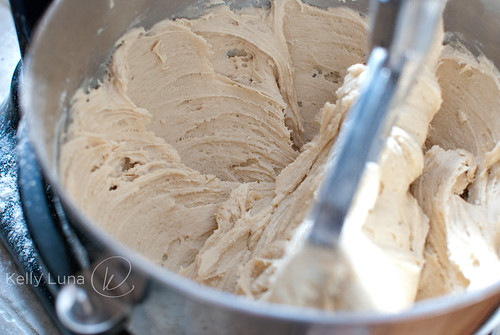
But don't worry. After you add the dry ingredients, it comes together beautifully.

dough-smooth

And sticky. You've been warned.

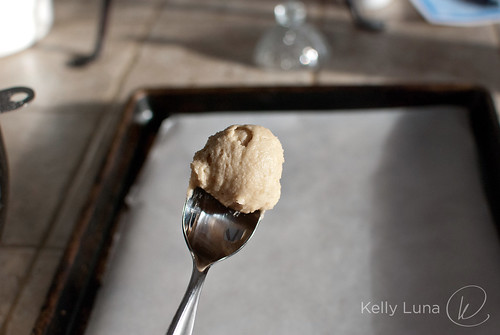
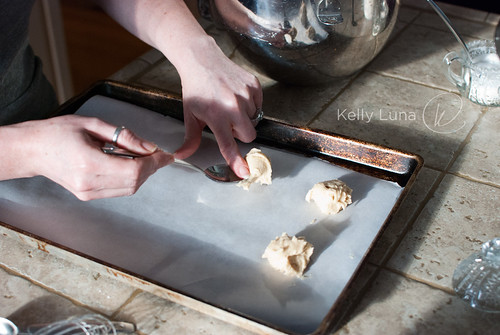
We're going old school with this, just like I did as a kid, and using a regular spoon to get these on the pans. I would normally use one of my cookie scoops, but I wanted to keep this authentic.

dough-spoon1
dough-onpan

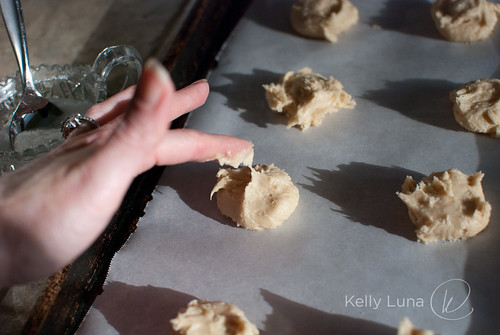
When you flatten the cookies slightly (you can use a fork like it says in the hand written recipe card, but my mom never did) be sure to dip your finger in water. It'll keep if from sticking. I forgot that on the first pan-full. Oops. Oh, and if you do flatten with a fork, dip that in water first. You'll thank me.

sticky

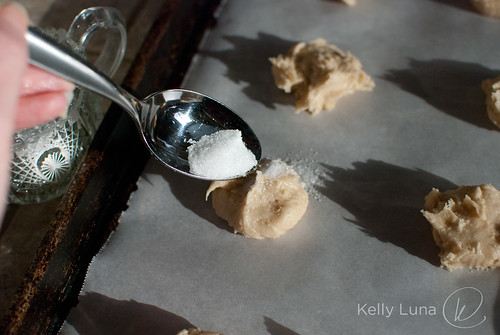
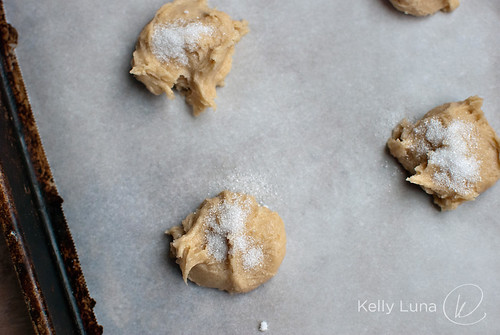
Now sprinkle some sugar on top and pop them in the oven.

sugar
on pan

Bake until the tops are no longer glossy. These won't get brown unless they're severely over baked. They'll melt and flatten, puff way up, the bottoms will brown, and the tops will look done. That's when you pull them out. I recommend NOT using insulated pans. The cookies don't puff up as nicely on them. If your pans are dark, turn the oven down a bit to avoid over-browning the bottoms.

baked

You can sprinkle more sugar over them just as they come out of the oven if you like. You can also use colored sugar for a more festive look.

I hope you like these as much as I do. Let me tell you, a whole flood of memories came back when making and eating these. I love how food can do that.

Soft Sugar Cookies
Yields about 5 - 6 dozen cookies depending on size

Ingredients
1 cup granulated sugar
1 cup brown sugar
1 cup butter (Original calls for shortening. We always used margarine growing up, but these worked great with butter.)
2 large eggs
1 tsp vanilla
1 scant tsp baking soda
1 Tbsp white vinegar
1 cup milk
3-1/2 cups AP flour

Directions
Preheat oven to 375°F if using lighter pans, 360°F if using darker pans.

Cream butter and sugars in mixer. Add eggs one at a time, beating well between and scraping bowl as needed.

Put soda in a one-cup measuring cup. Add vinegar and swirl until all soda is dissolved. Ooh and aah at the chemical reaction! Add milk to fill the cup.

Add milk mixture to butter mixture. It will look curdled. That's what it's supposed to look like. Really.

Add flour and beat until smooth.

Drop by spoonfuls on to parchment lined baking sheets. Flatten slightly with finger or fork, dipping whichever you choose in water first to prevent sticking.

Sprinkle with sugar. Bake 10-12 minutes or until top is no longer glossy and bottoms are lightly browned. Remove to cooling racks.

Best eaten the day you make them, but will keep 3 days in air tight container with layers of wax paper between. The tops will get a little sticky. That's normal. Just toss some more sugar over the tops. Problem solved.

Enjoy! And try not to eat too many all at once.

Wednesday, December 21, 2011

Wordy Wednesday — Christmas Baking

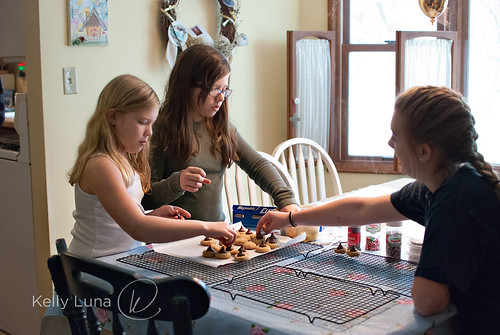
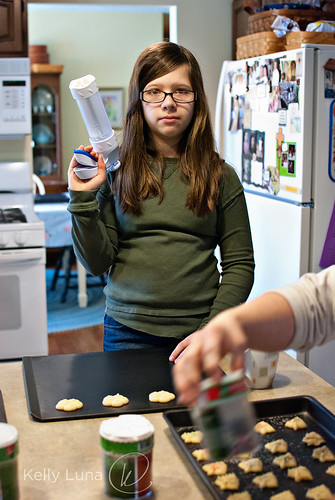
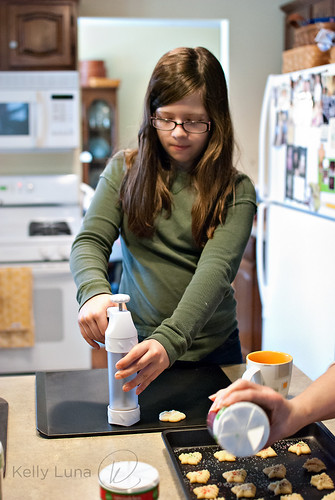
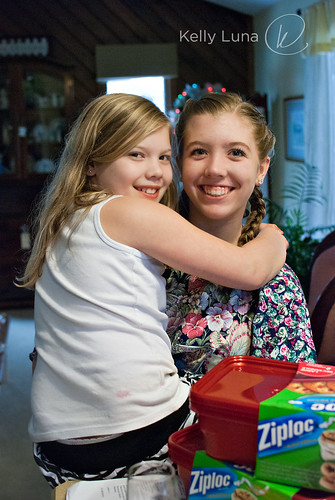
So I did some baking this past weekend. Lots of it. On Saturday, I went to my mom's to bake with her, my sister and my nieces.

3helpers

We had fun and managed to bake a ton of cookies in a fairly short amount of time.

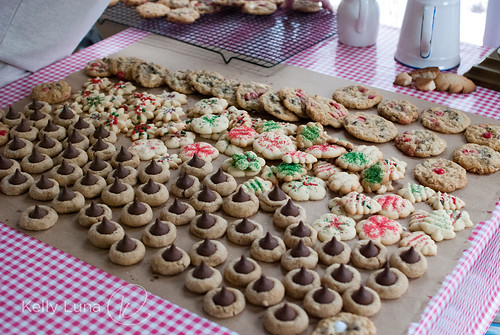
cookies from moms
This was about half of what we made that day.

My mom had made some dough ahead of time and baked the sugar cookies, so between that and the cookies we mixed on the spot, we were the model of efficiency. Fun and productive. Win-win!

cookiepress
Have cookie press. Will travel.

cookiepress2

Quick! Look! They're getting along. Aww...

sisters

Hooray for making cookies - and memories.

* * * * * * * * * * * * * * * * * * * *

Sunday was all me. I'd also made all my dough ahead. I knew I had too much to do to try and accomplish it all in one or two days, so the weekend prior then a couple of times through the week, I mixed up batches of cookie dough. All that was left was the baking (and cooling and picture taking and packaging...) and it worked out so nicely that I plan to do future epic baking sessions like that as well. No messing with mixing bowls, measuring cups, ingredients everywhere - then having to clean them to repeat the process. Just lining up pans and baking all day. Awesome.
So here's most of what I made. Links for recipes below photos.

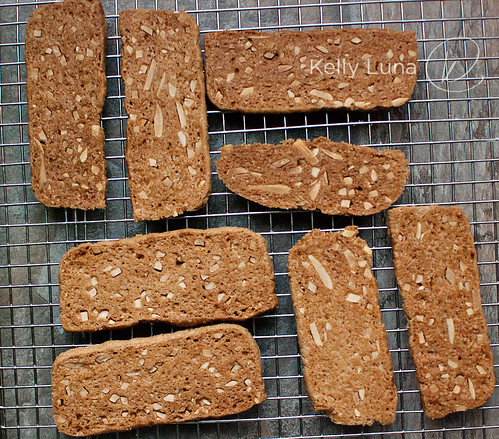
almond shortbread-baked

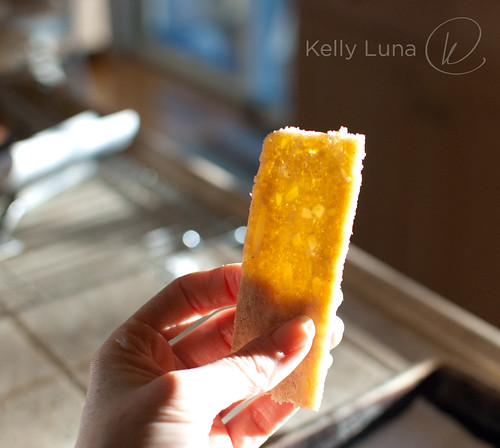
My favorite of the day — Pain d'Amande from Flo Braker (via David Lebovitz). Crispy, nutty, sweet with subtle but noticeable cinnamon. So easy and one of my new favorite cookies. You can keep this dough in the freezer to slice and bake whenever the urge strikes. I love how these looked when the light hit them as I sliced the dough.

almond shortbread-trans

Next up...

molasses ginger cookies

Molasses Ginger cookies from Farmgirl Fare —Big, chewy, super spicy and a close second to the almond cookies. This was the recipe one of my coworkers had to have. They're good. Really good.

Also from Farmgirl Fare...

shortbread bites2

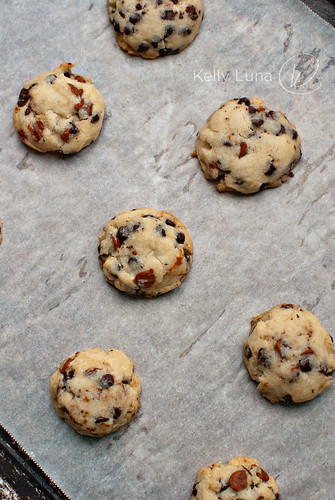
Chocolate chip shortbread cookies — she uses toffee bits, but I didn't have any, so I threw in some cinnamon chips along with the mini chocolate chips. Buttery, melt-in-your-mouth, not too sweet bites of bliss.

On to a pinterest find...

lemon cherry crinkle cookies

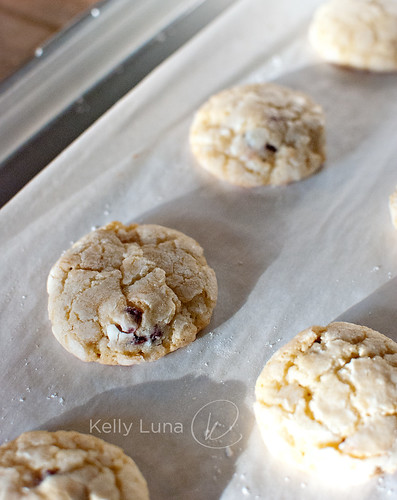
Lemon crinkle cookies — I wanted to "holiday" this up a bit, so I added cherry flavored dried cranberries. The texture of these is out of this world — slightly crunchy on the outside, super soft and chewy on the inside. I really liked the cranberries in these, but the lemon was too subtle for my taste. I even aded a bit of lemon extract, but I'd double the lemon next time. Still, these were excellent.
And the final one I'm sharing is the savory one of the bunch (apologies for terrible pic)...

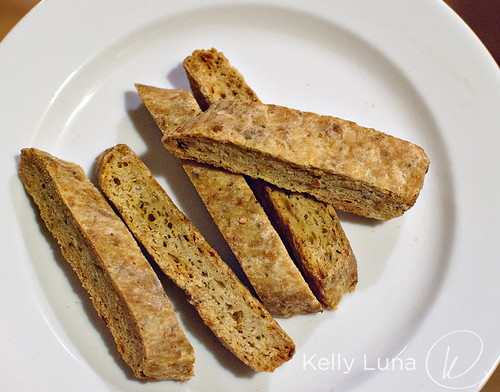
parmesan biscotti

Parmesan-Herb Biscotti — I used this recipe after doing a search for "savory biscotti". I love homemade cheesy crackers, but they don't stay crisp or keep very long, but I knew biscotti held up so I figured there had to be a savory version. The original recipe doesn't call for herbs, but I added some Italian spices along with a pinch of red pepper flakes. A nice little kick to go with the cheese and crunch. I halved the recipe. I did make this from start to finish on Sunday, the only dough mixing of the day.
* * * * * * * * * * * * * * * * * * * *

I also baked snickerdoodles, but can't recall where I found the recipe, so I didn't bother taking pics. It's just your basic snickerdoodle. I also made Browned Butter Rice Krispie Treats that I found at Smitten Kitchen. NOT just your basic treat. So good and so easy. Browned butter makes everything better.

* * * * * * * * * * * * * * * * * * * *

care package

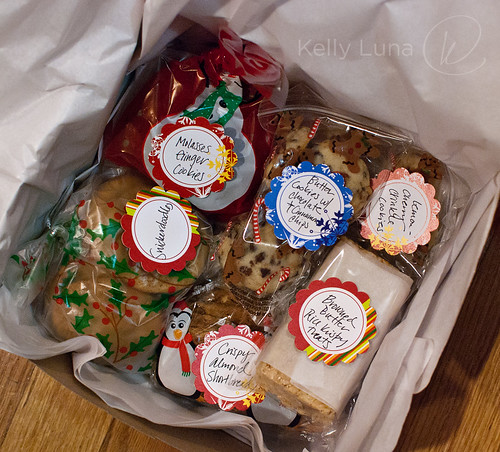
I packaged everything up and got them ready for gift-giving. I hope you are all having fun with YOUR holiday baking!

Monday, July 11, 2011

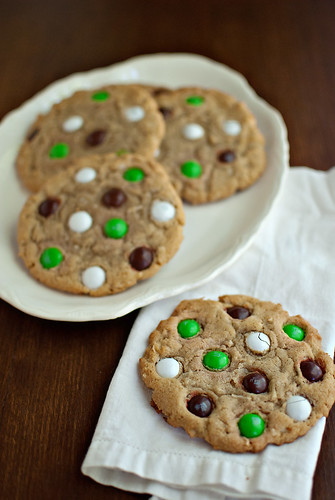
Coconut M&M Cookies

Coconut M&M Cookies-on napkin

I've never hated coconut, but if you'd asked me if I liked it, I would have wrinkled my nose and said, "No, not really. It's mostly a texture thing." While that hasn't completely changed, I will say that I'm kind of in love with coconut, at least in the right form.

I made this German Chocolate Cake for Dwight's birthday and swooned. Dwight said it was the best GCC he's ever had. Aw, what a guy.

Toasted coconut is a new favorite, too. I learned the bliss that is toasted coconut when I made "7 layer bars" for the first time just a few months ago and couldn't stop eating the leftover toasty bits of pecans, graham crackers and coconut in the baking pan.

Then I made that coconut bread. You know the one. This one. Browned butter, vanilla bean, coconut. Did I mention browned butter? All together in one heavenly bread. Aw, yeah. The new-found joy of coconut continued.

And when I just had to make cookies because it had been too darn long since I'd made any, I decided to use, say it with me... coconut. I'd recently read about a chocolate chip cookie that uses browned butter and I knew I needed to try it. It worked so well with the bread, why not cookies. So I modified the basic Toll House recipe, browned the butter and added coconut M&Ms instead of chocolate chips along with coconut and vanilla bean.

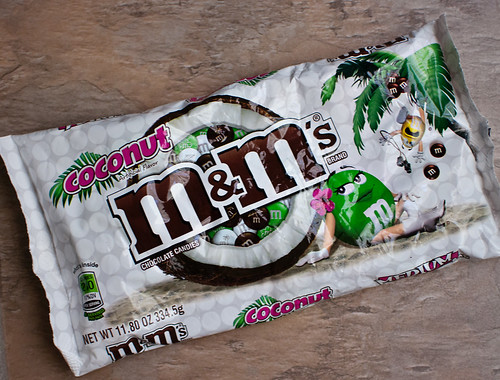
coconut M&Ms package
*Contains no actual coconut. Heh. 


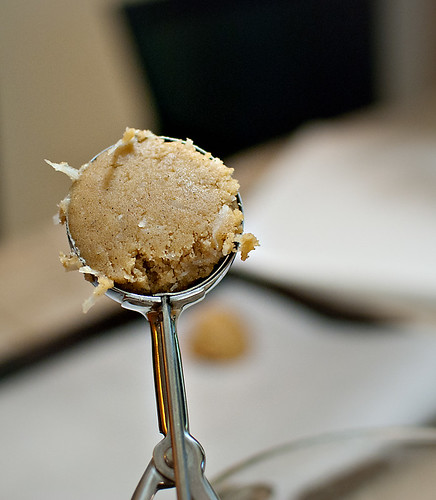
Coconut M&M Cookies-scoop
*Contains just the right amount of coconut. Mmmm.


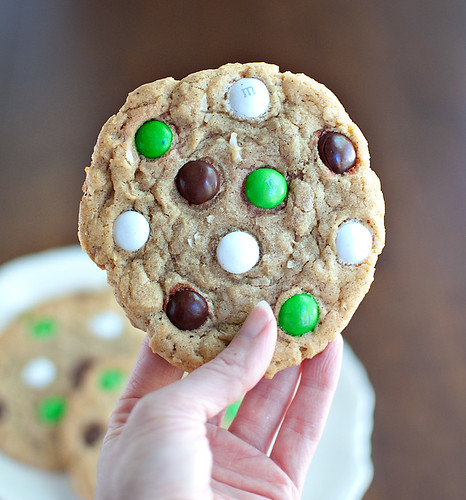
Coconut M&M Cookies-size

Ding ding ding! We have another winner. The love affair continues...

Coconut M&M Cookies
loosely adapted from Toll House chocolate chip cookie recipe

Ingredients
1 Cup (2 sticks) Butter, browned
1 vanilla bean, scraped reserving pod

2-3/4 Cup flour
1 tsp baking soda
1 tsp salt
1 tsp cinnamon
1 cup coconut, packed

3/4 Cup brown sugar, packed
2/3 Cup granulated sugar
2 eggs

To make browned butter:
Place butter in small sauce pan over medium-low heat. Melt, stirring periodically. Once it's melted, continue stirring. The butter will get foamy - keep stirring. Once the foam goes away, you'll notice that it's gotten very clear with some solids at the bottom. Keep stirring! You don't want those to burn. You want the butter to start to turn a very light brown color and you'll definitely start noticing the amazing, nutty aroma. Let the solids at the bottom turn light brown then remove from heat. Let cool about 5 minutes, then drop the cleaned out vanilla pot into the butter. Do this too soon and you'll have fried vanilla bean — trust me — so wait the 5 minutes. The hot butter will draw the rest of the vanilla goodness from the scraped bean. 


Let this cool about 15-20 minutes in bowl of stand mixer or mixing bowl. Add vanilla beans.

Directions
Preheat oven to 350°F.

Whisk flour, soda, salt and cinnamon in medium bowl. Stir in coconut. Set aside.

Add both sugars to butter and mix until completely combined. It will be sludgy. Add eggs one at a time, beating thoroughly between each and scrape down sides of bowl. Mixture should be noticeably lighter in color and texture.

Add flour mixture to butter mixture beating until full incorporated. You can mix in the M&Ms now or place them individually on the tops before baking.

Line baking sheets with parchment paper. I used my large pampered chef scoop which is a scant 1/4 cup. You can make them any size you wish.

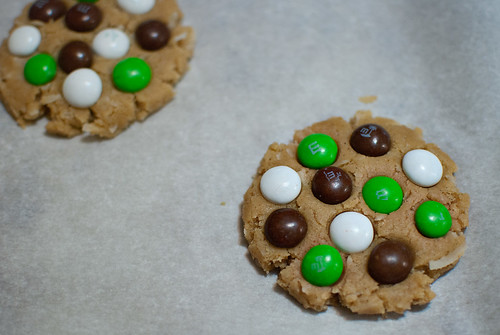
Place about 2 inches apart on sheet. (They will spread quite a bit.) Flatten and place M&Ms close together if adding them now.

Coconut M&M Cookies-candy placement

Bake 9-11 minutes until light golden brown. (My were perfect at exactly 10 minutes.) They'll spread then puff up then turn golden. Don't over bake. Leave on pan 5 minutes before transferring to cooling rack.

You can eliminate the M&Ms altogether and just have a coconut cookie. They're excellent plain.

Enjoy!

Thursday, September 2, 2010

Oatmeal, Cranberry & Almond Cookies

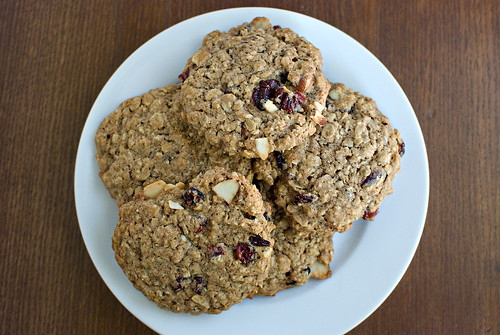
OatCranAl-closeup
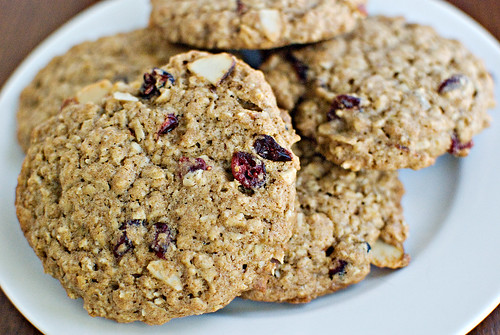
Last Friday night, I had the baking bug and wanted something quick and not too sweet. So I flipped through a few cookbooks, seeing if anything caught my eye. The words "Oatmeal Cookies" jumped off the page—I do love oatmeal raisin cookies; they're one of my favorites. I decided to try the recipe I knew was lurking on the inside of the Quaker Oats lid. I made some modifications, of course. I can't help it.


I saw the dried cranberries when I grabbed the oats, so I decided to use those instead of raisins and I had some sliced almonds just begging to be added, too. Then I remembered that I bought some caramel extract and knew it needed to be in these cookies. Man, was I right. These smelled so good baking and tasted even better.


caramel flavoring


OatCranAl-OH

Oatmeal, Cranberry and Almond Cookies
adapted from Quaker Oats package top
Yields approx 24 large cookies

Ingredients
1/2 pound (2 sticks) butter, softened
1 cup brown sugar, very loosely packed
1/2 cup granulated sugar
2 eggs
1 tsp caramel extract (or other flavor of choice)
1-1/4 cups whole wheat flour
1 tsp baking soda
1 tsp Penzeys Baking Spice (or cinnamon)
3 cups rolled oats, old fashioned or quick
3/4 cup dried cranberries
1/3 cup sliced almonds

Directions
Preheat oven to 350°F. Line baking sheets with parchment paper.

Combine flour, baking soda and spices in small bowl, whisking until thoroughly combined.

Cream butter and both sugars in mixing bowl. Don’t over beat, just mix until smooth. Scrape down sides of bowl.

Add eggs and flavoring, beating until fully incorporated. Scrape sides of bowl as needed.

Add flour mixture to wet, mixing well.

Add almonds and cranberries and fold in with a wooden spoon until evenly distributed.

I used my large Pampered Chef scoop to dole out the dough, which is approximately 3 tablespoons or a scant 1/4 cup. Flatten the mounds slightly with your hand or the bottom of a drinking glass dipped in water. These don’t spread much on their own and will cook too fast on the outsides before the insides are cooked through.

Bake for 10-12 minutes or until lightly browned and no longer glossy looking. Let sit on pan for a minute before transferring to cooling racks. Let cool slightly and ENJOY! These are best the day of or day after baking. Longer than that and they start to dry out, but will keep for a few days in an air tight container.

Download Printable Recipe Here

Sunday, March 14, 2010

St. Patrick's Day Baking Extravaganza

spd collage

Hang on. It's going to be a photo-filled post! Don't say I didn't warn you.

I actually planned ahead for St. Patrick's Day. Hey, it's as much of a shock to me as it is to you, trust me. I had a hankerin' to make sugar cookies and knew I wanted to send some to friends hither and yon, so I got to baking last weekend.

I knew which recipes to use and that I wanted to make shamrocks, but wasn't sure about how to decorate them. So I did some looking around and found this:

So cute! Now I had my inspiration, just had to execute. First, the recipes:

The Best Rolled Sugar Cookies
Allrecipes by Jill Saunders

Note: I halved this.

Ingredients
1 1/2 cups butter, softened
2 cups white sugar
4 eggs
1 teaspoon vanilla extract
5 cups all-purpose flour
2 teaspoons baking powder
1 teaspoon salt

Directions
In a large bowl, cream together butter and sugar until smooth. Beat in eggs and vanilla. Stir in the flour, baking powder, and salt. Cover, and chill dough for at least one hour (or overnight).
Preheat oven to 400 °F. Roll out dough on surface sprinkled with powdered sugar (won't make the dough tough like flour will) 1/4 to 1/2 inch thick. Cut into shapes with cookie cutter. Place cookies 1 inch apart on parchment lined cookie sheets.
Bake 6 to 8 minutes until JUST turning golden on the edges. Cool completely on racks before decorating.
If you want to keep these simple, just sprinkle them with decorator sugar, non-pareils or other decorating sprinkles before baking. These cookies are very good all on their own!


Royal Icing
Dries hard - makes for easy transport. Mine held up through a UPS trek to NY 

Ingredients
3 tablespoons meringue powder
4 cups confectioners sugar
1 teaspoon pure vanilla extract (or other flavoring of choice - watch color though, it will tint the frosting)
6 tablespoons water (less for really thick icing, more for thin)

Directions
Combine all ingredients in mixing bowl. Beat on high for at about 10 minutes or until stiff peaks form.
Divide and color as desired. Add more water as needed for flooding or more sugar if you get a little heavy handed with the water.

Now for the pictures:
green icing bowls
I divided the icing into thirds, keeping one white. The other two are as you see.
ltgrn outline
I outlined some in light green...

dkgrn outline2
And some in darker green.

Here's a handy tip for filling bags. (I just use sandwich bags instead of decorator bags. Snip the corner and you're good to go.) Place the bag in a small drinking glass, pulling the edges over the sides. Fill with icing, twist the top, snip the corner and decorate. The icing is pretty runny though, so work quickly and try to keep the end pointed up.
filling bag-1
filling bag-2
Also, keep the bowls covered with damp towels. It will keep the icing from drying out. It will form a crust pretty quickly!

After the outlines have dried, it's time to flood the insides.
dk green-flooding
Smear it around with a tooth pick to get the icing to all of the edges.
dk green-flooding-done
ltgreen-flooding done
white flooding

Once the flooding dries,  it's time to decorate. Rember the idea cookies? I loved the swirly one, but...
swirls
Hm. Not exactly like the picture, eh? I laughed and laughed, then moved on to a different attempt. I stuck with a checkerboard and dots. Even with just three colors and two "designs", I ended up with a nice looking mix.
finished cookies2
finished cookies1

Then I wrapped each one in plastic wrap, nestled them in a bed of crinkly paper and shipped them to well-deserving folks.
cookies-packaged

Round One COMPLETE!

This weekend was Round Two.

I knew I wanted to do cupcakes and quickly got my inspiration from Bakerella. I didn't use her recipe, but loved the GREEN!

Green Velvet Cupcakes
Slightly modified from Joy of Baking

Ingredients
2 1/2 cups sifted all purpose flour
1/2 teaspoon salt
2 tablespoons Dutch-processed cocoa powder
1 cup unsalted butter, at room temperature (original called for 1/2 cup - I had 2 sticks ready so I used both. Stick with original for lower fat option.)
1 1/2 cups granulated white sugar
2 large eggs
1 teaspoon pure vanilla extract
1 cup (240 ml) buttermilk (I used powdered buttermilk. Add powder to dry ingredients, add water when adding wet)
1 oz (one bottle) liquid green food coloring (see pic below)
1 teaspoon white distilled vinegar (used white wine vinegar-didn't have any distilled on hand)
1 teaspoon baking soda

Directions
Preheat oven to 350°F.
Combine flour, cocoa and butter in medium bowl. Set aside.
In mixing bowl, beat butter until smooth and light. Add sugar. Beat until fluffy. Add eggs one at a time, beating well between each and scraping down sides of bowl. Add vanilla. Add food color to buttermilk (or water if using buttermilk powder).
Alternately add flour mixture with buttermilk/color beginning and ending with flour, beating well each time. Mix SLOOOWLY to start when adding the liquid. Otherwise it will splash and get green food color everywhere. (It's a good idea to wear an apron or at least something that won't be ruined if you get food color on it.)

In small bowl or measuring cup, dissolve soda in vinegar. It will bubble (yay, chemistry) quickly add to batter, just folding in until incorporated - don't beat in.

Divide into 2 prepared 9" cake pans or cupcake liners. I got 12 cupcakes and a single 9" layer.

Bake cake approximately 25 minutes or until toothpick comes clean. Cupcakes will only take about 15 minutes. Ovens vary, so keep an eye on them. The might need more or less time. Cool in pans about 10 minutes then transfer to racks. Cool completely before decorating (or turning into cake pops).

The Best Buttercream Frosting EVER
I used this on my niece's birthday cake. It's da BOMB.

SPD-cupcakes-foodcolor
spd-cupcakes-soda vinegar
Woo-Chemical reaction in progress! And really, that's what baking is all about.

SPD-cupcakes-batter
Now THAT's green!

SPD-cupcakes-scoop
The large Pampered Chef scoop works great for cupcakes.

SPD-cupcakes-filled
SPD-cake
SPD-cake&cupcakes-cooling
SPD-cupcakes-1st decorated
I used plain white frosting first, but decided I need a bit of color to make the white sprinkles show more.
SPD-cupcake-dye icing1
SPD-cupcake-dye icing2
SPD-cupcake-dye icing-mixed
Dip a clean toothpick in the gel color, smear into the frosting and mix. A nice, pale green, just what I wanted. Obviously you can add more if you want a deeper shade. Go crazy!

SPD-cupcakes-decorated1
Better! And I got to use my cupcake stand - so fun.
SPD-cupcakes-onstand

Next up — CAKE POPS!

Take the 9" cake, crumble, add frosting (about a 3/4-1 cup), mix, scoop.
spd-cakepops-mixing collage-sm

Roll.
SPD-cakepops-ball
SPD-cakepops-trayfull

Melt.
almond bark

Skewer.
SPD-cakepops-sticks

Dip.
SPD-cakepops-dipped

Decorate.
SPD-cakepops-in sugar
SPD-Cakepops-overhead

Eat.
SPD-cakepops-bite1

If you didn't get enough pictures here, head over to my Flickr photstream for even more. (Yes, there are more!)

And if you're wondering about the wood stand in the group cake pop photos, stay tuned. I'll be posting a "How-To" on that later this week.
Related Posts Plugin for WordPress, Blogger...