Showing posts with label vanilla bean. Show all posts

Sunday, July 29, 2012

Bourbon Date Blueberry Cinnamon Rolls

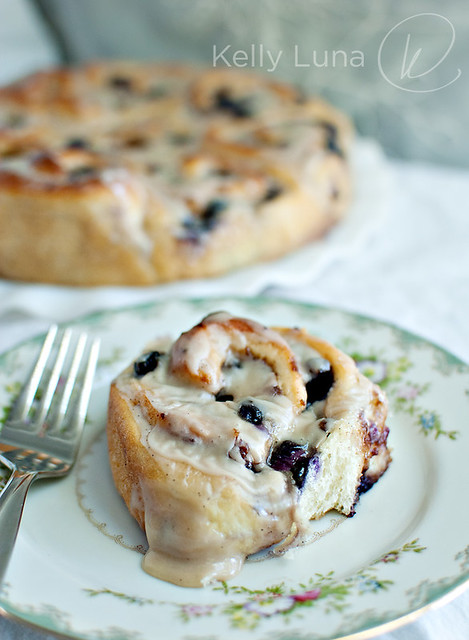
roll-plated

Inspired by the über-talented Barb over at Creative Culinary, I just *had* to make these rolls. You see, she tweeted about the bourbon date cinnamon rolls she was making and I couldn't get them out of my head. I knew I had the ingredients on hand, so when I got home, I immediately set to making them.

I'm not going to include a proper recipe in this post because I was seriously winging it, but I'll let you know what I did so you can give it a go. What I would suggest is going over to Barb's blog and check out her recipe. I'm sure it is phenomenal as everything I've made of hers — and there have been MANY – are keepers.
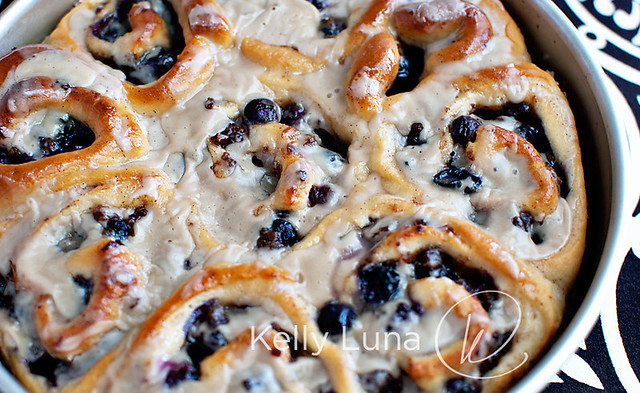
rolls in pan

I used Peter Reinhart's cinnamon roll recipe for the dough, with the exception of the egg. Oops. I completely spaced it when mixing the dough, hence the reason for a properly assembled mise en place!

I roughly chopped some dates and put them in a bowl, poured some bourbon over the top and let them soak while the dough was rising. When it was time to assemble the rolls, I ran the dates and bourbon through my food processor to create a lovely and fragrant paste. I added about 1/4 cup of sugar (could have used more, but the sugary icing made up for the lack) and 2 heaping teaspoons of cinnamon. Mixed that all together and spread it over the flattened dough. I then sprinkled about a cup and a half of fresh blueberries over that, rolled it up and cut them into rolls.

I decided to go with a simple powdered sugar and milk icing but added a half teaspoon of vanilla extract, seeds from one vanilla bean, and half a teaspoon of caramel extract. (I LOVE this stuff, and you might remember that I've used in around here before in these cookies, oh and these, too, among other things.)
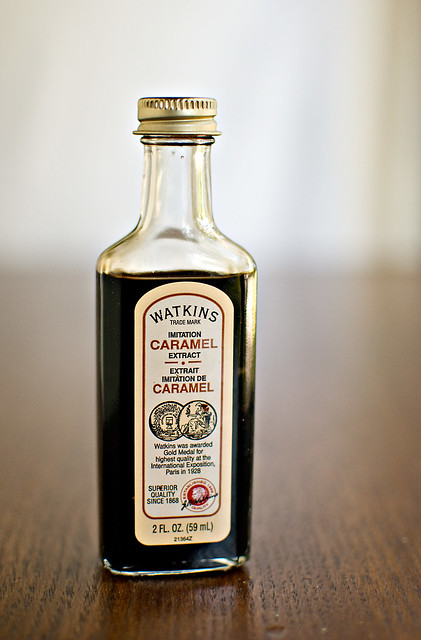
caramel flavoring

I used at least a cup and a half (probably more like two) of powdered sugar, then just added enough milk to make it the correct consistency, and drizzled it over the tops of the rolls, being rather generous with my "dripping." Nothing wrong with that!
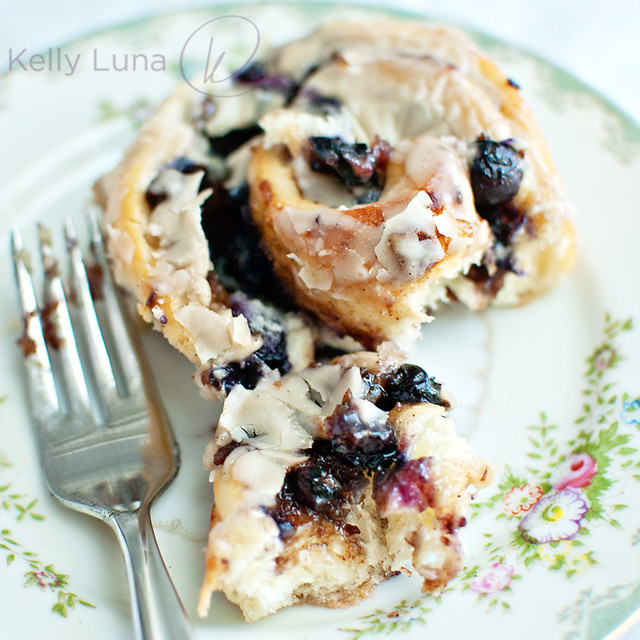
roll-plated-fork

The verdict: gooey, sweet, fresh rolls begging for a cup of coffee or a tall glass of milk.

Remember, you can get the recipe for Barb Kieble's amazing Date, Walnut and Bourbon Cinnamon Rolls (with cream cheese frosting - OH MY!) over at Creative Culinary.

Monday, April 18, 2011

Browned Butter Coconut Bread

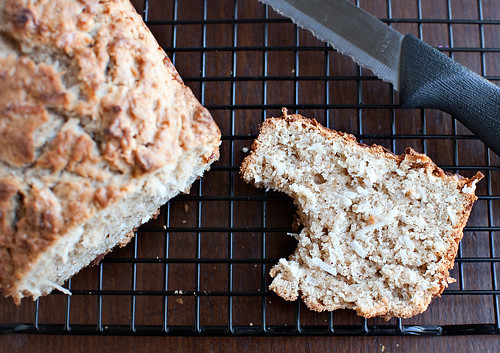
coconut bread-bite

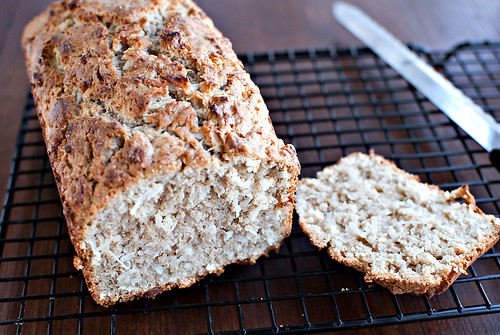
Or what I'm now calling The Best Quick Bread I've Ever Made.

I'm not kidding. This stuff is amazing. I'm already dreaming of variations. (I've attempted one, but it's not perfected yet. Once it is, you'll be the first to hear about it. Psst... it involves alcohol. Oh yeah.)

But let's get back to this bread first. This fragrant, sweet, flavorful, addictive bread. And this from a girl who claims not to like coconut. Well, not anymore folks.

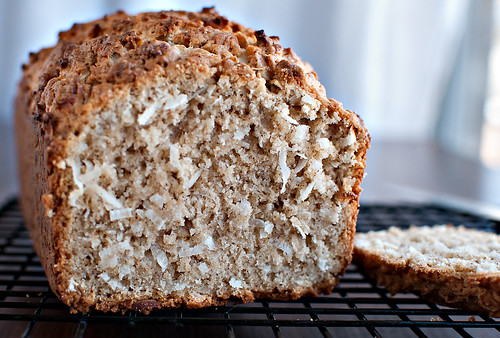
coconut bread-crumb

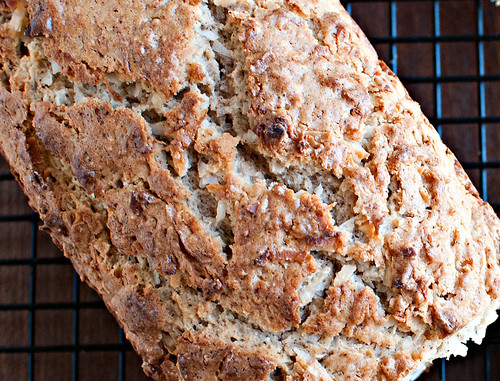
One of the best things about this bread — and really, everything about it is fantastic — is the crust. Oh, the crust. I think it's so amazing because of the mixing technique you'll see below. The crust is crunchy and full of vanilla buttery flavored goodness.

coconut bread-crust

The original recipe calls for melted butter. Since I was melting it anyway, I decided to take it a step further and make browned butter instead. If you've never browned butter before, don't worry. It's incredibly simple and transforms butter into something even more magical. The nutty aroma is one of my favorite baking smells. That and vanilla.

Speaking of vanilla, you'll need a vanilla bean for this recipe. I know, they're crazy expensive. Unless, like me, you get them from ebay. Yes, really. I talked about it here. They're probably not the best nor the freshest, but when I can get 1/4 pound for nearly the same price as 4 measly beans from the grocery store, I'm not going to complain!

Let's get to the recipe. ("FINALLY" I can hear you say.)

coconut bread

Browned Butter (and vanilla bean) Coconut Bread
Adapted from Seven Spoons


Ingredients
6 tablespoons unsalted butter, browned and cooled slightly (see notes below)
Seeds scraped from a vanilla bean (hang on to the pod!)

2 large eggs
1 1/4 cups COCONUT milk (I originally wrote this as just regular milk but completely spaced that I'd used coconut milk (canned) - sorry!)
2 teaspoons vanilla extract
2 1/2 cups flour, plus more for dusting the pan
2 teaspoons baking powder
2 teaspoons cinnamon
1/2 teaspoon salt
1 cup sugar
5 ounces flaked coconut* (about 1 1/2 cups)

*I used sweetened. My store didn't have unsweetened. I think you'll be fine using either.

To make browned butter:
Place butter in small sauce pan over medium-low heat. Melt, stirring periodically. Once it's melted, continue stirring. The butter will get foamy - keep stirring. Once the foam goes away, you'll notice that it's gotten very clear with some solids at the bottom. Keep stirring! You don't want those to burn. You want the butter to start to turn a very light brown color and you'll definitely start noticing the amazing, nutty aroma. Let the solids at the bottom turn light brown then remove from heat. Let cool about 5 minutes, then drop the cleaned out vanilla pot into the butter. Do this too soon and you'll have fried vanilla bean — trust me — so wait the 5 minutes. The hot butter will draw the rest of the vanilla goodness from the scraped bean. And, as an added bonus, your house will smell incredible. Best. Air freshener. Ever.
Let this cool about 15 minutes or so.

Directions
Preheat oven to 350°F.

Grease and flour a loaf pan.

In a small bowl, combine the eggs, milk, vanilla extract and scraped vanilla seeds (here's a great post from Zoe Francios at zoebakes about vanilla beans and how to use them).

In a large mixing bowl, whisk together the flour, baking powder, cinnamon, salt and sugar. Stir in the coconut with a wooden spoon. Add the egg mixture and stir JUST until combined. You can leave some flour dry because you add the browned butter next.

Remove vanilla bean from butter, then pour over batter. Gently fold in the butter, incorporating all of it but don't over mix - be gentle!
**Here's where I think the magic happens in this recipe. Adding the butter LAST means that it's basically coating the batter, hence the crunchy, flavor-filled crust. At least, that's my theory.**

Scrape batter into prepared loaf pan and bake on the middle rack about 1 hour. The top will be golden brown (as you see in the photos) and a toothpick will come out clean.

Let the bread sit on a cooling rack in the pan about 10 minutes then turn out on to the rack. Let cool a bit more before slicing.

This is wonderful warm, but is equally fantastic at room temperature. It doesn't need a thing to make it any better, but I suppose you could spread some butter or jam over the top. I didn't bother. It was far too good all on its own to cover up with anything else.

Make this. Now!

Sunday, August 23, 2009

Ganache-Filled Vanilla Bean Cupcakes with Ganache-Dipped Strawberries


First things first, I want to give a shout out to Stephanie at Wasabimon for the inspiration for these cupcakes. Stephanie is a fabulous food blogger with gorgeous photography and tons of great recipes, many gluten-free. I know plenty of people out there have gluten allergies, including my sister, so it's nice to have resources like Wasabimon out there.

No beating about the bush with this post, we're going to get right to it. The title is a mouthful as are the cupcakes. And OH, what a mouthful they are. Here's how to make your own.


The Recipes

Vanilla Bean Cupcakes
reproduced with permission from Rachel Rappaport, Coconut & Lime
Thanks, Rachel!

  • 2 cups flour
  • 1 cup sugar
  • 3/4 cup milk
  • 1/2 cup butter, at room temperature
  • 1 egg, at room temperature
  • 1 vanilla bean, cut length-wise
  • 2 teaspoons baking powder
  • 1 teaspoon salt

Directions:

In a small saucepan, heat the milk and vanilla bean together until the milk just boils. Remove from heat and let cool for about 1 hour. Then remove the vanilla bean. Scrape out the seeds from the vanilla bean and add them to the milk. Discard the remaining bean pod. Meanwhile, preheat the oven to 350. In a medium bowl, whisk together the salt, flour and baking powder. In a large bowl, cream together butter and sugar until light and fluffy. Add egg and beat well. Alternately add the flour and milk mixture until well combined. Divide batter into about 20 lined or greased cupcake wells. Bake 15-20 minutes or until a toothpick inserted in the middle of the middle cupcake comes out clean. Cool on a wire rack and then ice.


Vanilla Bean Buttercream Frosting
  • 1 lb. confectioners' sugar
  • 1/2 c. butter, softened
  • 1 tsp. vanilla extract
  • 1 Vanilla bean, scraped
  • 3 tbsp. milk
Beat together sugar, butter, vanilla, seeds from vanilla bean and milk until smooth. If necessary add more milk until frosting is spreading/piping consistency.


Ganache (feel free to halve!)
adapted from Alton Brown, Food Network

  • 3 tablespoons corn syrup
  • 6 ounces heavy cream
  • 12 ounces dark chocolate, chopped into small pieces
Put chopped chocolate in heat-proof bowl. In a small saucepan, combine the corn syrup and heavy cream. Bring to a simmer. Pour over chocolate. Stir until smooth. Cool to room temperature before using.

Bring it all together

After the cupcakes and ganache have cooled, fill a pastry bag fitted with a small star tip with the ganache. Push the tip all the way into the cupcake and gently squeeze the bag until the top of the cupcake rises and the ganache starts to push back. It will pop out of the top a bit. No problem. You'll be covering that up with the buttercream. Speaking of...

After filling all of the cakes, clean out the pastry bag and tip and fill with the buttercream. Pipe as you see in the photos, or in your preferred style.

Clean and dry your strawberries. Gently reheat your ganache in the microwave until it's just thin enough to allow for dipping. You don't want it too thin or warm, just just a few seconds should do it.

Take the berries by the tops, dip and swirl in the ganache. Let most of the extra to fall back into the bowl, then gently place the berry on top of the cupcake, pushing part way into the buttercream. The little bit of extra ganache will puddle on top of the frosting.

Pop in the fridge if not eating immediately. Remove from fridge at least 20 minutes prior to serving so that they're not cold.

Trust me. These are as good as they look. The cupcake recipe is so easy and oh-my-goodness delicious. It would be great with just about any frosting/flavor combo you can dream up. The ganache filling and dipped strawberries really put these over the top.

Sunday, May 3, 2009

Vanilla


When it comes to the "chocolate vs vanilla" debate, I quickly respond, "CHOCOLATE." It's so rich and decadent. At any given time, in any given recipe, it can be bold, mild, sweet, bitter, gooey, crisp–the possibilities are endless.

Vanilla is just so... vanilla.

Except, what would I do without vanilla for nearly all of my baking? What's my go-to flavoring? Why vanilla, of course. So the "chocolate vs vanilla" debate isn't quite as clear cut as it seems.

Thankfully, I don't have to choose. And thanks to an unlikely source (or so it seemed to me), I've been able to delve even further into the world of vanilla. At some point during a stroll through the foodie blogosphere, I stumbled on a discussion about vanilla beans and learned something invaluable in the comments. Someone mentioned that they buy their vanilla beans on ebay.


Ebay? I guess I shouldn't have been so shocked. You can find literally anything and everything on ebay, so why not vanilla beans. I'd never used them before, but wanted to for a long time. There just terribly expensive at the store. If memory serves, I found a bottle of THREE for something like $7. The way Martha Stewart and similar celebrity chefs/bakers call for them, you'd think they were a dime a dozen. The cost was just too prohibitive.

Until ebay. Just do a search and you'll find a number of wholesalers out there. I found and bought 1/4 pound Grade A (whatever that means) Madagascar bourbon beans — with shipping — for less than $18. And they threw in a free 10 pack of Tahitian Grade B beans.


Since the concept of a quarter pound of beans is rather abstract, I guesstimate that there were a good 40-ish beans in that package. According to the listing, there are approximately 100-120 beans per pound. I'm sure I had way more than 25 beans in the package. I probably have that many left after using I-don't-know-how-many since I bought them back in November.

I've used them in homemade coffee liqueur, homemade Irish cream, countless baked goods, and the coolest — homemade vanilla extract. YES! You can make your own. Google "homemade vanilla extract" and you'll find various recipes. The easiest is what I did — put some vodka in a jar, add beans, and let it steep for a few months. Voila!


I have two jars going right now so I won't have to be without it when I use up the last of this jar. The cool things is that, as you use the bean, extracting the seeds for various recipes, you can pop the "empty" pods in the jar of extract. No need to waste, there's plenty of delicious vanilla-ness left in the pod, certainly enough to help enhance the extract.

See those black flecks? Those are the seeds. You can't believe how good this smells!

If you've ever wanted to bake or cook with vanilla beans but didn't because of the expense, I highly recommend ebay!

Now for a recipe!

I had a hankerin' to make something with my beans and wanted to make some sort of shortbread. After a quick search, I found a recipe from Cooking Light. I made some minor modifications to come up with the following. Original recipe here.

Browned Butter Vanilla Bean Shortbread
altered slightly from Cooking Light

Ingredients
Cooking spray
2 cups all-purpose flour
1/4 cup cornstarch
1/4 teaspoon salt
1/2 cup butter, browned (see below)
1/2 cup canola oil
1 tsp vanilla extract
1/2 cup sugar
1 vanilla bean, split lengthwise

Browned Butter
Directions from Smitten Kitchen
Cut butter into four or five pieces and cook butter in a small heavy saucepan over medium heat, stirring frequently, until it has a nutty fragrance and flecks on bottom of pan turn a light brown, anywhere from 4 to 7 minutes. It helps to frequently scrape the solids off the bottom of the pan in the last couple minutes to ensure even browning. Transfer butter to a bowl and chill until just firm, about 1 hour.


Preparation
1. Preheat oven to 350°.

2. Line bottom and sides of a 13 x 9–inch baking pan with foil; coat foil with cooking spray, and set aside.

3. Weigh or lightly spoon flour into dry measuring cups; level with a knife. Combine flour, cornstarch, and salt in a large bowl; stir with a whisk.

4. Place butter in a medium bowl; beat with a mixer at medium speed 2 minutes or until light and fluffy (since you've altered the butter by browning it, this butter won't act the same as it would if it were just softened). Add oil; beat with a mixer at medium speed 3 minutes or until well blended. Add extract. Gradually add sugar, beating well. Scrape seeds from vanilla bean, and add seeds to butter mixture; discard bean (better yet, put it in your extract!). Add flour mixture, beating at low speed just until blended. Spoon dough into prepared pan. Place a sheet of heavy-duty plastic wrap over dough; press to an even thickness (I used an offset spatula instead and it worked great). Discard plastic wrap. Bake at 350° for 30 minutes or until edges are lightly browned. Cool in pan 5 minutes on a wire rack; cut into 32 pieces. Carefully lift foil from pan; cool squares completely on a wire rack.

p.s. I just thought of something else you can do rather than discard the bean from this recipe. Put it in a container with sugar. You'll infuse the sugar with all of the flavor and scent of the vanilla bean–heavenly!
Related Posts Plugin for WordPress, Blogger...