Showing posts with label how to. Show all posts

Saturday, July 26, 2014

How To Make a Tri-Fold Art Display

tri-fold panel

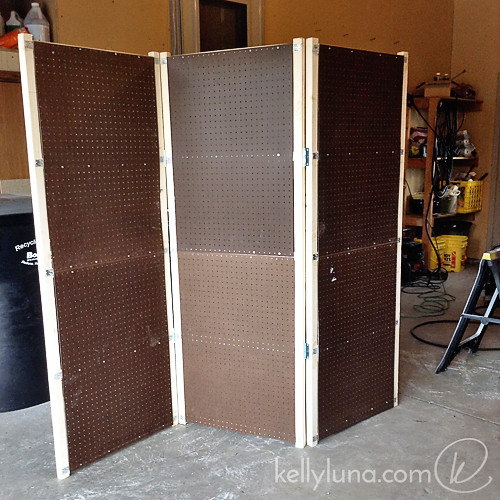
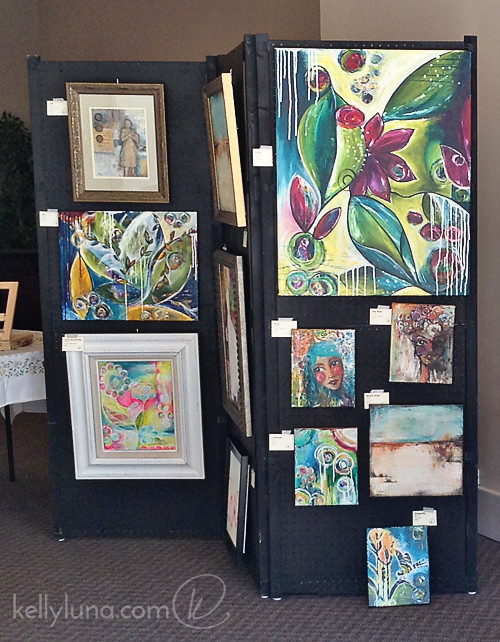
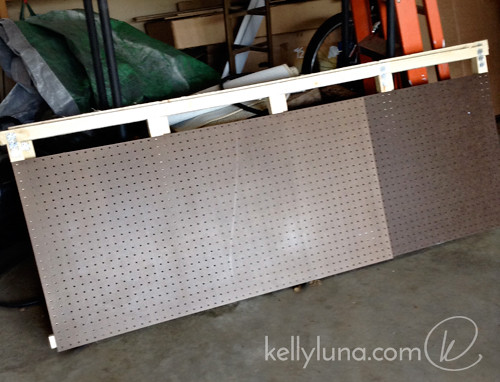
As promised, albeit much later than I anticipated, here is my "How To" on the tri-fold art display Dwight and I made for our first At Walk show back in May.

We researched a lot of ideas but landed on this as it was a great way to make use of ready-made parts.
menards-frame panels-500px
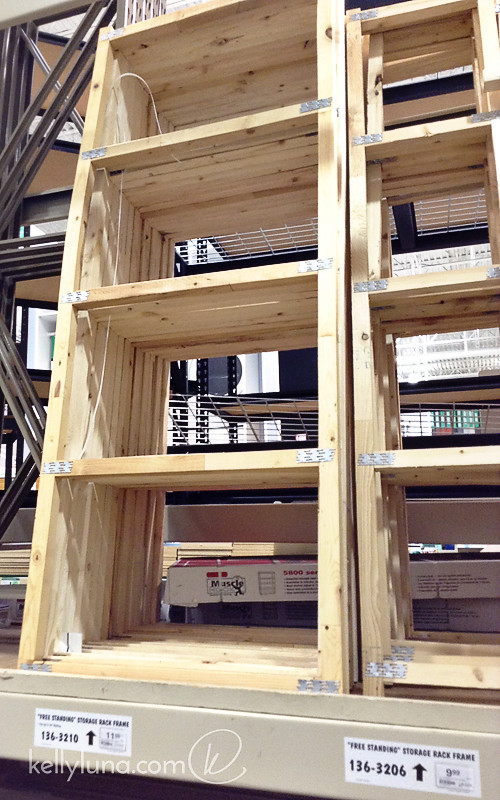
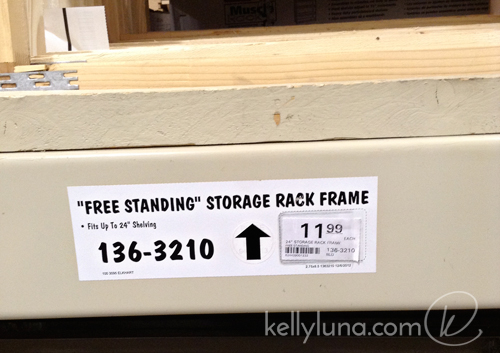
We bought three of these free standing storage rack frames. They were a good height saved us from making a frame.
menards-frame-closeup-500px

We needed two pieces of pegboard for each frame because they come in 4' x 4' or 2' x 4' sizes but we needed 6' of board to completely cover the frames, so we bought six 2' x 4' sheets.
Panel assembly-parts

Next up: Hardware
Two hinges per connection = 4 hinges, plus plastic feet for the ends (6 total) and lots of 1" wood screws, which we already had on hand.

Finally, some black spray paint. We bought flat black paint and primer in one. I don't remember how many cans we ended up using, but it had to have been at least four. Obviously, you can use any color-and finish- you like!

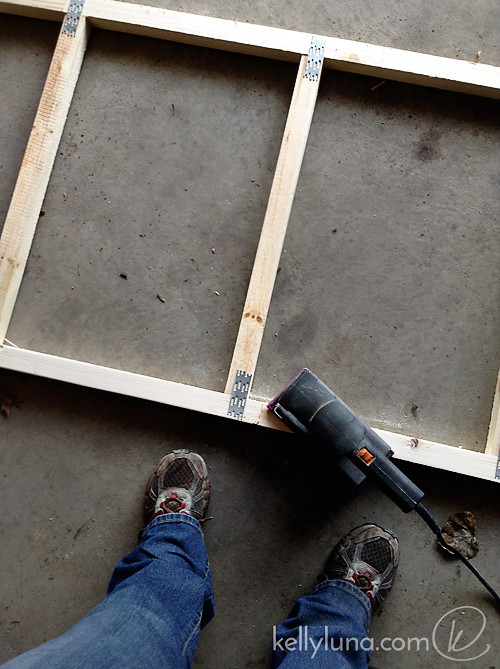
First up, we sanded the frames. They were ROUGH. They weren't perfect after, but at least we didn't have to worry about getting maimed by giant splinters!
Panel assembly-sanding

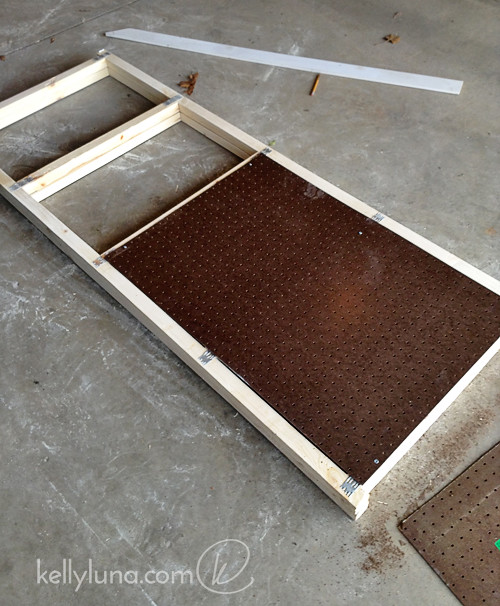
Next we cut the pegboard so that we would have some place to screw them in. That is, we had to make sure that the pegboard could be fully supported by a crossmember.
Panel assembly-pegboard

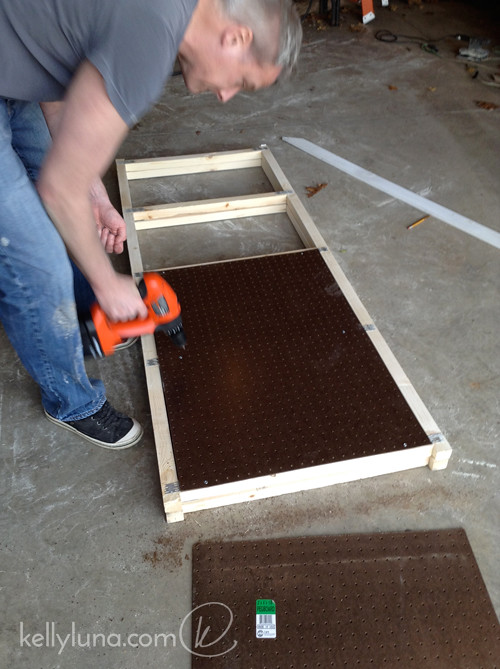
We attached the pegboard to the frames, centering them as closely as we could. Because these frames are meant to hold a 24" board between the supports, the pegboard did not go from edge to edge. It's noticeable when the pieces are raw, but after they're painted, it's not a big deal. This also means that there are no screws along the sides, only horizontally along the cross members.
Panel assembly-pegboard-Dwight

We stood them on end, lining them up to make sure they would fold the right way, then added the hinges.
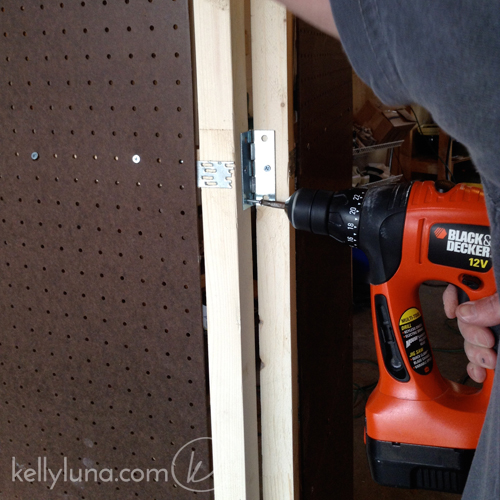
Panel assembly-hinges
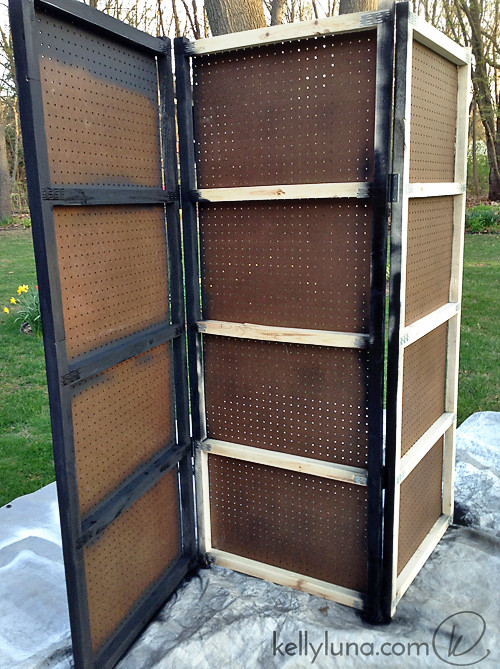
Panel assembly-unpainted

Finally, it's painting time. My least favorite part. We have a well-worn tarp that has seen countless spray-painted projects and bares the scars! We grabbed the paint and had at it, trying to avoid being down wind, and hoping our hands wouldn't cramp up.
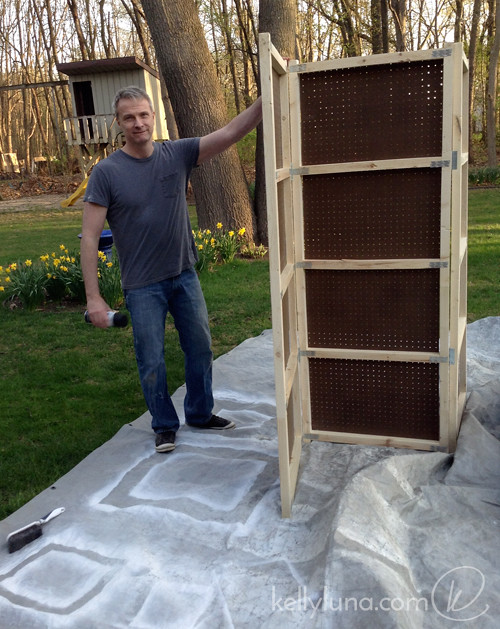
Panel assembly-ready to paint-Dwight
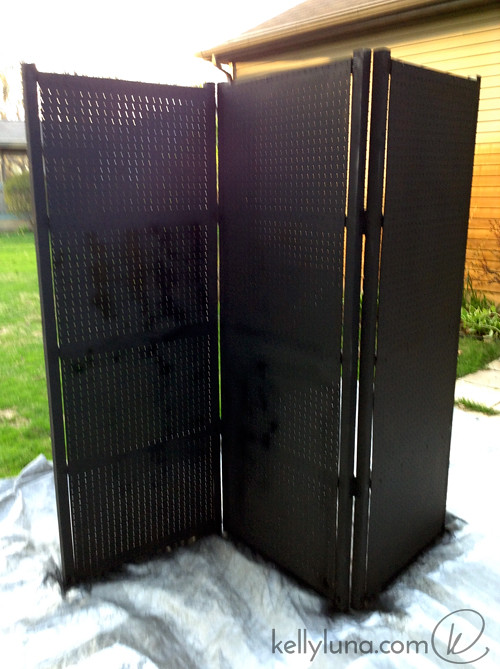
Panel assembly-1st coat paint
Panel assembly-1st coat paint-front

After it was completely painted and dry, Dwight added the plastic feet to protect whatever surface these would be on, and they make it much easier to move the screen around once it's up. (You can see them in the very first photo on this post.)

It works great indoors. We haven't tested it outside. I suspect it needs some bracing or strategically placed weights should there be any wind. While it looks fantastic and holds a lot of art, front and back, it does have a few drawback, size being the biggest. It's 6' tall and about 28" wide. Dwight has an Element and we're able to get it in there with the passenger seat all the way forward. Unless you have a similar vehicle or a truck, this is just too big to be hauling from show to show.

We ended up finding a much better solution for us, which I'll share in my next post. Ooooh, cliffhanger!


Supply list and costs
All of this is from Menards:

  • Frames – $11.99 ea x 3 = $35.97
  • Pegboard – $3.99 ea x 6 = $23.94
  • 3" hinges – $2.48 x 2 (2 per pack) = $4.96
  • Spray paint – $3.37 ea x 4 = $13.48
  • 6 plastic feet (can't find receipt)
  • Screws (we already had these)

Sunday, March 16, 2014

My First Painting Demo Video!


Here it is! my very first painting demonstration video. There was quite a learning curve on all of this–took a LOT of time– but I had a blast. And there is still so much to learn! I have a entirely new respect for artists that regularly create videos. It is very time consuming, although I suppose you get better and better at it, just like anything.


I don't have a proper video camera, so I used my iPod Touch along with a special tripod adapter and my regular cheap-o tripod to shoot this. Again, lots to learn but overall the set up worked nicely. I even got to put one of my photo lights to use.


Starting out, I had an idea of what I wanted to do, something similar to some other pieces I've done recently, using a pallet knife and broad swipes of color. As you'll see, I decided to shift the idea to more closely follow my inspiration than stick with a strictly abstract piece. I've never been taught how to properly use a pallet knife, so I just go about it all willy nilly, just the way I like it. 

You'll also see me paint with my fingers quite a bit. I think it's a wonderful way to make flowers and blend color. I also like to use sandpaper because it helps the piece feel lived in and a bit worn, like a great pair of jeans. You'll notice I keep going over and over the piece. Part of that is refining and honing the look. Part is just covering up what I no longer like. But even when I cover things up, the depth of the piece is always enhanced with these layers and layers of paint. I think it makes it a lot more interesting.

I don't have a title for this yet, so if you have any ideas, lay them on me. 


I hope you enjoy watching. I got it down to just over 25 minutes, so I hope it's not too long!

In the comments below, please let me know what you think of the video, and any suggestions you have RE: music, lighting, duration, etc. I'd love to hear them!


Supply List
12" 12" Blick Premier stretched canvas, 7/8" deep


Valspar satin latex sample pots:
Belle Grove Sorbet, Rushing Stream and Lovely Buff

Bilck matte acrylic in Brilliant Magenta

Cadmium Yellow Medium Hue
Mars Black

Cobalt Turquois
Phthalo Turquois
Quinacridone Magenta

Payne's Grey
Turquoise

My Pinterest Inspiration 


Tuesday, October 25, 2011

Chocolate Chip Cookie Dough Cake

CCC Cake

Right off the bat, I'm going to let you know that I'm not including any recipes directly in this post.

Wait, don't leave!

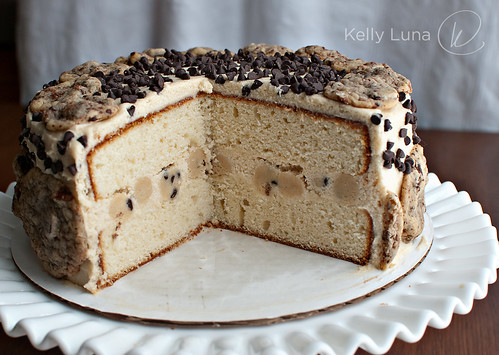
There will be links to all of the recipes I used, though. This post is more about the IDEA of this cake. It takes basic parts — straight up yellow cake, my favorite buttercream frosting, chocolate chip cookies and a simple no-bake chocolate chip cookie "dough"— and brings them all together into something larger than the sum of it's parts.

**********
GOOD NEWS! I've created a PDF of all the recipes so you can have them in one place in addition to the links I've posted here for reference. I hope this helps! Download by clicking here.**********

Another confession — I first made this cake in February. I know. A thousand apologies, really. I totally meant to write it up way back then, but I don't even know why I didn't. But a couple of weeks ago, a co-worker specifically requested this cake for his birthday. As he put it, "It was the best cake I've ever had." Granted this kid would eat just about anything you gave him because he's a 24-ish year old guy and 24-ish year old guys will eat just about anything you give them. They're just grateful for the free meal. But I still took it as a huge compliment and happily whipped up another cake. Two cakes, actually (they were small).

CCC Cake mini-side

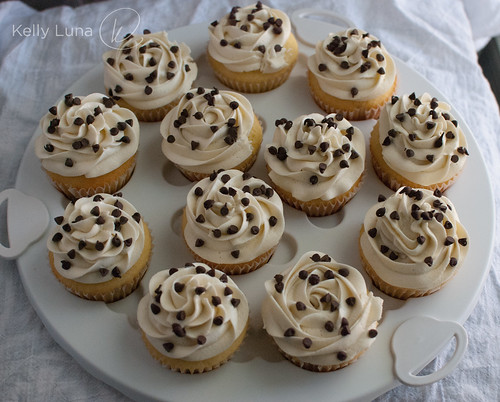
And 12 cupcakes.

CCC cupcakes-in carrier OH

Because I'm crazy.

The inspiration for this cake came from two very talented bakers and bloggers who both happened to be named Amanda. Over at Fake Ginger, Amanda not only bakes beautiful deserts and breads, she's also a wonderful cook with a large collection of delicious and easy recipes. She's a mom of three little boys, so this woman knows the importance of quick, tasty food!

It was Amanda's Cookie Dough Cupcakes that caught my eye. Beautifully photographed and, hello? Cookie dough cupcakes? Sign me up! Obviously the flavors and the no-bake dough are where I got the general idea. The cake part, though, came from another Amanda.

If you follow baking blogs at ALL, you already know Amanda at i am baker. You do know i am baker, right? Do yourself a favor and just scroll through any of her recipe archives. Your jaw will drop and your stomach will growl. This woman is an amazingly talented baker with a flair for making the most over the top incredible cakes that will blow your mind. I'm not kidding.

It was her Chocolate Covered Cherry Cake that became the inspiration for the assembly of this cake. Go take a look at hers, but promise to come back, OK?

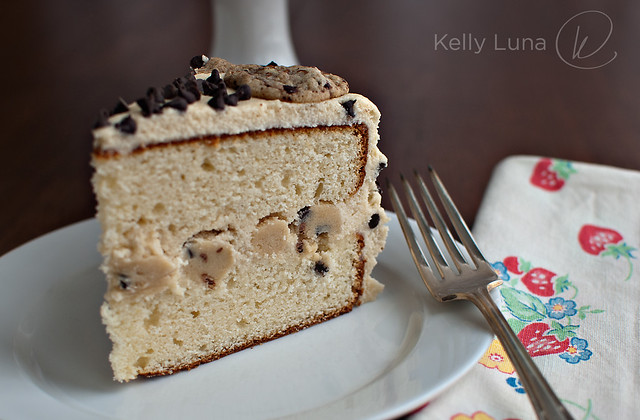
CCC Cake-cut

You start with a basic cake.

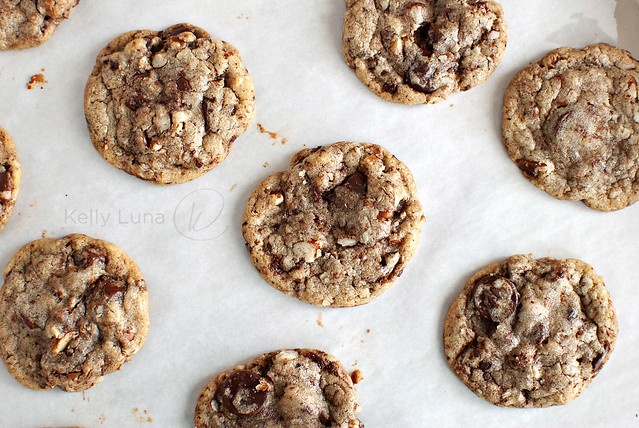
Wait! No, first you want to make cookies. Use your very favorite chocolate chip cookie recipe. My new fave is from David Lebovitz's Ready for Dessert. You can find the recipe here, but I highly recommend you check out the entire book. It's scrumptious.

CCC

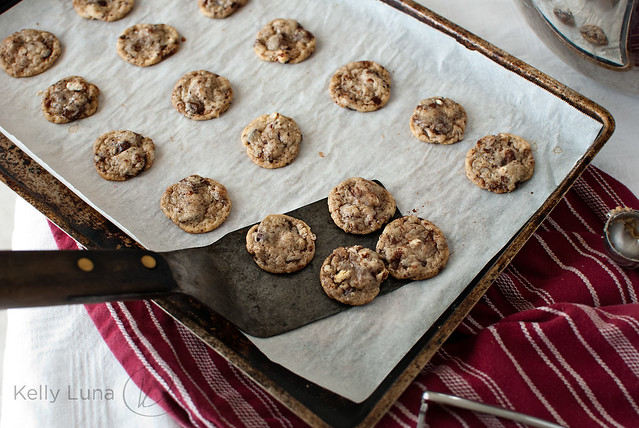
Make small and medium size cookies if you're making a full-size layer cake.

CCC-small

NOW let's make the cake.

After learning how easy it is to make cake from scratch, I almost always use the 1-2-3-4 cake** you've seen on here a number of times before. There's a reason I keep using it. I tend to be fickle with a lot of recipes, but not this one. I haven't looked around for a new one because this never lets me down. It's always delicious and I always get compliments on it. It's also sturdier than a box mix, so If you plan on making this cake, I would honestly suggest you make a scratch cake.

**PLEASE NOTE: This cake will require 2- 9" cake pans. The recipe link above is for a 9" and a 6" that are cut in half. This cake just uses 2- 9" cakes that are stacked, not sliced in half. Just level the tops with knife before assembly. My apologies for any confusion! 

CCC cake slice fork
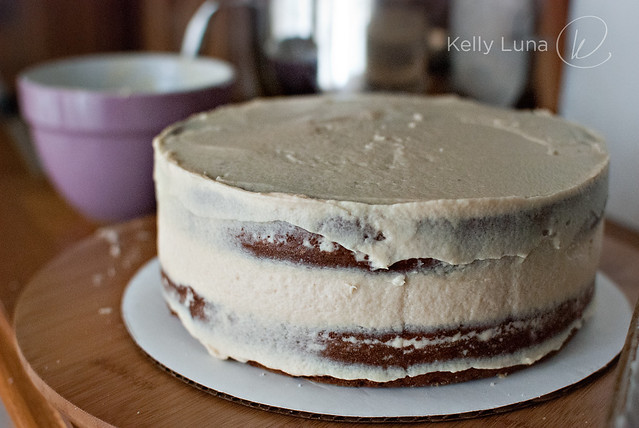
(Unfortunately the frosting is the same color as the cake here, so it's nearly impossible to see the thick layer of frosting. Bummer. But this was a semi-failed attempt at a brown sugar frosting, so a white buttercream will show up better.)

Next you'll need a basic buttercream. You can use my go-to Best Ever recipe, or your favorite version.

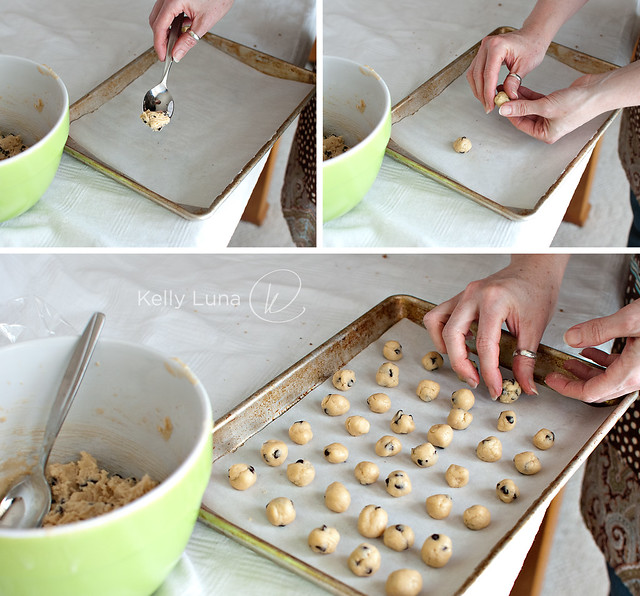
Then you'll need the cookie "dough". Mix it right after you put the cakes in the oven so that it has a chance to set up a bit in the fridge. Makes it easier to form little balls of dough.

And here's where the magic happens. And where the Chocolate Covered Cherry cake inspiration comes in to play. I love the idea of a surprise center in a cake or cupcake and the idea of having the super thick frosting layer, so Amanda's cake stuck in my head and burst forth when I had the epiphany for this cake. Slather a thick layer of frosting in with a bunch of cookie dough balls. Sort of like cookie dough ice cream, but as the center of a cake.

I took the chilled cookie "dough" and made a bunch of small balls.

dough rolling collage

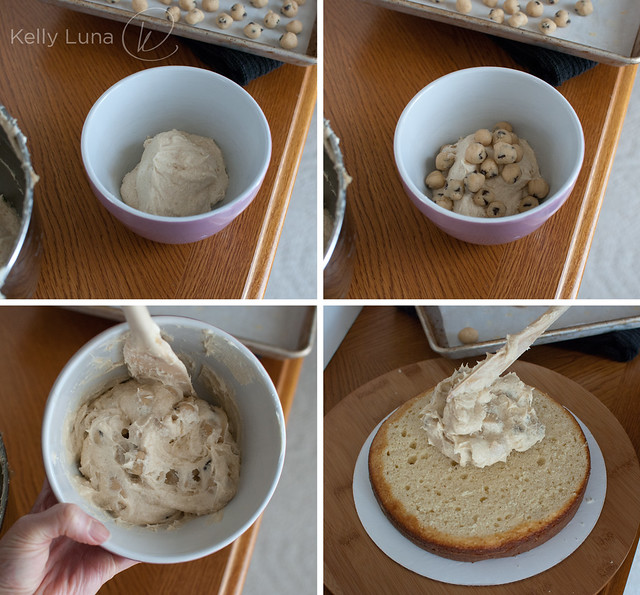
Then went to work assembling the cake. I put some frosting in a bowl, then added some dough balls, slapped it on the bottom layer.

CCC filling collage

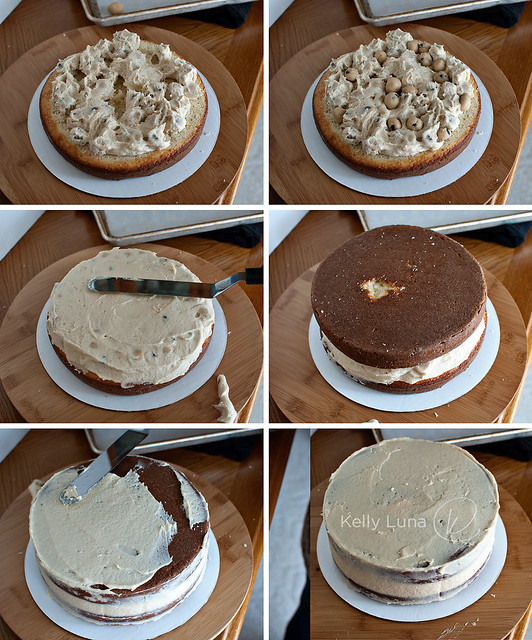
Added more frosting, filled the gaps with more dough balls then added the top layer...

CCC layering collage

Then crumb coated the entire cake.

CCC crumb coat

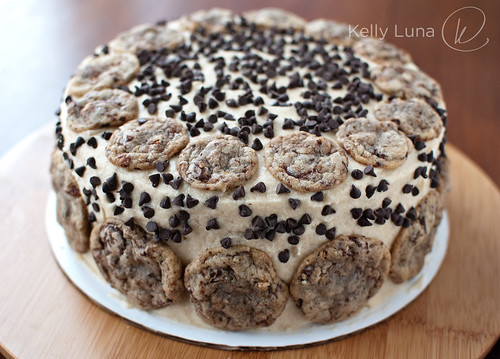
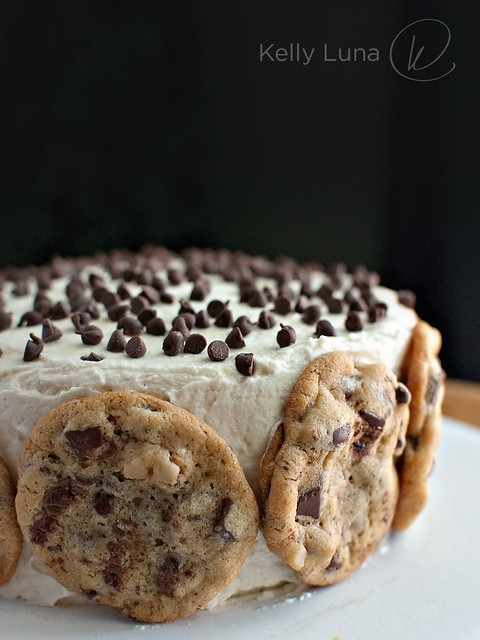
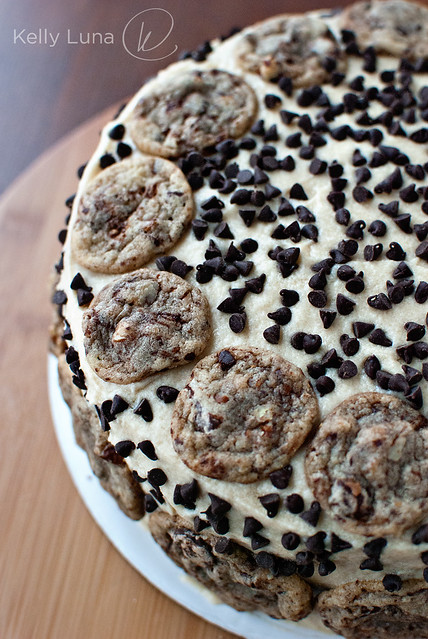
Popped in in the fridge to set up, then finished frosting it. I added medium size cookies around the base and small cookies along the top edge, sprinkled mini chips on the top and (literally) threw mini chips on the side. (It was a hoot. I was flinging chips all over the place.)

CCC cake OH

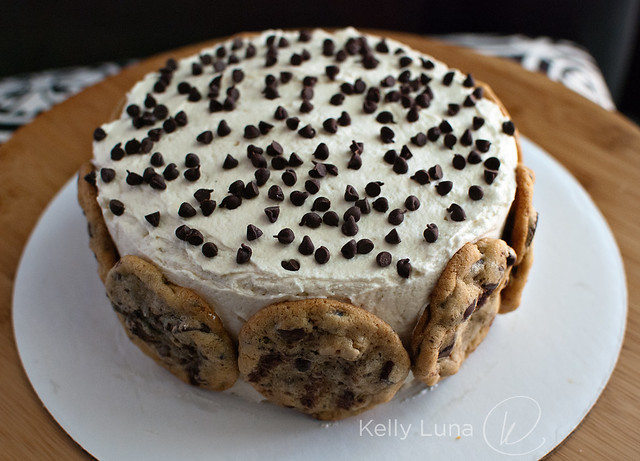
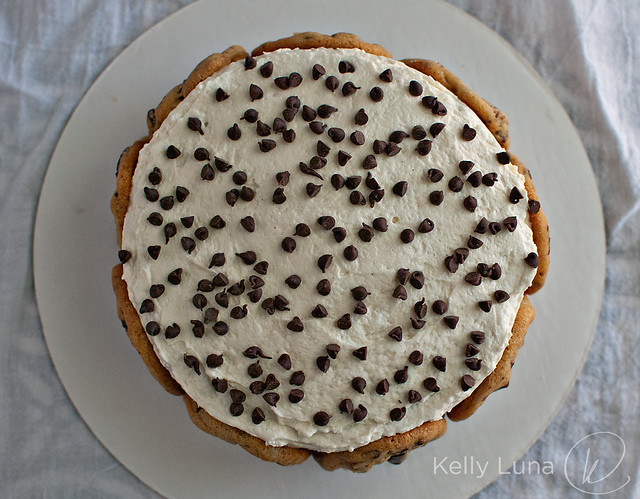
Some would stick, some wouldn't, but I just kept flinging until it was coated to my liking.  For the 6" cakes I made for my co-worker's birthday, I just used medium size cookies, which took up the entire sides, then sprinkled chips on the top.

CCC cake mini-topfront

CCC Cake mini-OH

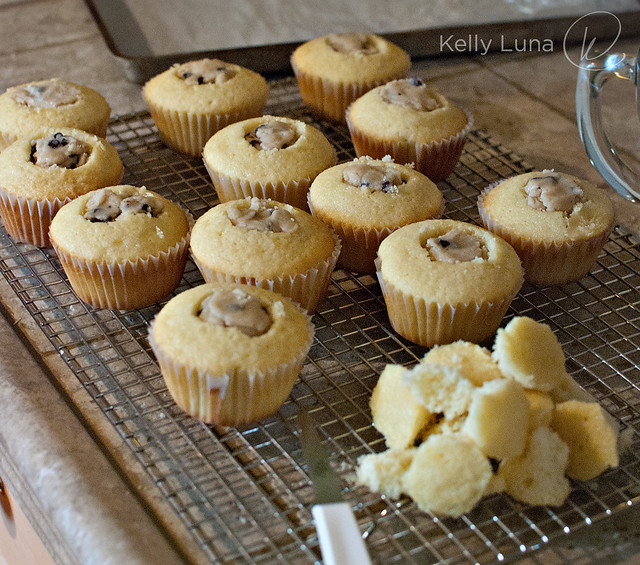
For the cupcakes, I just cut out a cone of cake, stuffed the hole with the no bake cookie "dough"...

CCC cupcakes filled
(I totally ate almost all of that pile of cake bits. I'm not going to lie.)

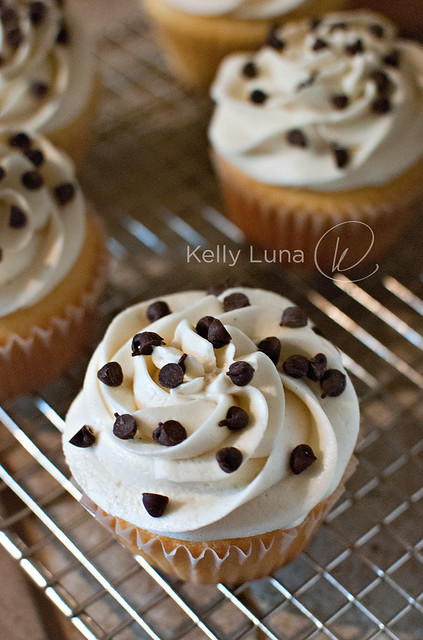
...and piped frosting over the top using the Wilton 1M tip, my go-to tip. (It's only about $2 - you totally need to have one, if you don't already. They make your cupcakes look super purdy.)

CCC cupcake single

Topped with mini chips, the cupcakes are ready to go.

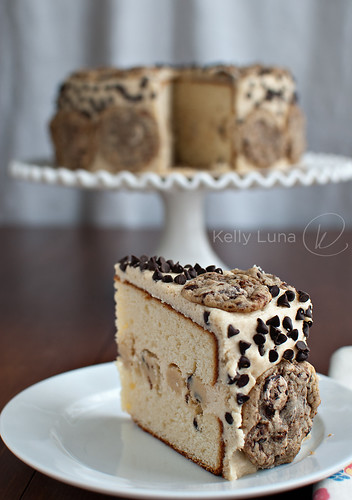
So what do you think? Pretty awesome, right? If you have a few hours to wile away on a weekend, give this cake a shot. Someone will probably tell you it's the best cake they've ever had. For reals.

CCC cake slice stand

Saturday, August 20, 2011

How I did It: Art Journaling

BIF-Day5-Enjoy

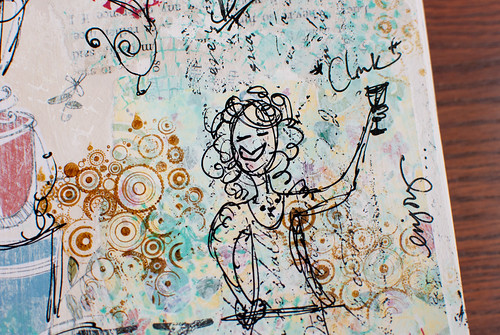
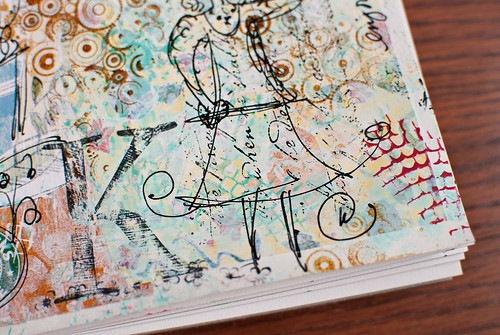
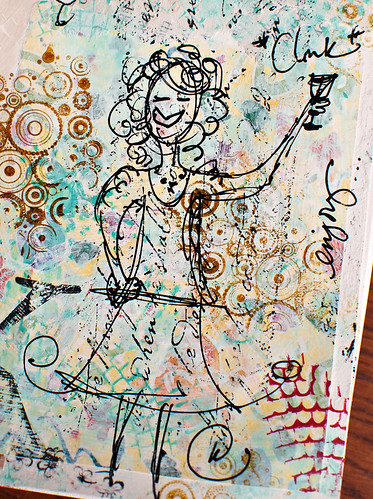
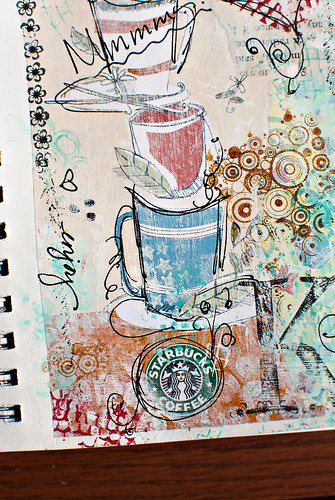
You might have noticed that I have a "Big Idea Festival" badge on the left side of my blog. The Big Idea Festival, Words to Live By, is a free, 12-day workshop where each day, a different instructor gives a word of the day, and the participants use that as inspiration for their pages. Most participants are scrapbookers, but some, like me, are treating it as an art journalling class.

I've been getting some VERY sweet compliments on my pages in the gallery section of the workshop, and one person asked if I could elaborate on how I create my pages, the layers etc. So I took some still photos of the page and also shot a very amateurish video on Dwight's iPod, to walk through the steps. I seemed easier than typing it all out here.

Before I get into it, though, I do have to give a shout-out to Christy Tomlinson, a crazy-talented mixed media artist and creator of the She Art Workshop (and other workshops) where I learned a lot of the techniques I use. If you have any desire to do mixed media work, I highly suggest Christy's classes. She's incredibly generous with her talent and is just darling.

Now on to the show.


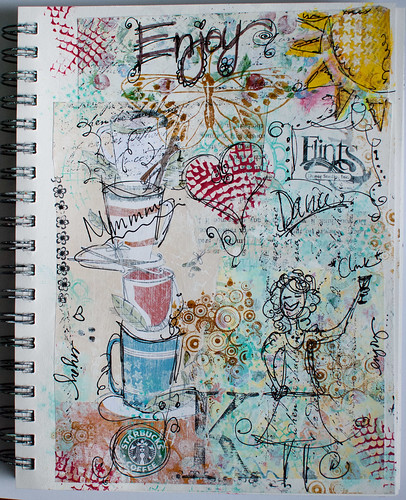
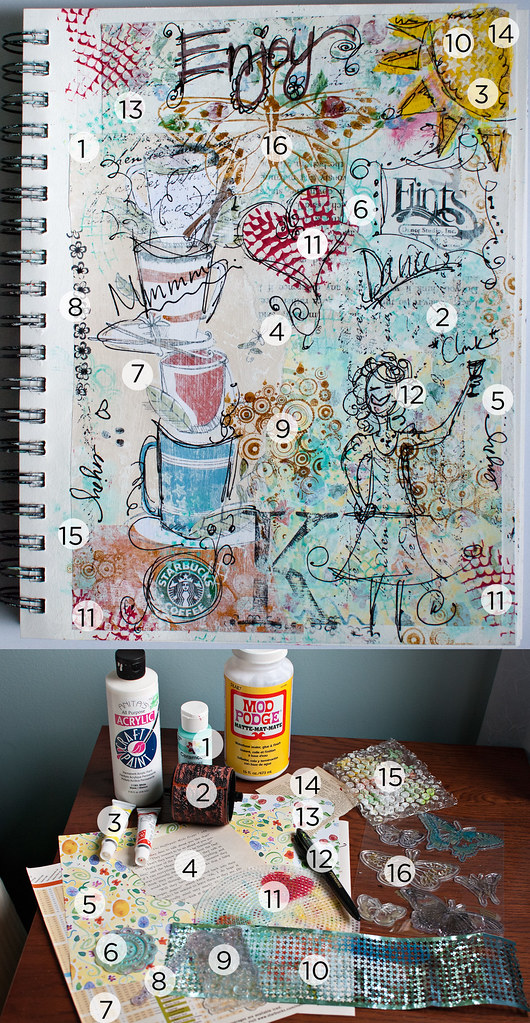
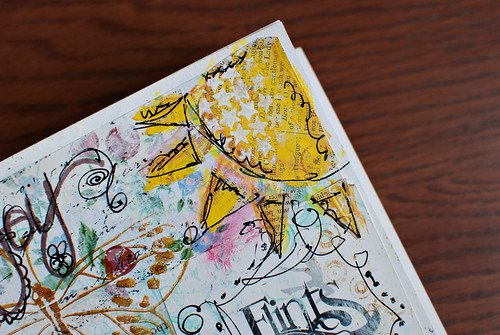
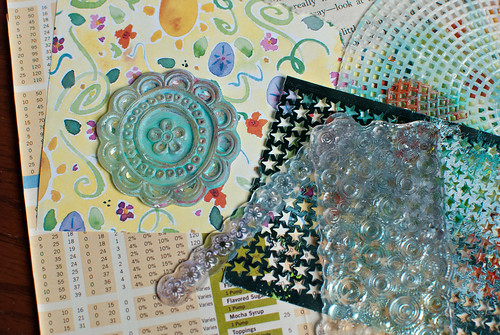
Here's a still of the complete page along with a shot of the supplies (most of them, anyway). I've labeled each supply and the place it's used on the page.
journal pg-numbered

1. Acrylic paint
2. Roller stamp with more or less illegible script, perfect for texture
3. Watercolors
4. Book Paper from Chronicles of Narnia, Voyage of the Dawn Treader (my favorite in the series)
5. Scrapbook paper, used on bottom right
6. Stylized flower stamp
7. Starbucks brochure
8. Flower border stamp
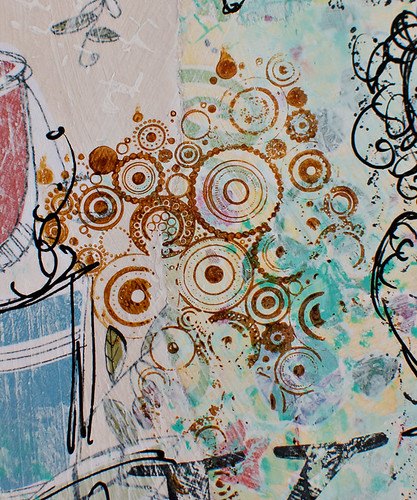
9. Gear stamp
10. Punchinella (sequin waste)
11. Plastic thingy I found at a craft store. You weave on it or something.
12. Permaball pen for doodling
13. More scrapbook paper, used at top of page.
14. More book paper, from an old anthology of Shakespeare works. Page is from Much Ado About Nothing.
15. Bubble wrap
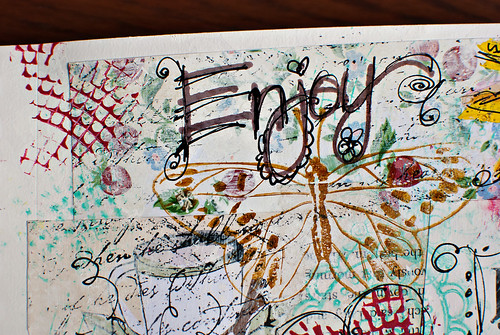
16. Martha Stewart butterfly stamps (found on sale at Michaels - score!)

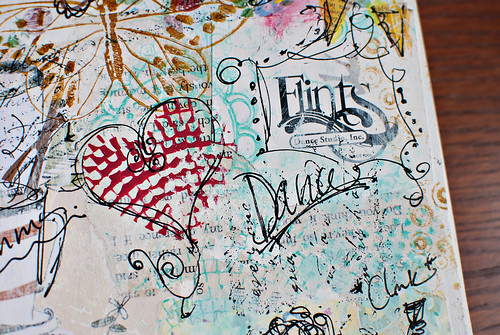
Here are some detail shots of the page.
Enjoy+butterfly
gear stamp
heart flints
doodle top
doodle bottom detail
me doodle2
sbucks detail
sun
stamps

I hope you enjoyed this. Now that the cat's out of the bag, I'll probably be sharing more art pieces here. It's something I've been meaning to do for a little while now.

Saturday, February 12, 2011

Vlog — How to French Braid your OWN Hair

And now for something totally different.

I kinda sorta managed to figure out how to use my iSight camera and iMovie to shoot a little tutorial for you today. In the past week or so, I've seen at least 2 references to French braiding your own hair, implying that it was impossible - or at least incredibly difficult. I taught myself how to braid hair on my OWN hair and that's when I was like 11 years old. So if my 11-year-old self can do this, so can you, it just takes practice.

Now on to the show...


Hopefully you found this helpful. If you need further clarification, just send me an email or ask in the comments and I'll be happy to help.

Monday, January 24, 2011

DIY Necklace Holder

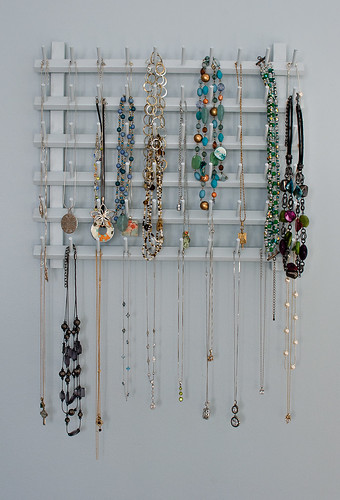
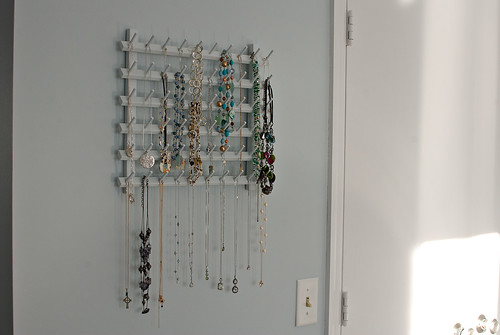
necklace-holder-front

I've been wanting to get or make some sort of necklace holder for a little while now. Dwight likes to buy me necklaces and I let him, so I've managed to accumulate quite a few. I have two jewelry boxes but neither are ideal for necklace storage. They were becoming a bit of a jumbled mess.

I tossed around a few ideas but landed on this one when I saw the thread holder in the Wal-Mart craft section and a light bulb went off. I snatched up the holder and knew just what to do with it.

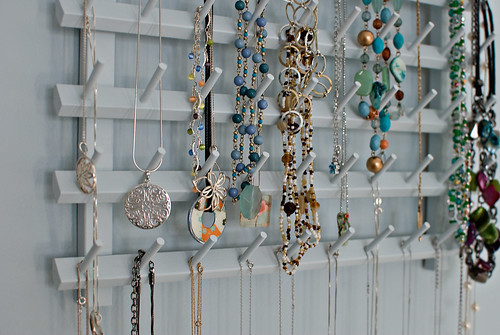
necklace-holder-side-detail

I decided to paint it the same color as the wall to make it blend in, but after seeing it up, I think a complimentary color would have worked, too.

This isn't an ideal solution because the pegs from lower rows are in the way, but it's a far cry from the pile of necklaces I was dealing with. One of the requirements for a hanger was that it would be out of kitty reach. I couldn't even think about getting something to put on my dresser – or hang anything too close to it because the cats would be able to reach it. And like me, kitties are easily distracted by something shiny. They'd see a dangling row of sparkly things and think. "TOYS!" So I hung the rack on the blank spot between the vanity area and the closet.

necklace-holder-side

All in all, I'm happy with it. Once I live with it for a while, I'll see if the idea holds up to real life use.

p.s. The rack came with flip out arms on the back so that, if you wanted to, you could have this sitting on a desk or dresser. I removed those and added hangers to the tops of each vertical arm. The little hanger things were part of a multi-pack, multi-purpose hanging kit. It was a circle with a bar across the bottom that had two pointy ends that you tap into the wood in lieu of a little nail or screw. Super simple and easy to install.

Sunday, March 21, 2010

How To: Make a Cake Pop Stand

SPD-cakepops-single
the stand in action (before finishing)


What you'll need:
12" round wood table top/bar stool seat
Drill
11/64" bit (or 3/16" if you want a little more wiggle room)
Pencil
Ruler or piece of paper
Compass (optional)
Acrylic craft paint
Small paint brush
Drop cloth or large piece of cardboard

I lieu of a piece of styrofoam for holding cake pops, I decided to make a stand out of wood. I picked up a pre-cut piece of wood at Menards and went to town drilling, measuring and finishing.
pop stand-1

The board is mainly for holding the pops while they dry then for photographing, but you can also use it for presentation. I had cake pops handy so I could determine how far apart to make the holes. I marked the distance on a piece of paper and used it for reference. You could use an acutal ruler, but I didn't want to go looking for mine—paper was easier!
pop stand-2 distance btw

A compass comes in really handy (but isn't absolutely necessary). Find the center of the board, adjust the size to match the right distance...
pop stand-5 next row
pop stand-6 next row compass
Draw a circle
pop stand-7 next row circle
pop stand-8 measure compas

Make cross hatch mark at the correct distance along the circle & drill at the intersections.
pop stand-9 marks
pop stand-10 all drilled

You can drill all the way through if you want, but I decided (after drilling two holes all the way through) that drilling MOST of the way through is better. That way you can pick up the board with pops in it and they won't slide down! I'll just fill the bottoms of those holes with wood putty.

Lightly sand with fine sand paper or a fine sanding block.
pop stand-11 sand 

Then all you have to do is paint it. Acrylic craft paint is the best because it comes in a bunch of colors and is really thick—covers great. But you can use regular wall paint if that's what you have handy.
pop stand-13 paint tube
painting collage

After painting, be sure to put a stick in each hole and wiggle it around a bit so the paint doesn't block the holes as it dries.
 pop stand-21 clean out
pop stand-23 done
I painted mine white to keep it simple, but I think it would be really fun to have them in different colors to match the holiday or occasion. Have fun with it!
Related Posts Plugin for WordPress, Blogger...