

As promised, albeit much later than I anticipated, here is my "How To" on the tri-fold art display Dwight and I made for our first At Walk show back in May.
We researched a lot of ideas but landed on this as it was a great way to make use of ready-made parts.
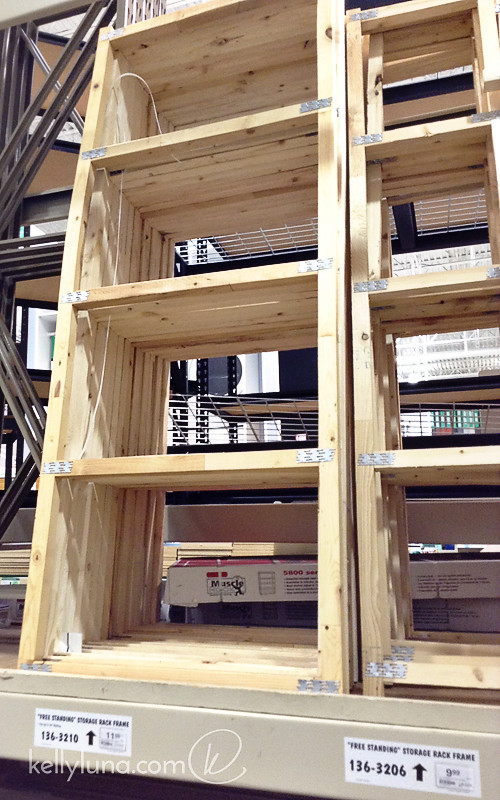
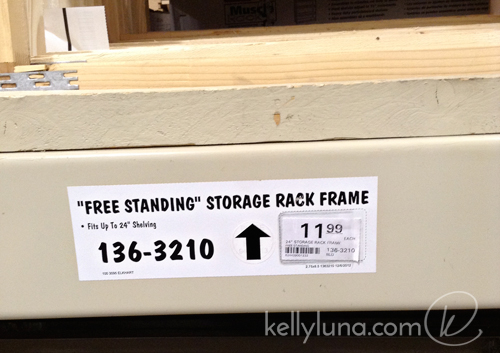
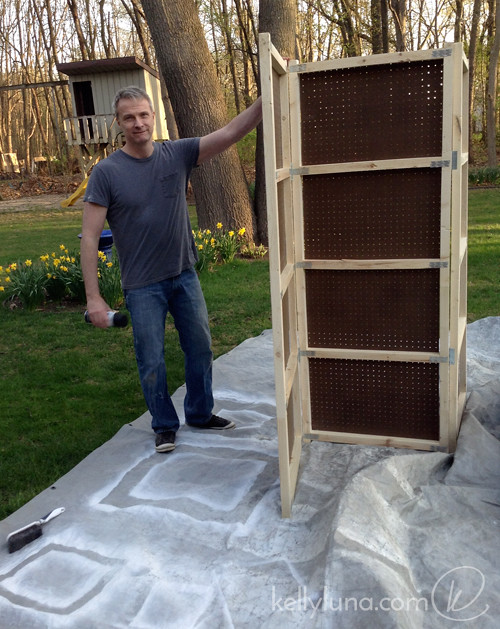
We bought three of these free standing storage rack frames. They were a good height saved us from making a frame.
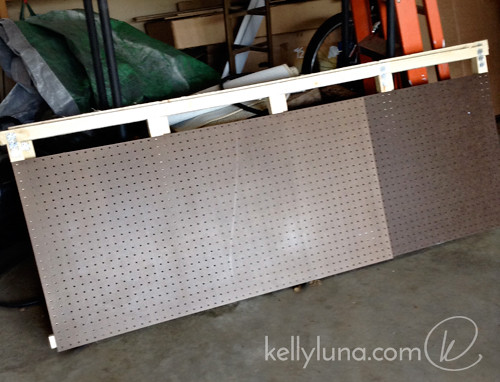
We needed two pieces of pegboard for each frame because they come in 4' x 4' or 2' x 4' sizes but we needed 6' of board to completely cover the frames, so we bought six 2' x 4' sheets.
Next up: Hardware
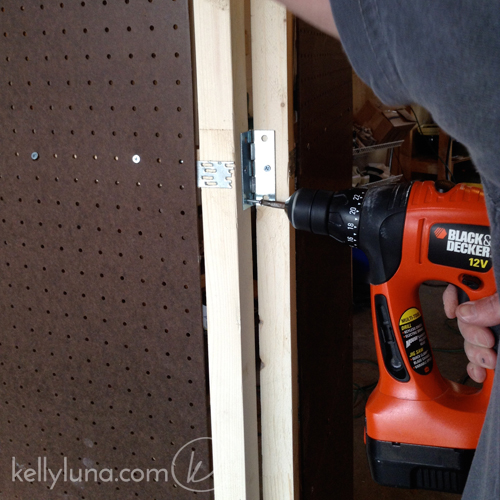
Two hinges per connection = 4 hinges, plus plastic feet for the ends (6 total) and lots of 1" wood screws, which we already had on hand.
Finally, some black spray paint. We bought flat black paint and primer in one. I don't remember how many cans we ended up using, but it had to have been at least four. Obviously, you can use any color-and finish- you like!
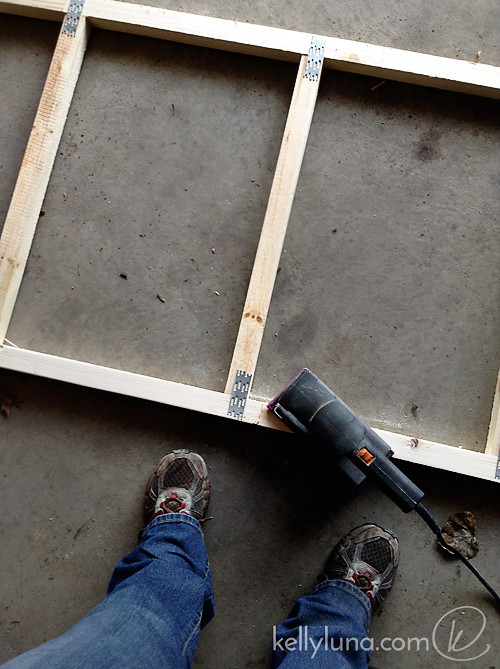
First up, we sanded the frames. They were ROUGH. They weren't perfect after, but at least we didn't have to worry about getting maimed by giant splinters!
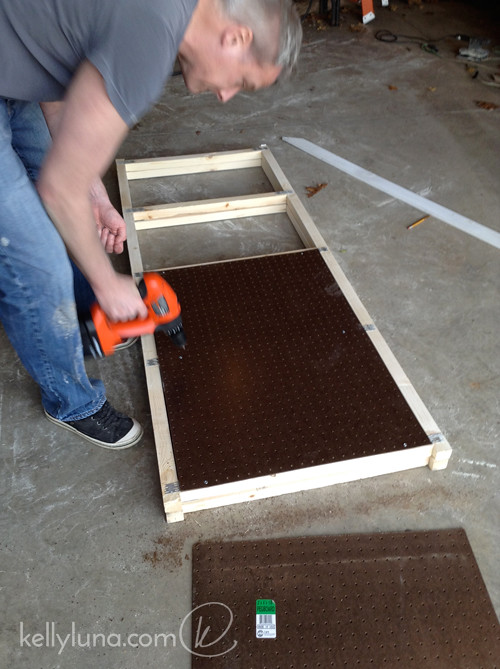
Next we cut the pegboard so that we would have some place to screw them in. That is, we had to make sure that the pegboard could be fully supported by a crossmember.
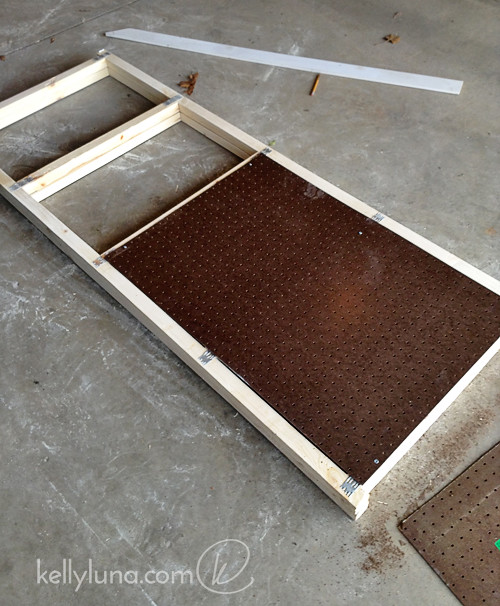
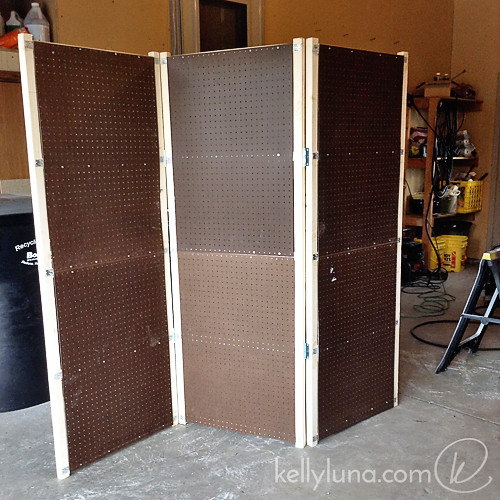
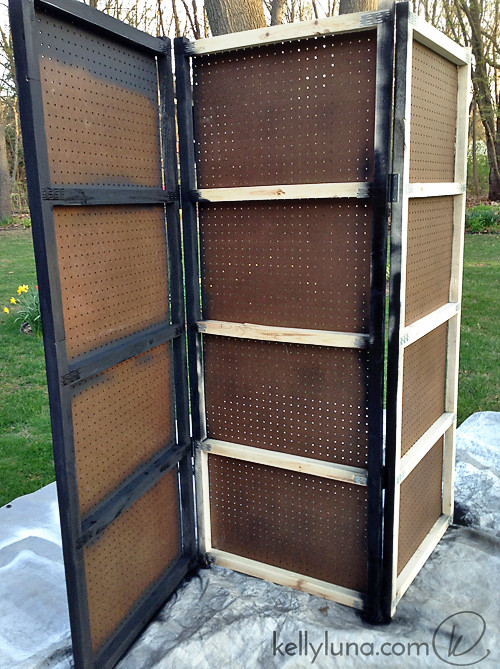
We attached the pegboard to the frames, centering them as closely as we could. Because these frames are meant to hold a 24" board between the supports, the pegboard did not go from edge to edge. It's noticeable when the pieces are raw, but after they're painted, it's not a big deal. This also means that there are no screws along the sides, only horizontally along the cross members.
We stood them on end, lining them up to make sure they would fold the right way, then added the hinges.
Finally, it's painting time. My least favorite part. We have a well-worn tarp that has seen countless spray-painted projects and bares the scars! We grabbed the paint and had at it, trying to avoid being down wind, and hoping our hands wouldn't cramp up.
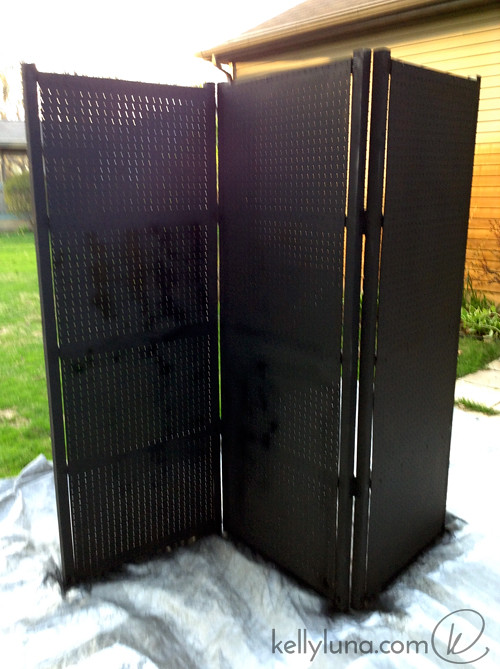
After it was completely painted and dry, Dwight added the plastic feet to protect whatever surface these would be on, and they make it much easier to move the screen around once it's up. (You can see them in the very first photo on this post.)
It works great indoors. We haven't tested it outside. I suspect it needs some bracing or strategically placed weights should there be any wind. While it looks fantastic and holds a lot of art, front and back, it does have a few drawback, size being the biggest. It's 6' tall and about 28" wide. Dwight has an Element and we're able to get it in there with the passenger seat all the way forward. Unless you have a similar vehicle or a truck, this is just too big to be hauling from show to show.
We ended up finding a much better solution for us, which I'll share in my next post. Ooooh, cliffhanger!
Supply list and costs
All of this is from Menards:
- Frames – $11.99 ea x 3 = $35.97
- Pegboard – $3.99 ea x 6 = $23.94
- 3" hinges – $2.48 x 2 (2 per pack) = $4.96
- Spray paint – $3.37 ea x 4 = $13.48
- 6 plastic feet (can't find receipt)
- Screws (we already had these)
No comments:
Post a Comment
Thanks for stopping by and leaving a comment! Please note that I moderate comments so yours won't show up right away, but do know that I read all of them!
I will gladly answer any questions you have right here in the comments. If you would prefer a reply back via email, just let me know and include your email address. Or you can email me directly at info_kellyluna {at} frontier {dot} com.